Locations is the list of every room your team can scan for a patient visit survey or a discharge check. It shows where each room is, which questions it asks, when it was last scanned and whether it is active. It is also the door to each room’s record page.
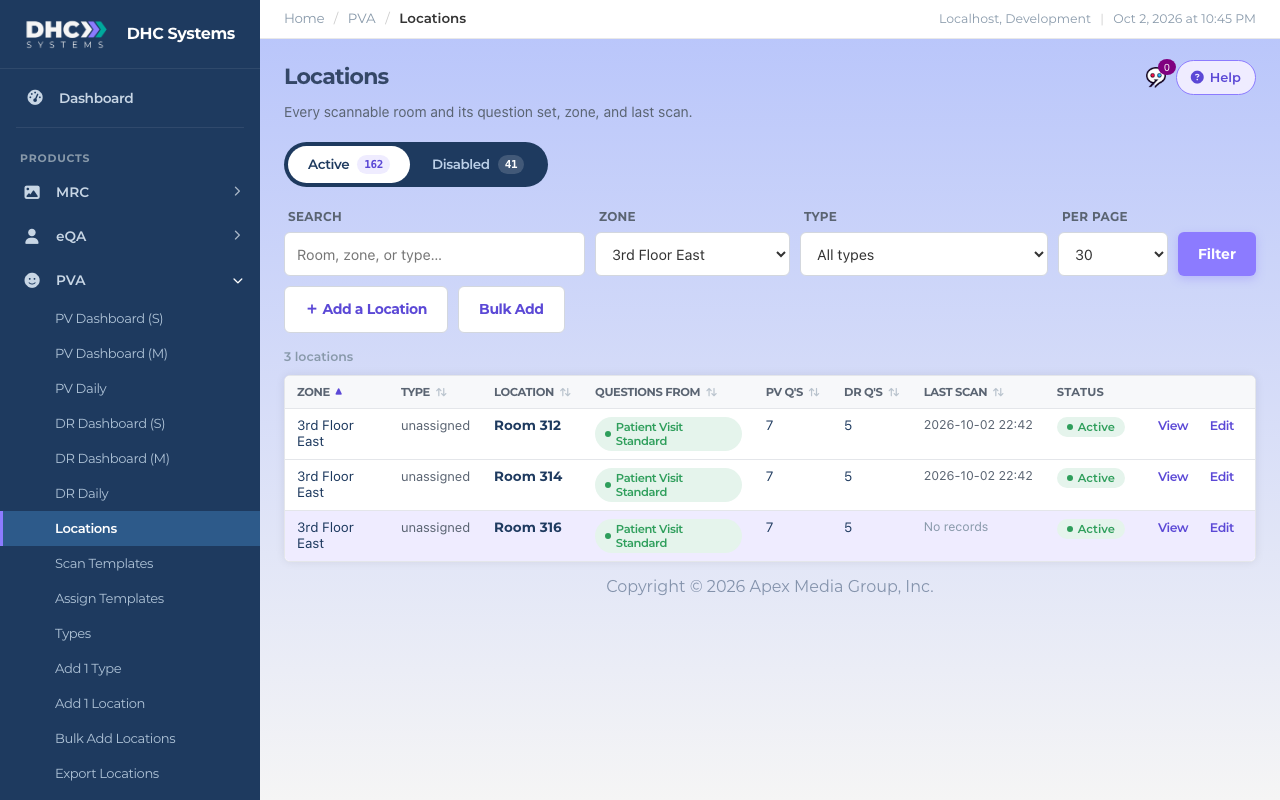
The Locations list, filtered to one zone
What the columns mean
Zone: the unit or area the room belongs to.
Type: the room’s location type, such as Patient Room. Rooms added through the Facility add page show unassigned here.
Location: the room name workers see on the phone and in reports.
Questions from: a green badge with a template name means the room uses that Scan Template. Room questions means the room uses the question set saved on its own record. Click the badge to open the template.
PV Q’s and DR Q’s: how many Patient Visit and Discharge questions a scan will actually show. If a template is assigned these are the template’s counts.
Last scan: date and time of the most recent survey or check at this room, or No records if there has never been one.
Status: Active or Disabled. For a Director (M2) this pill is a button.
View and Edit: open the room record read only, or in edit mode.
Finding a room
Type part of a room, zone or type name in Search, or pick a Zone or Type from the drop downs, then click Filter. Several words narrow the search: each word has to match. Click a column heading to sort by it. Per page switches between 30, 100 and 250 rows.
Search, filter and the two add buttons
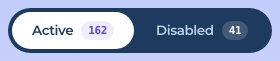
Active and Disabled
The rail under the title switches between the two views. The number in each pill is how many rooms are in that state. A disabled room’s uCode stops accepting PVA scans until it is enabled again. Disabled rooms are also left out of Export Locations.
Switch between active and disabled rooms
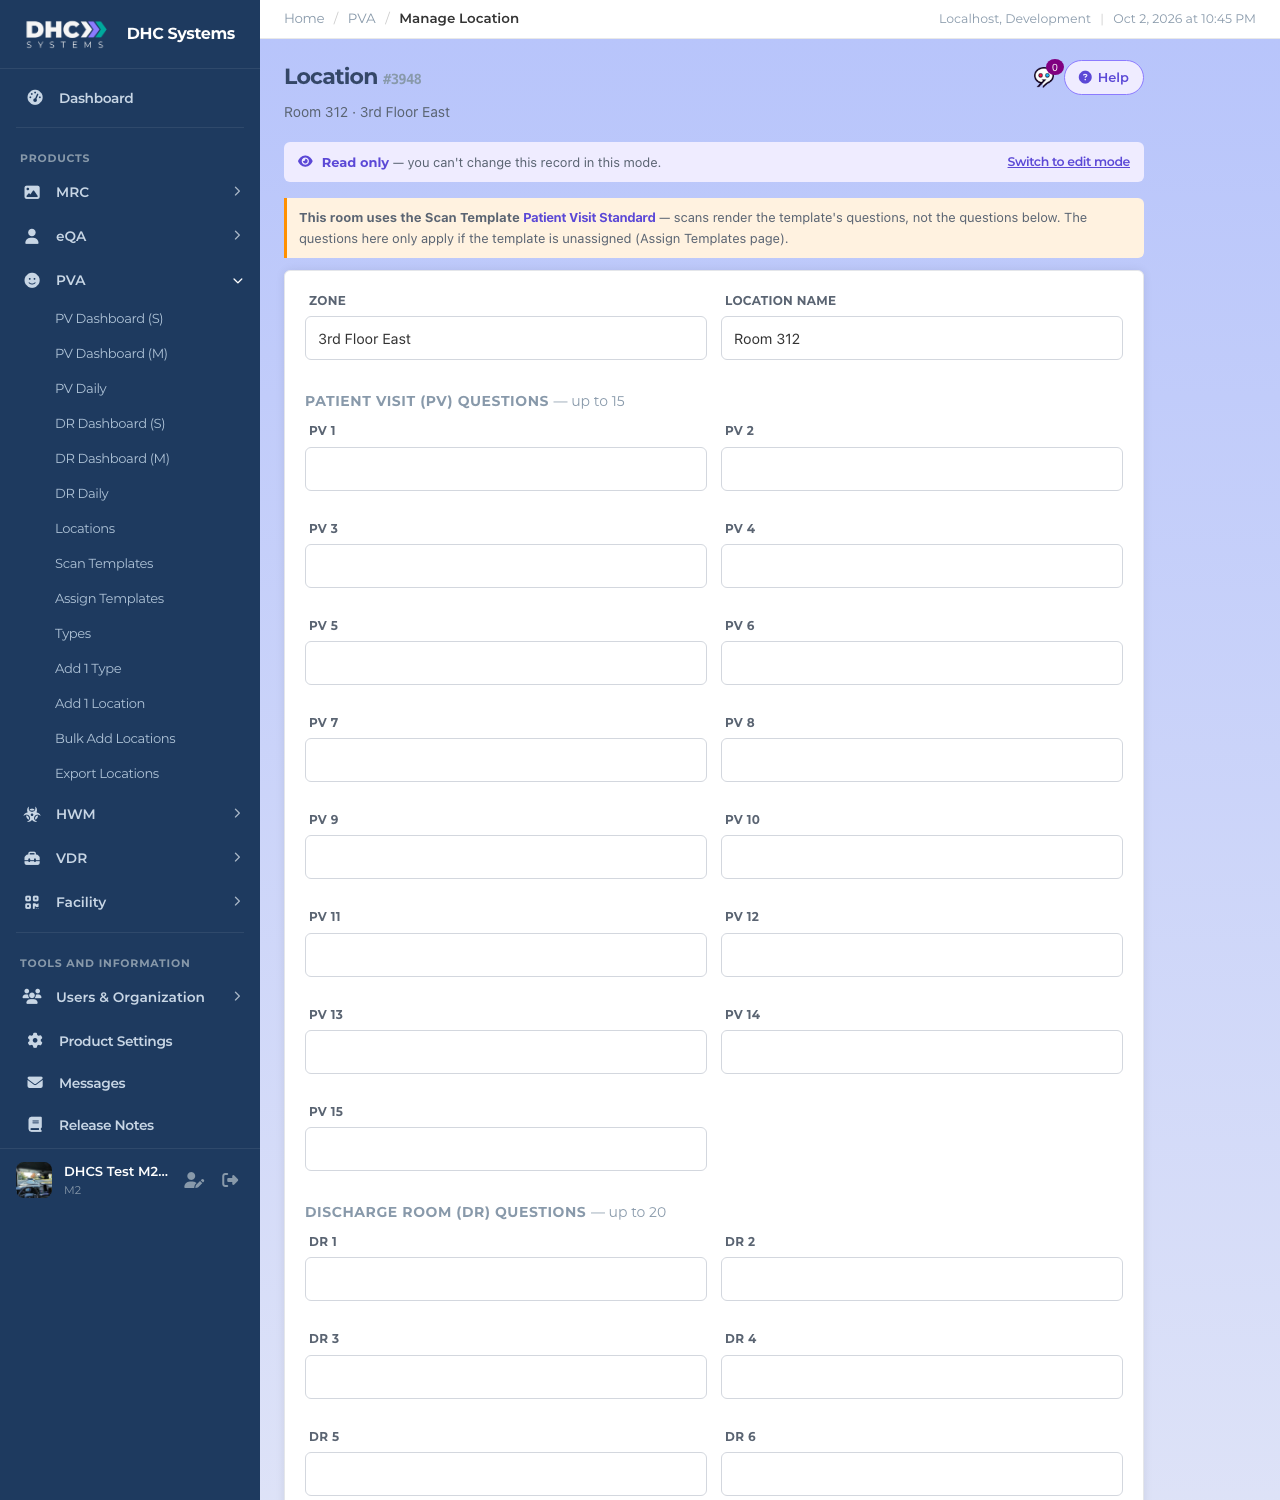
The room record
Click View to open the record. The top shows the room number, the name and zone, and a yellow banner when the room is on a Scan Template. Below that are the Zone and Location name fields, then the room’s own Patient Visit (PV) questions (up to 15) and Discharge Room (DR) questions (up to 20) and an optional Notes box.
A room record in read only mode
When a template is assigned, the questions on the record are dormant. The phone shows the template’s questions instead. The questions on the record only come back into play if you remove the template on the Assign Templates page.
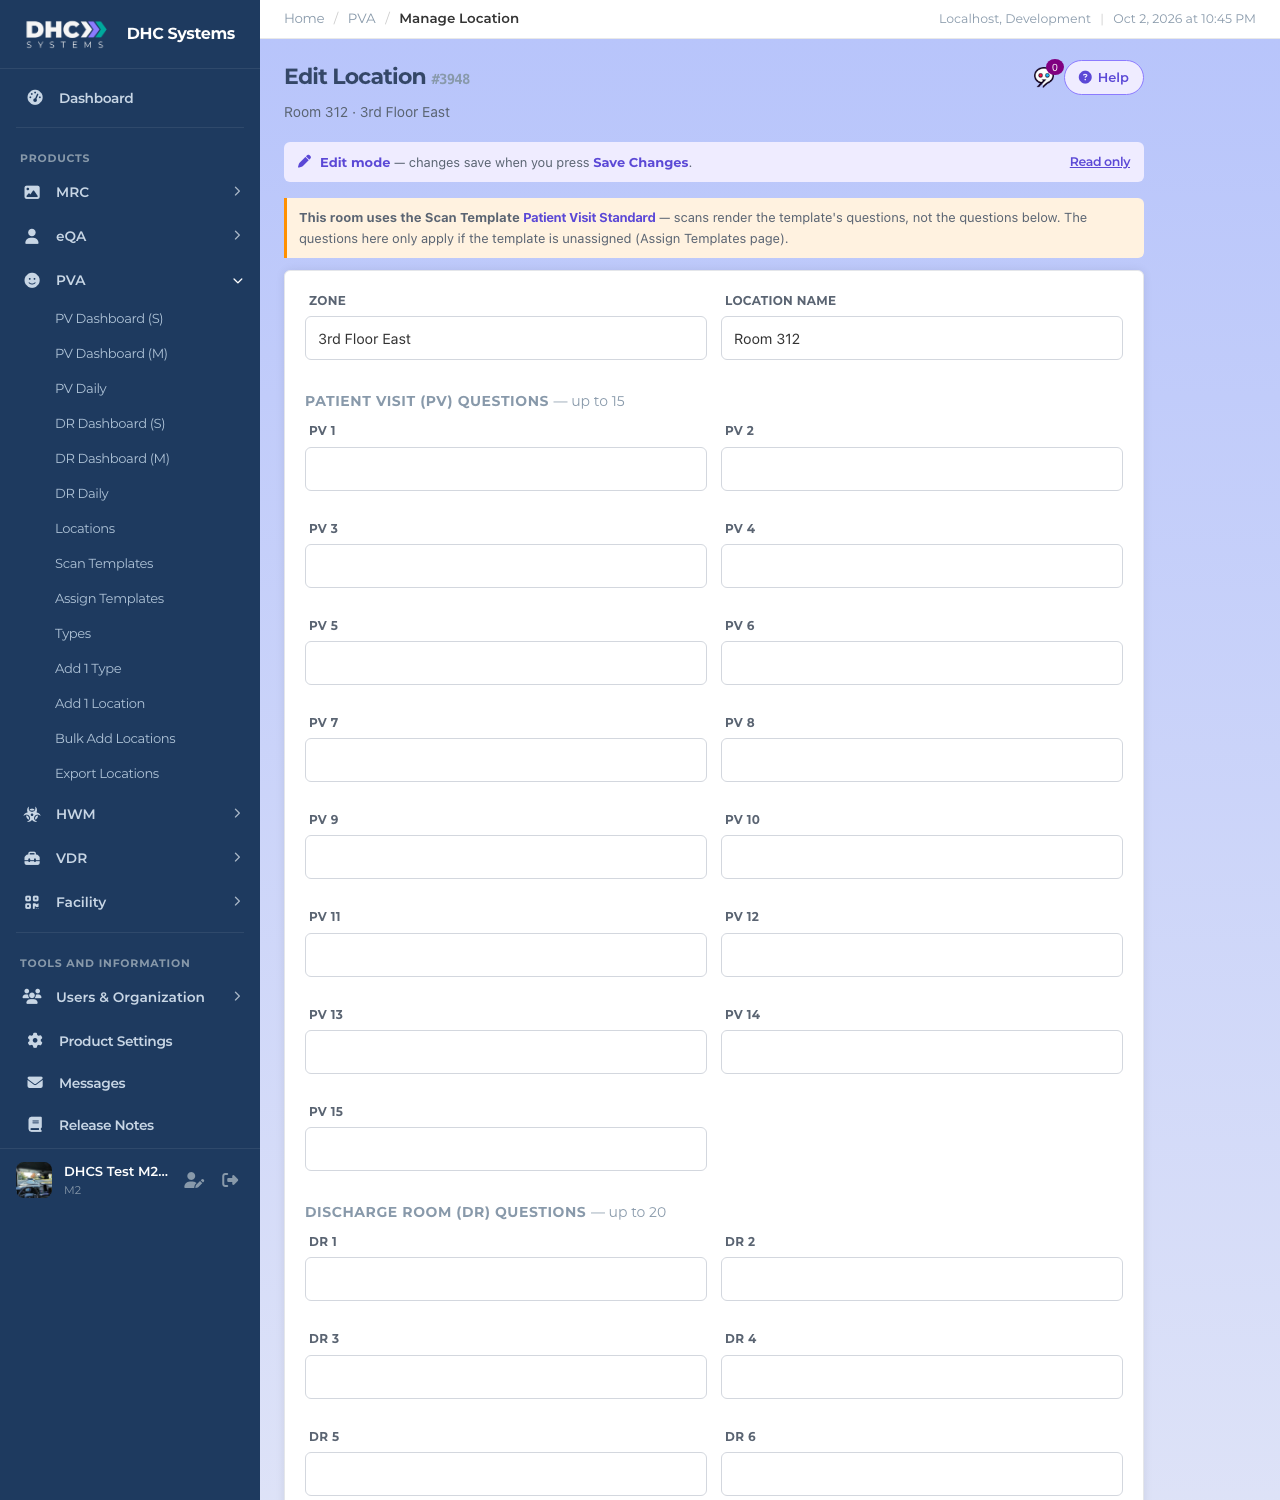
How to edit a room
On the Locations list click Edit for the room, or open the record and click Switch to edit mode.
Edit mode: change the fields, then Save Changes
Change the Zone or Location name. Renaming here renames the room in every product that shares the uCode.
If the room has no template, change its PV and DR questions here. Leave boxes you do not need blank.
Click Save Changes. A green “Changes saved.” message appears and you are taken back to the list.
Question edits apply to future scans only. Answers already recorded never change. Every save is written to the activity log field by field.
How to disable or enable a room
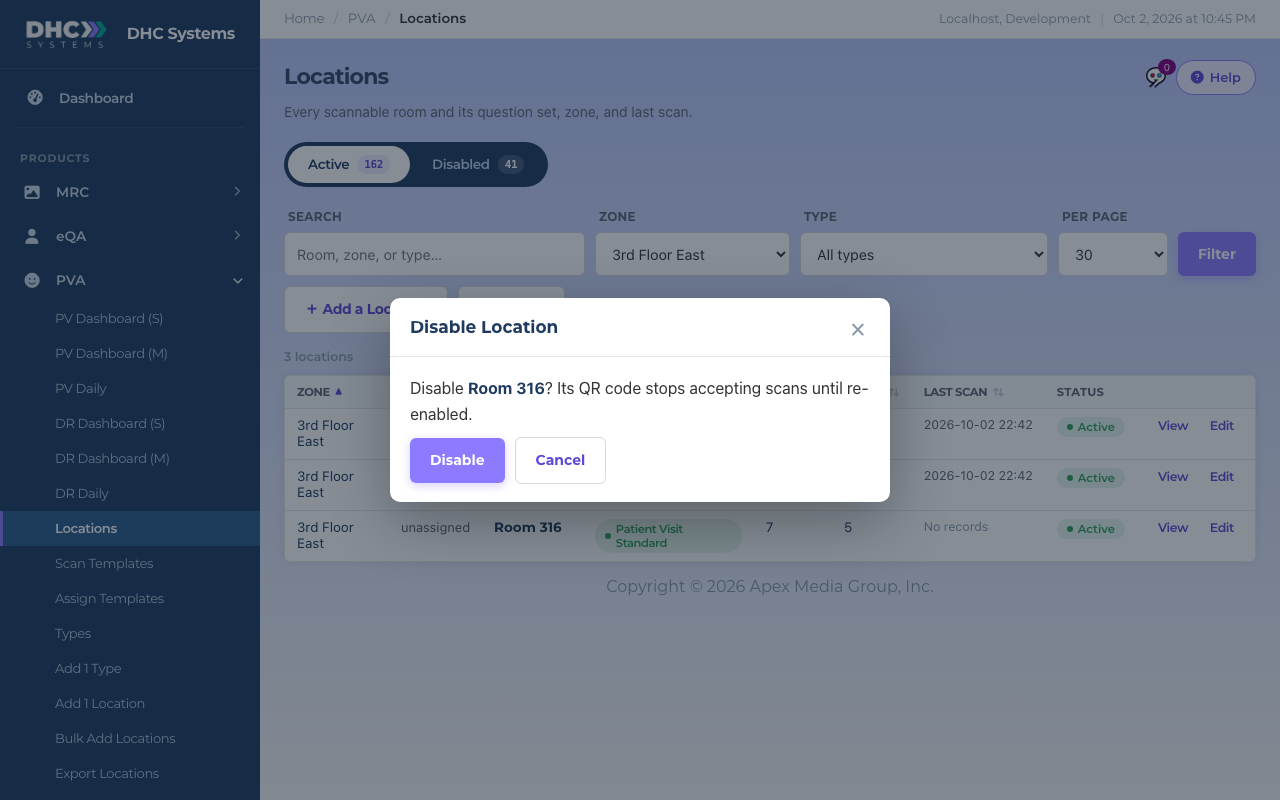
On the Locations list, click the room’s Active status pill.
A confirm box opens: “Disable Room 316? Its QR code stops accepting scans until re-enabled.”
Confirm before a room is disabled
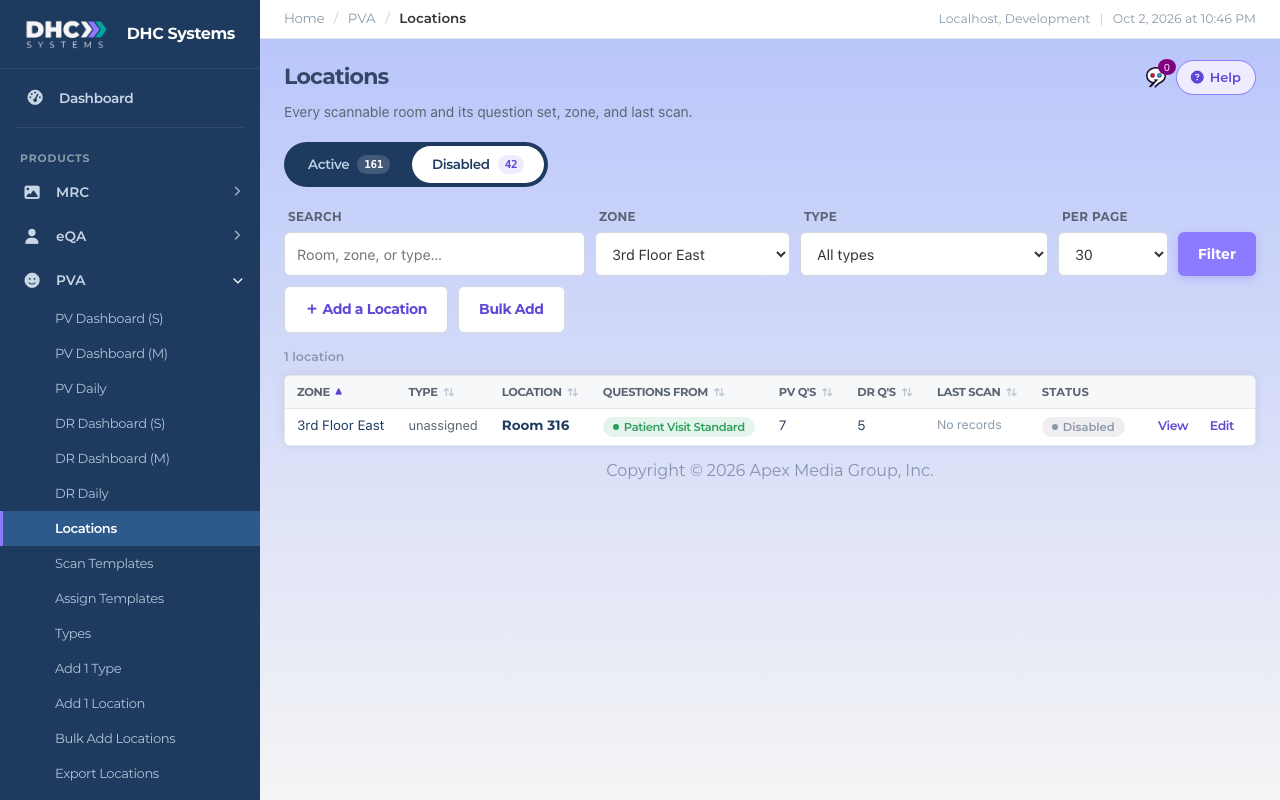
Click Disable. The list reloads and the room moves to the Disabled view.
The Disabled view, with the room you just disabled
To bring it back, open the Disabled view, click the grey Disabled pill and click Enable.
Disabling keeps all of the room’s history. Reports still show its past surveys.
Who can do this
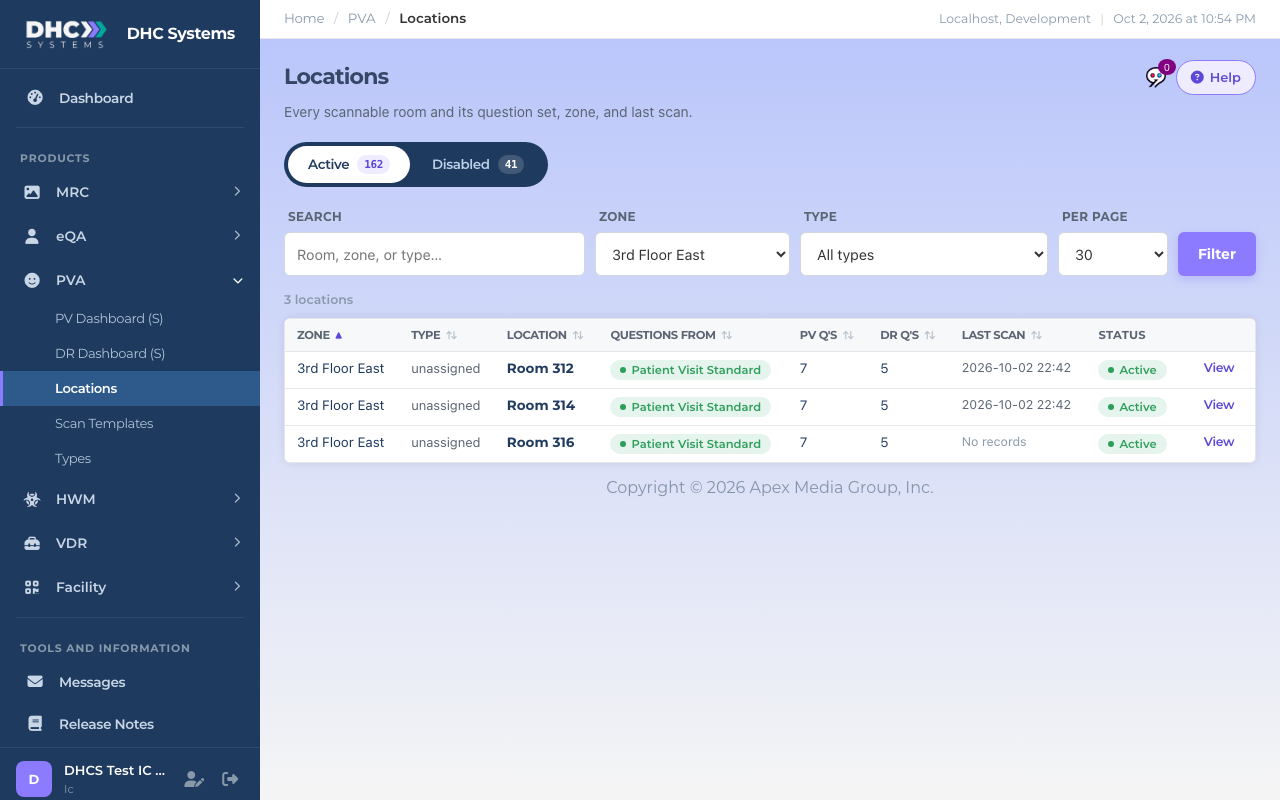
Everyone signed in can read the list and open a record. An M1 account can edit rooms and add a single room. A Director (M2) can also bulk add and disable or enable rooms. Workers (IC) see the same list with just the View button.
The read only view for an IC account
Tips
Sort by Last scan to spot rooms nobody has visited lately.
The + Add a Location and Bulk Add buttons open the Facility add pages with PVA already switched on. See “Adding a Single Location or Employee” and “Bulk Add Locations or Employees from a Spreadsheet”.
To change a room’s template, use Assign Templates. The record page only edits the room’s own questions.