A patient visit survey takes about a minute. You scan the uCode on the room, tap Patient Visit, answer the questions while you talk with the patient, type your name and employee ID and tap Submit. No app and no login. Any phone camera that reads QR codes will do, and you need a data or Wi‑Fi connection.
How to complete a patient visit survey
Open your phone camera and point it at the room’s uCode. Tap the link that pops up. The page opens in your browser.
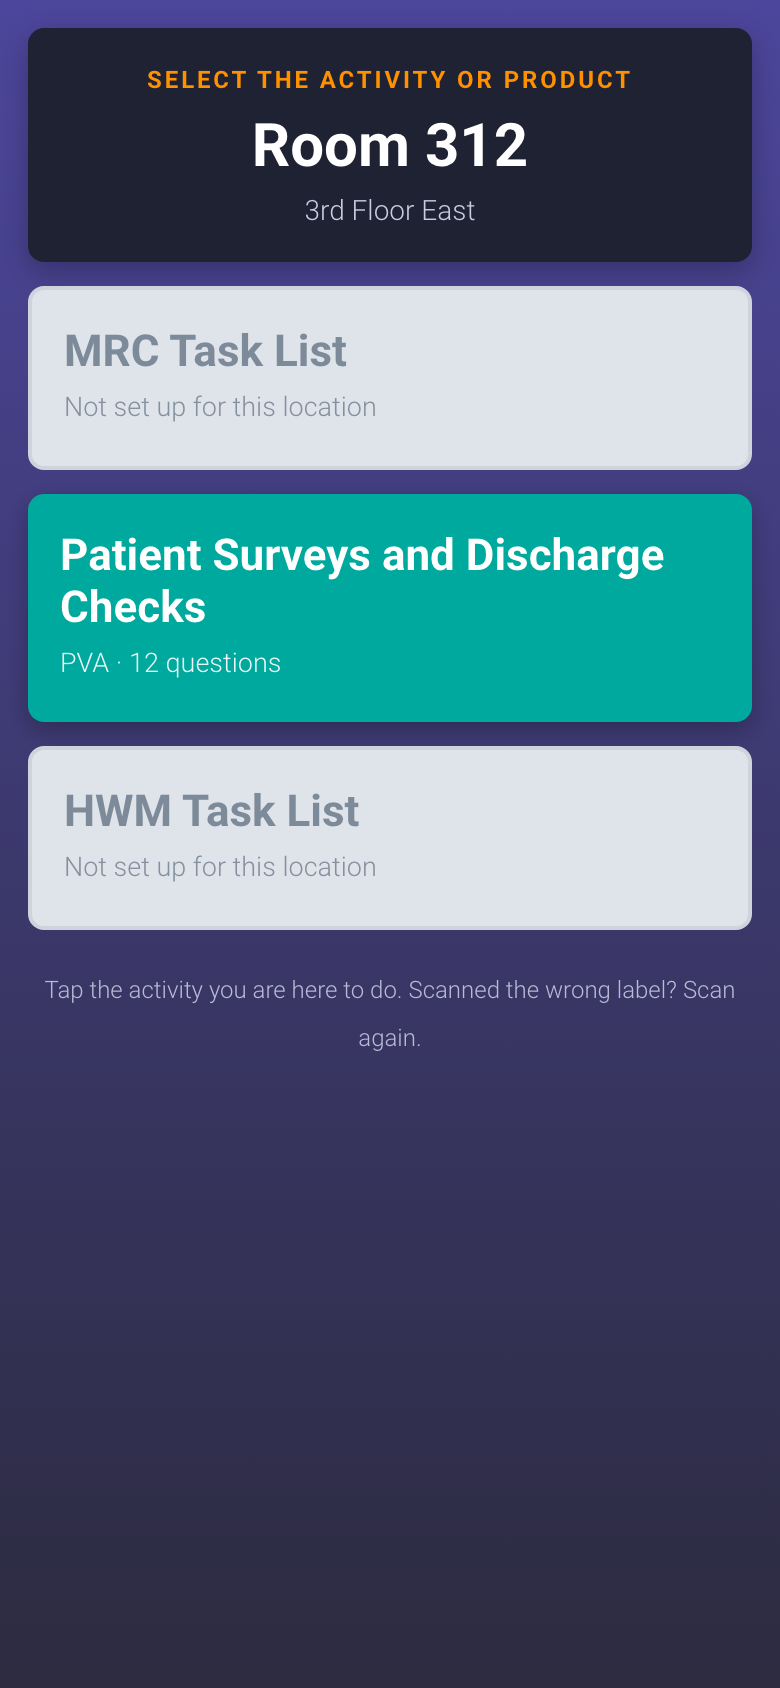
If the room has more than one product, you see Select the activity or product with the room name and zone at the top. Tap the green Patient Surveys and Discharge Checks button. Grey buttons are products this room does not have. (A room with only PVA skips this screen.)
The product chooser, shown when a room has more than one product
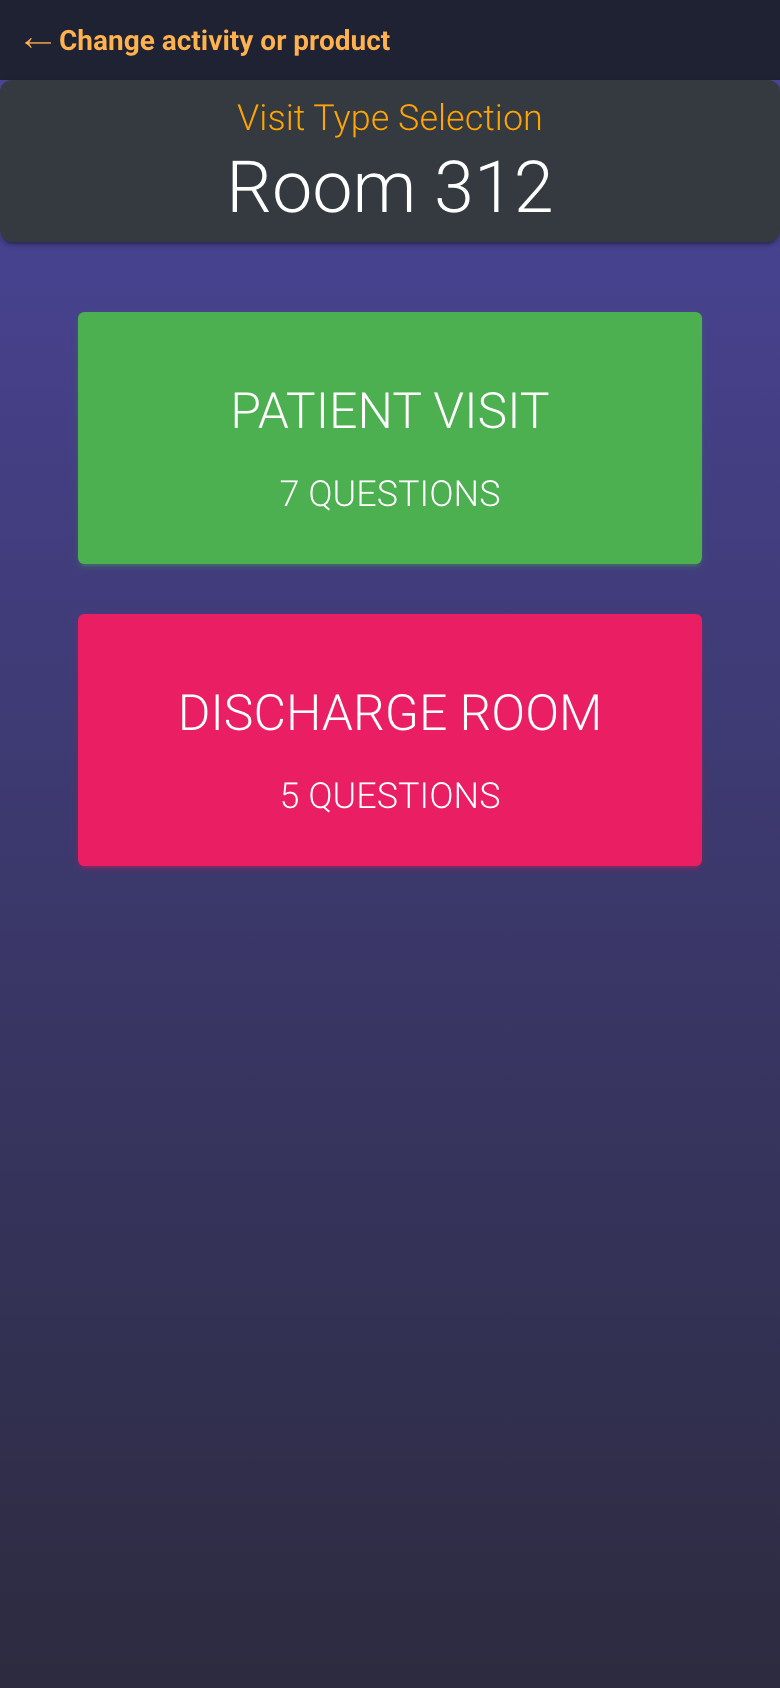
On Visit Type Selection, tap the green Patient Visit button. The number under it is how many questions you will answer. (The pink Discharge Room button is for the discharge check after the patient leaves.)
Pick Patient Visit
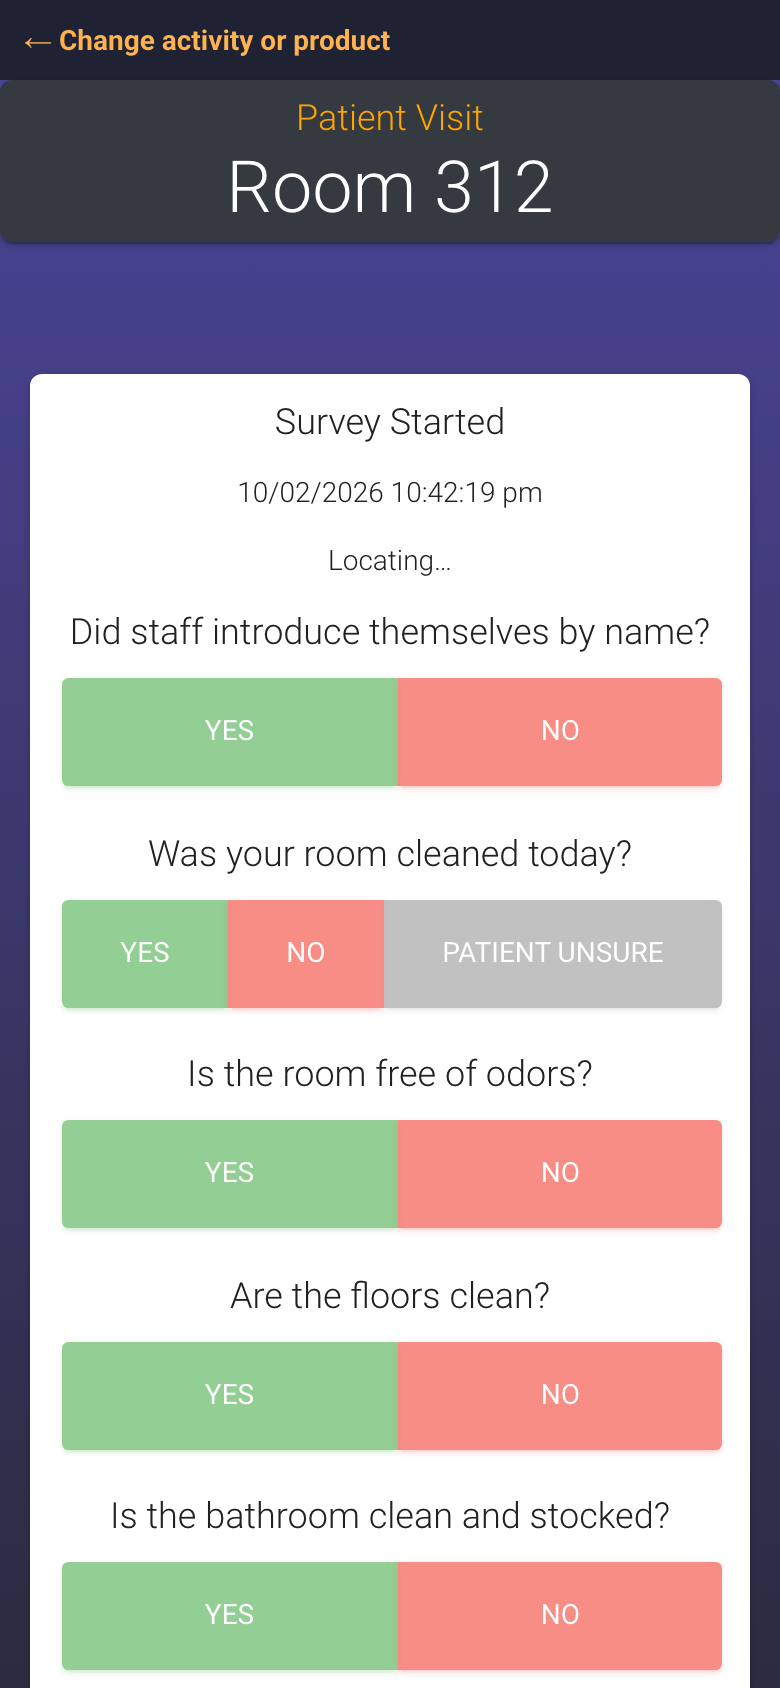
The survey opens with Patient Visit and the room name at the top and the time it started. Answer each question in turn. Most are two big buttons, Yes or No. Some have a third grey button such as Patient Unsure or NA for when neither fits. A pick list question opens a drop down. A short text question gives you a box to type in.
Answer top to bottom. The chosen button turns blue
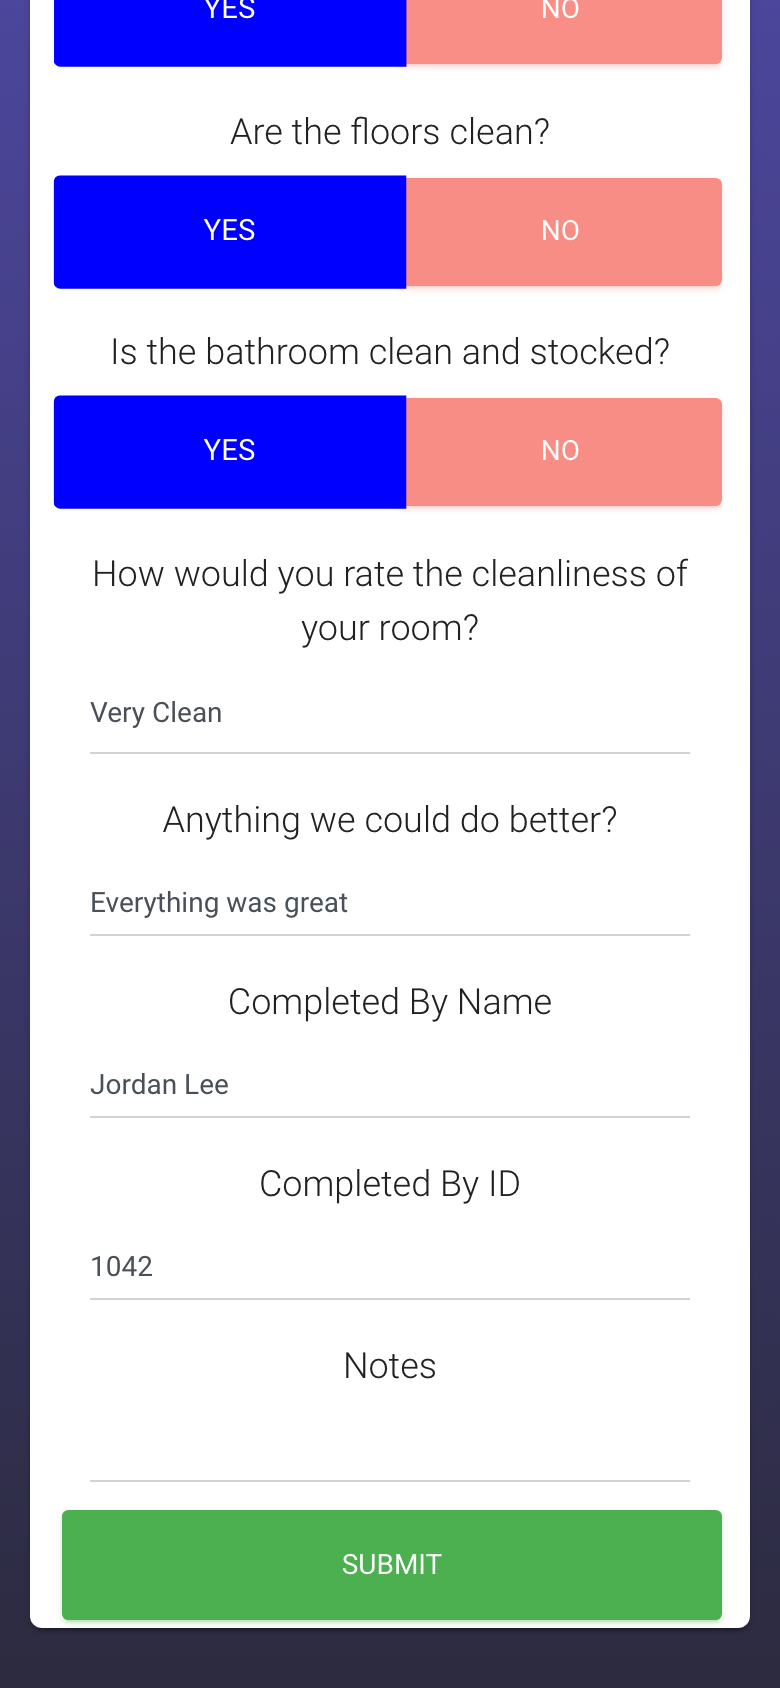
At the bottom type your Completed By Name and Completed By ID (your employee ID). Both are required. Add a note in Notes if something needs follow up.
Name and ID are required. Then Submit
Tap Submit. If you left the name or ID empty, a notice says “Please fill in all required fields” and the empty box gets a red border. Questions you skip are simply recorded as unanswered.
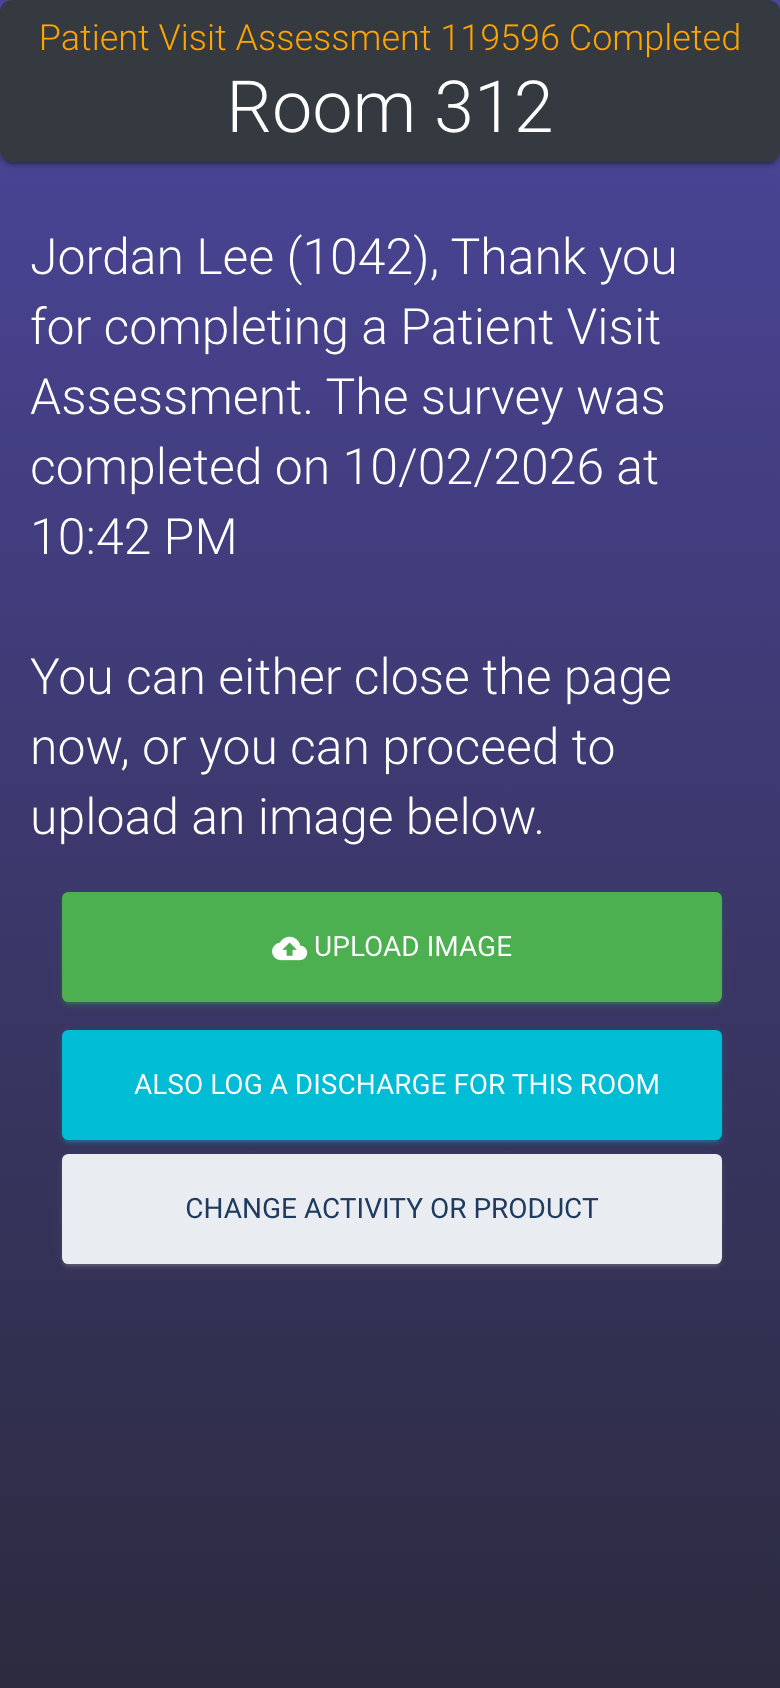
The thank you screen confirms the survey number, the room, your name and the time it was recorded. You can close the page here.
Done. Three optional next steps
Optional: add a photo
On the thank you screen tap Upload Image.
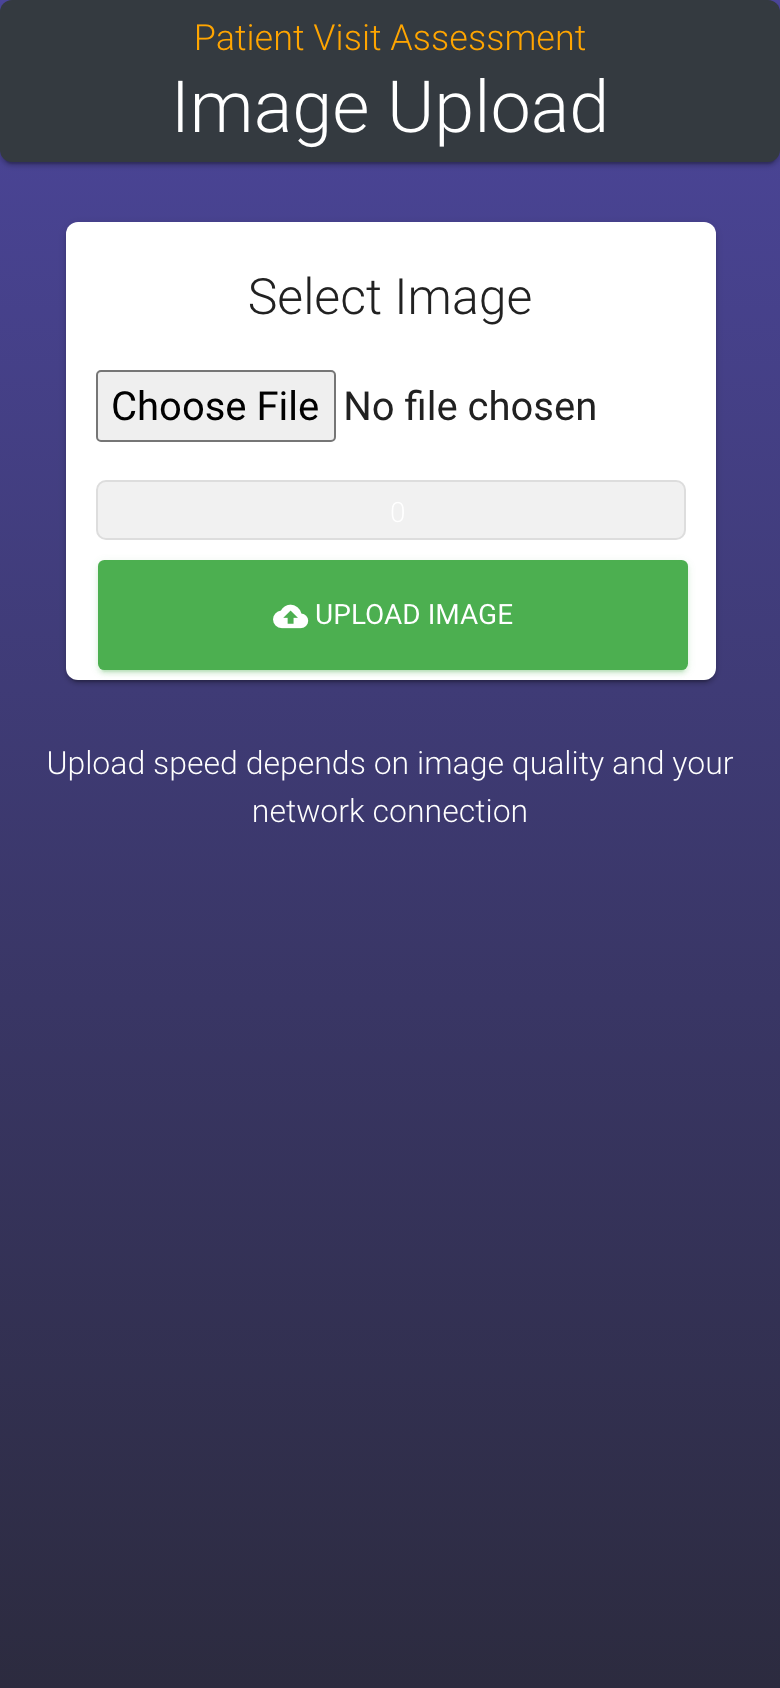
Tap Choose File. Your phone offers to take a photo or pick one.
Tap Upload Image and wait for Upload successful!. Larger photos take longer on a slow connection.
Attach a photo to the survey you just finished
Doing the discharge check right after
If the room is also being turned over, tap Also log a Discharge for this room on the thank you screen. It opens the discharge check for the same room without scanning again. Change activity or product takes you back to the product chooser.
Who can do this
Anyone with the uCode in front of them. No login is needed. The survey is tied to the room and to the name and ID you type, so type them the same way every time.
Tips
The chosen answer turns solid blue. If you tap the wrong one, just tap the right one.
Poor signal? The page keeps your answers and shows a sync badge. Submit once; do not refresh.
If the screen says “not ready yet” for PVA, the room has no questions yet. Ask a manager to assign a Scan Template.
Scanned the wrong room? Just scan the right one. Nothing is saved until you tap Submit.