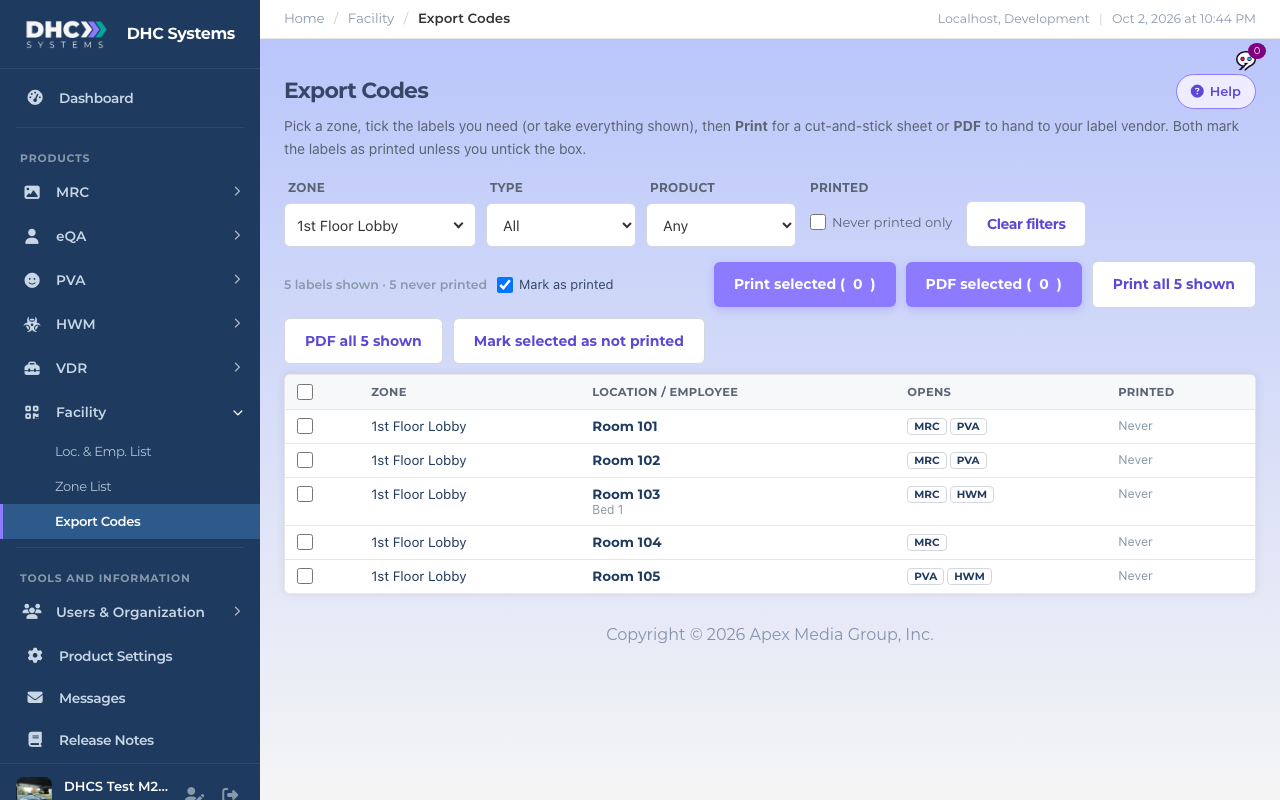
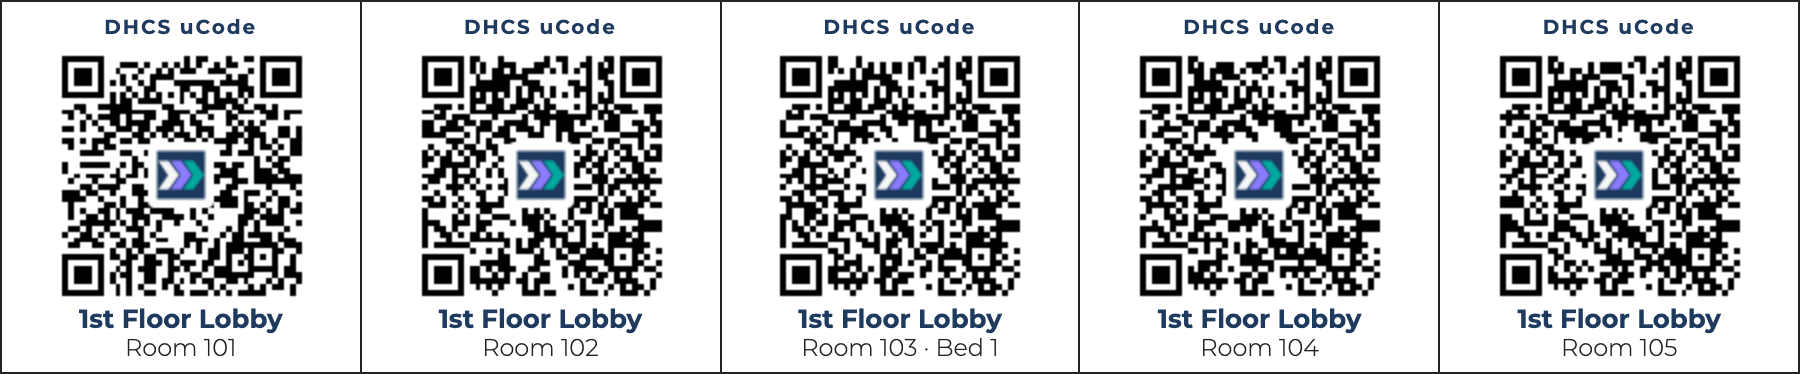
Export Codes prints your uCodes as a cut-and-stick sheet, or as a PDF to hand to your sticker vendor. Each uCode shows “DHCS uCode”, the QR barcode, the zone and the location name (or the employee’s name and ID). The same code keeps working no matter which products are added later, so you never reprint because a product was switched on.
Watch: printing uCodes from Export Codes (1:51)Export Codes with one zone picked
How to print a zone
Go to Facility, then Export Codes.
Pick the Zone. Type to find it. You can also narrow by Type (locations or employees) and by Product.
Tick Never printed only to see only uCodes that have never been on a print sheet. The count line tells you how many are shown and how many were never printed.
Leave Mark as printed ticked. It stamps today’s date on everything you print so the Never printed filter stays true.
Click Print all N shown. The sheet opens in a new tab.
Click Print page on the sheet, choose your printer and confirm. In Chrome, expand More settings and turn on Background graphics if the cut lines are missing.
Cut along the thin lines and stick the codes up.
How to get a PDF for a sticker vendor
Filter the same way as above.
Click PDF all N shown, or tick rows and click PDF selected.
The PDF opens in a new tab. Download it and send it to your vendor. It is the same layout as the printed sheet.
Sheet layout
The sheet has five codes per row with thin cut lines and no wasted space, the same shape as the product barcode sheets you already print. Each code reads, top to bottom: DHCS uCode, the QR barcode, the zone in bold, then the location name with the bed or room detail if there is one. For an employee the two lines are the name and the employee ID. Codes are sorted by zone then name.
Five codes per row with cut lines
Reprinting
A lost or damaged sticker: open the record from the Loc. & Emp. List and click Print all of [zone], or come to Export Codes, pick the zone, tick the row and click Print selected. The code is identical, so nothing needs setting up again.
A whole zone again: on the Zone List, zones where everything has been printed show a Reprint button. It opens Export Codes for that zone.
Just the image: on a record page, Open code image gives the bare QR for pasting into a sign or document.
Test prints and the Printed date
Untick Mark as printed before a test print you do not want recorded.
Stamped too early? Tick the rows and click Mark selected as not printed. On a record page the same thing is Mark as not printed next to the Printed date.
Where the Print buttons lead
Several places bring you here with the filters already set: Print N on a Zone List row (that zone, never printed only), Print the new uCodes after a Build or a Bulk Add (never printed only), and Print all of [zone] on a record page.
Who can do this
Directors (M2).
Tips
Printing from Safari? Click Print promptly once the dialog opens, or use the PDF instead. Safari can blank the sheet a few seconds after the print dialog opens. Chrome prints the sheet directly.
Print one zone at a time. The sheet is sorted by zone and name, so sticking codes up in order is quick.
The Printed column on the Loc. & Emp. List and the Zone List both come from the same date, so you can always see what is still waiting.