A vendor is an outside company that services your facilities, for example “ABC Pest Control”. Each vendor has its own checklist: the list of things its technician confirms on every visit. You set both up on the Vendors page. Open it from the sidebar: VDR, then Vendors.
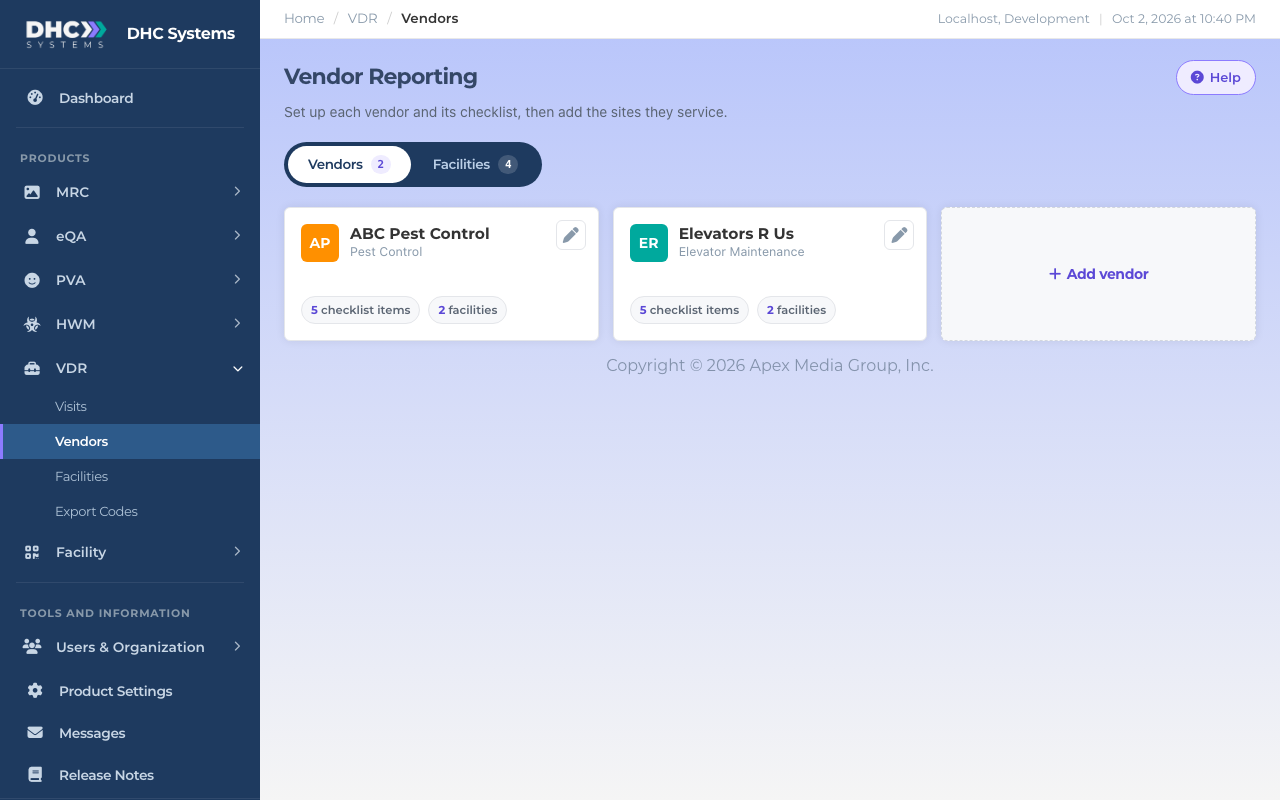
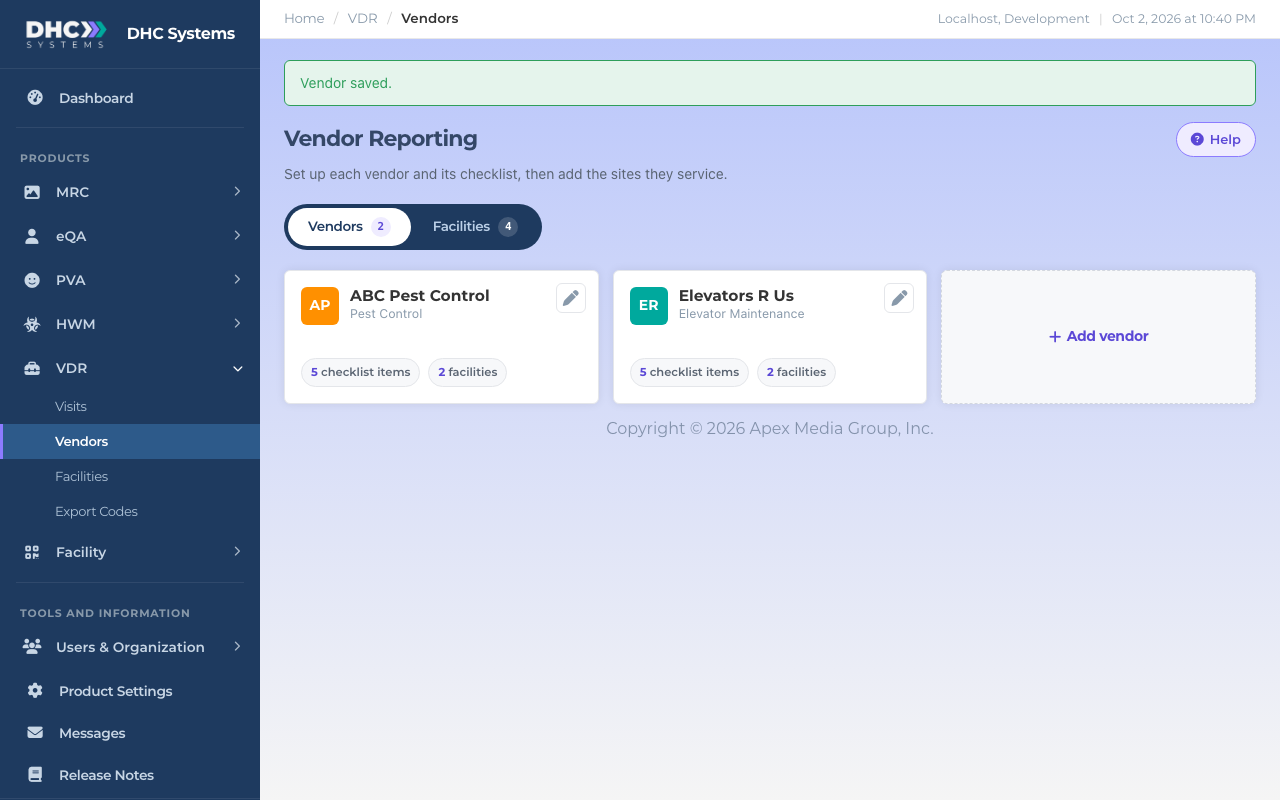
Each card is one vendor.
What is on the page
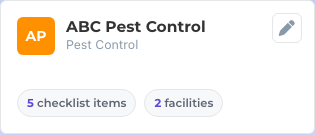
Each card is a vendor. It shows the vendor name, service type, how many checklist items it has, and how many facilities it services.
Click a card to open that vendor’s facilities (the sites it services).
The pencil on a card opens the vendor for editing.
Add vendor starts a new vendor.
The Vendors / Facilities switch at the top moves you between the two lists. The numbers are counts.
Pencil to edit, click anywhere else to open its facilities.
How to add a vendor
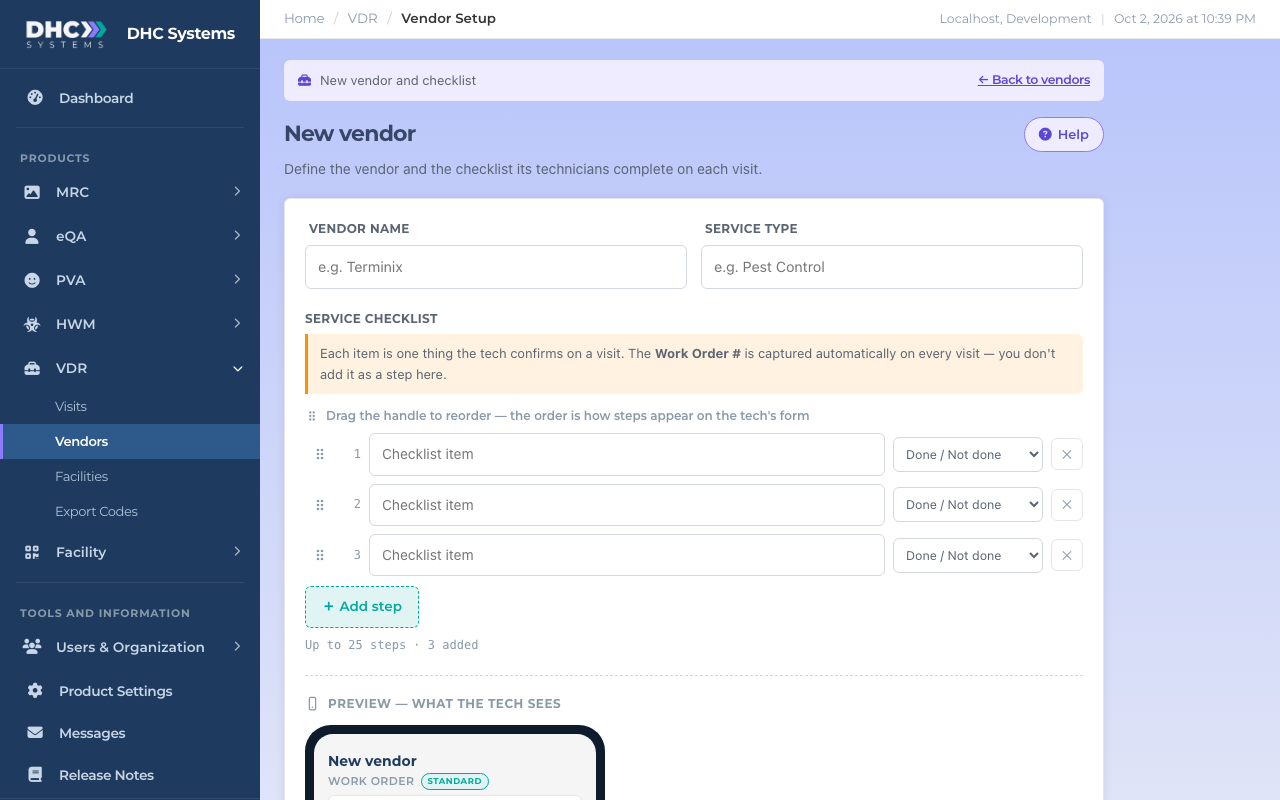
On the Vendors page, click Add vendor. The New vendor form opens.
A new vendor starts with three empty checklist rows.
Type the Vendor name (for example “ABC Pest Control”) and the Service type (for example “Pest Control”). The service type shows under the name on the technician’s form.
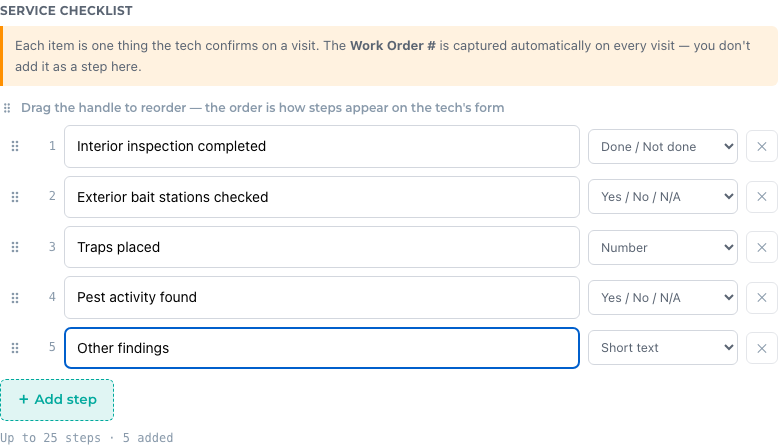
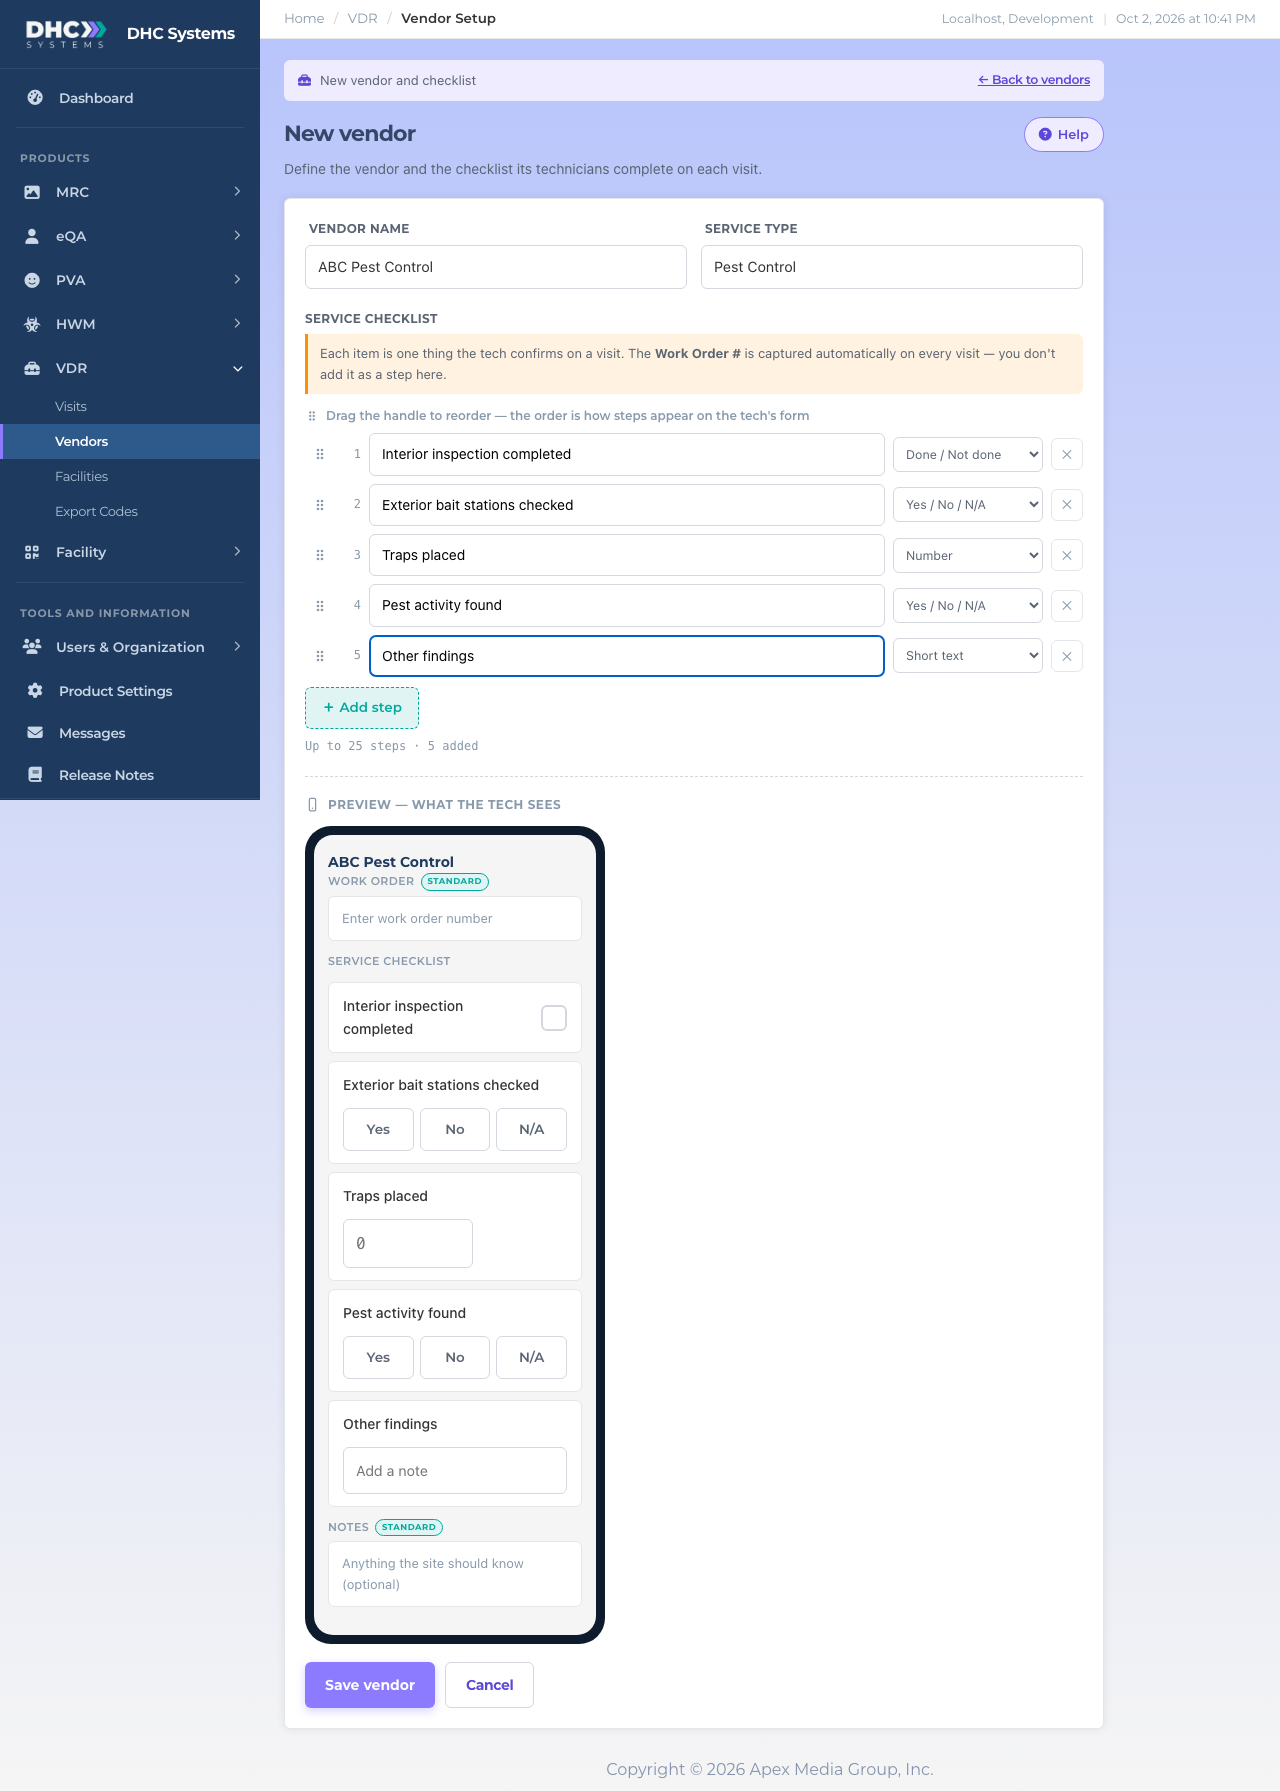
Under Service checklist, type one item per row. Each row is one thing the technician confirms, like “Interior inspection completed” or “Traps placed”.
For each row, pick how the technician answers it from the dropdown on the right:
Done / Not done: a single tap checkbox. This is the default.
Yes / No / N/A: three buttons, for items that sometimes do not apply.
Number: a number box, for example how many traps were placed.
Short text: a one line note, for example “Other findings”.
Click Add step for more rows (up to 25). Click the x at the end of a row to remove it.
Drag the handle (the dotted grip at the left of a row) to reorder. The order here is the order on the technician’s form.
Five checklist items with different answer types.
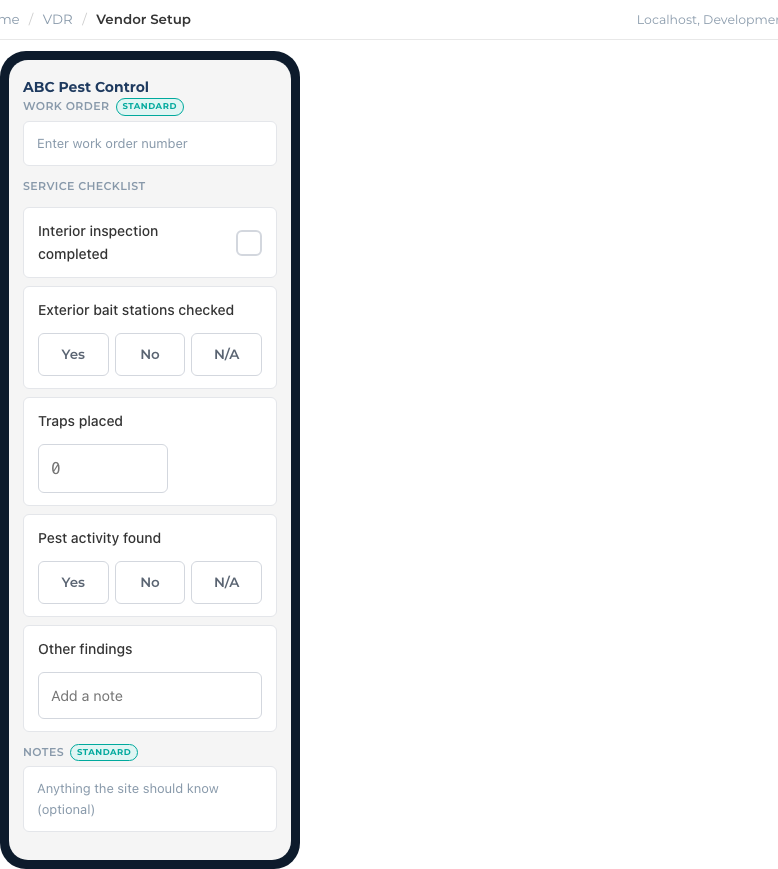
Check the Preview at the bottom. It is a live picture of what the technician will see, and it updates as you type, change a type, or reorder.
The preview is exactly what the technician gets.
Click Save vendor. You land back on the Vendors page with a “Vendor saved.” message and the new card.
Saved. The card appears with its checklist count.The complete form before saving.
How to edit a vendor
On the Vendors page, click the pencil on the vendor’s card.
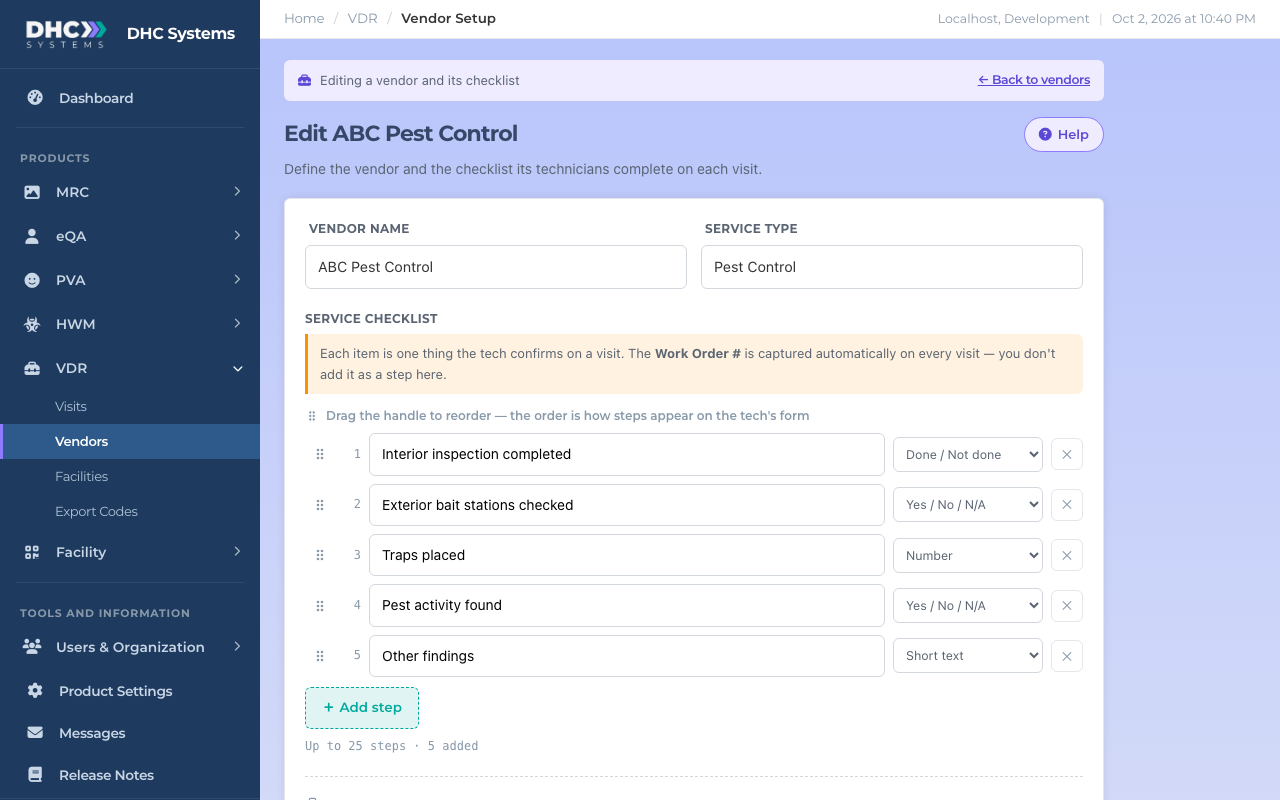
Change the name, service type, or any checklist row. You can add, remove, retype and reorder items the same way as when adding.
Click Save vendor. Or click Cancel (or Back to vendors) to leave without saving.
Editing loads the current checklist.
Things to know about the checklist
Work Order is always asked for on the technician’s form. Do not add it as a checklist item.
Notes is also always on the form, at the bottom. You do not need a “comments” item.
Changing a checklist changes what technicians see from now on. Visits already logged keep the items and answers as they were at the time.
Blank rows are ignored when you save, so an unused empty row does no harm.
Who can do this
Everyone can view the Vendors page. M1 accounts and Directors (M2) can edit an existing vendor (the pencil). Only a Director (M2) sees Add vendor and can create a new one. IC accounts see the cards with no pencil and no Add vendor card.
Tips
Name the vendor the way your staff say it. The name appears on every visit row and on the printed codes.
Use Yes / No / N/A for anything that might not apply at every site, so the technician is never forced to give a wrong answer.
After saving, click the card to add the vendor’s facilities. A vendor with no facilities cannot receive visits yet.