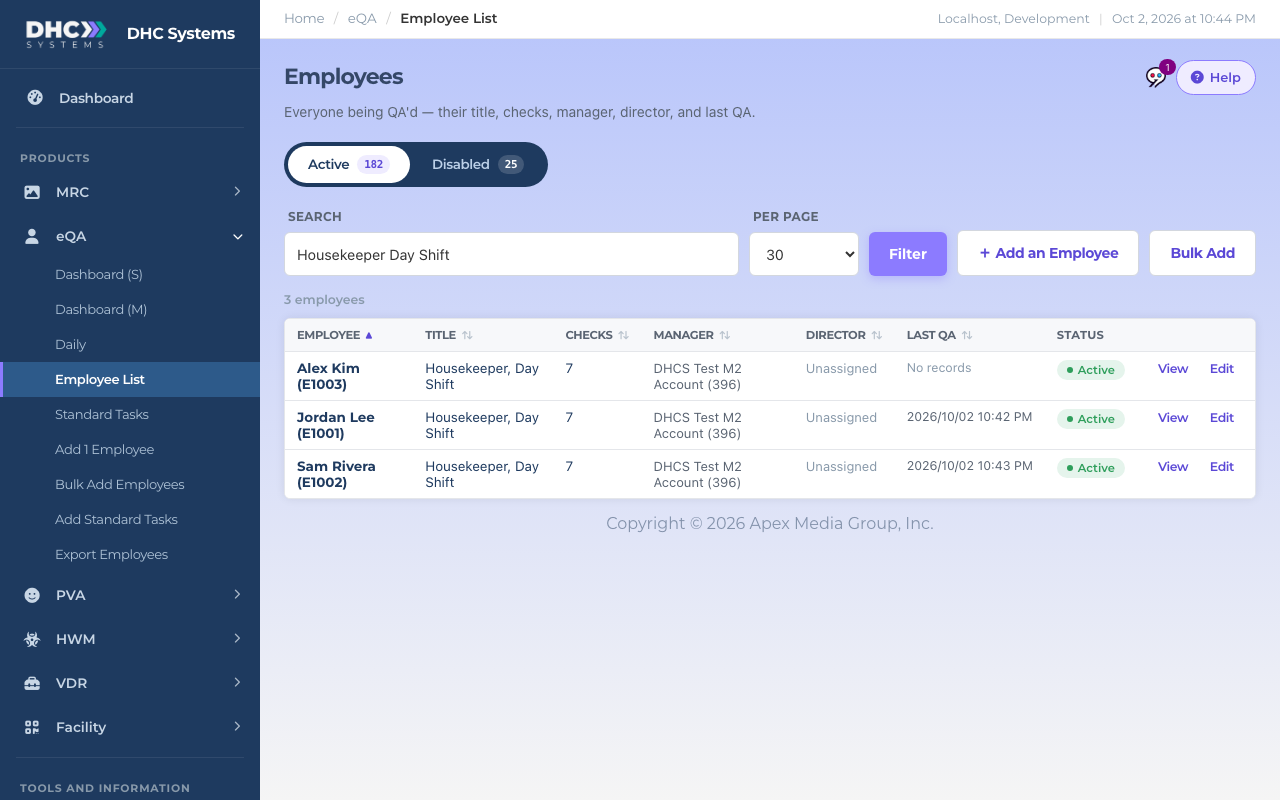
The Employee List is everyone being QA’d in your company, one row per person, with their Standard Title, how many checks they have, who they report to and when they were last QA’d. It is the starting point for most eQA work. Open it from eQA, then Employee List.
The Employee List, filtered with the Search box
What the columns mean
Employee. Name and Employee ID in brackets, for example Jordan Lee (E1001).
Title. The Standard Title (standard task list) the employee is on. Blank means their checks were typed in by hand or they have none yet.
Checks. How many checks are on their list, up to 25. A 0 here means a scan of their code will show no checks, so fix it before anyone scans them.
Manager and Director. Who the employee reports to, with that person’s ID. “Unassigned” means nobody has been set yet. The Manager is set when a manager saves the employee’s record (see editing below).
Last QA. Date and time of the most recent scan. “No records” means they have never been QA’d.
Status. Active or Disabled. A Director (M2) can click the pill to change it (see below).
View opens the record read only. Edit opens it ready to change (M1 accounts and Directors).
How to find someone
Type in the Search box. It matches name, Employee ID, title, manager and director. Several words narrow the match, so “Jordan Lee” finds one person and “Housekeeper Day Shift” finds everyone on that title.
Click Filter (or press Enter).
Use Per page to show 30, 100 or 250 rows, and click a column header to sort.
Search, page size and the add buttons live in one bar
Active and Disabled
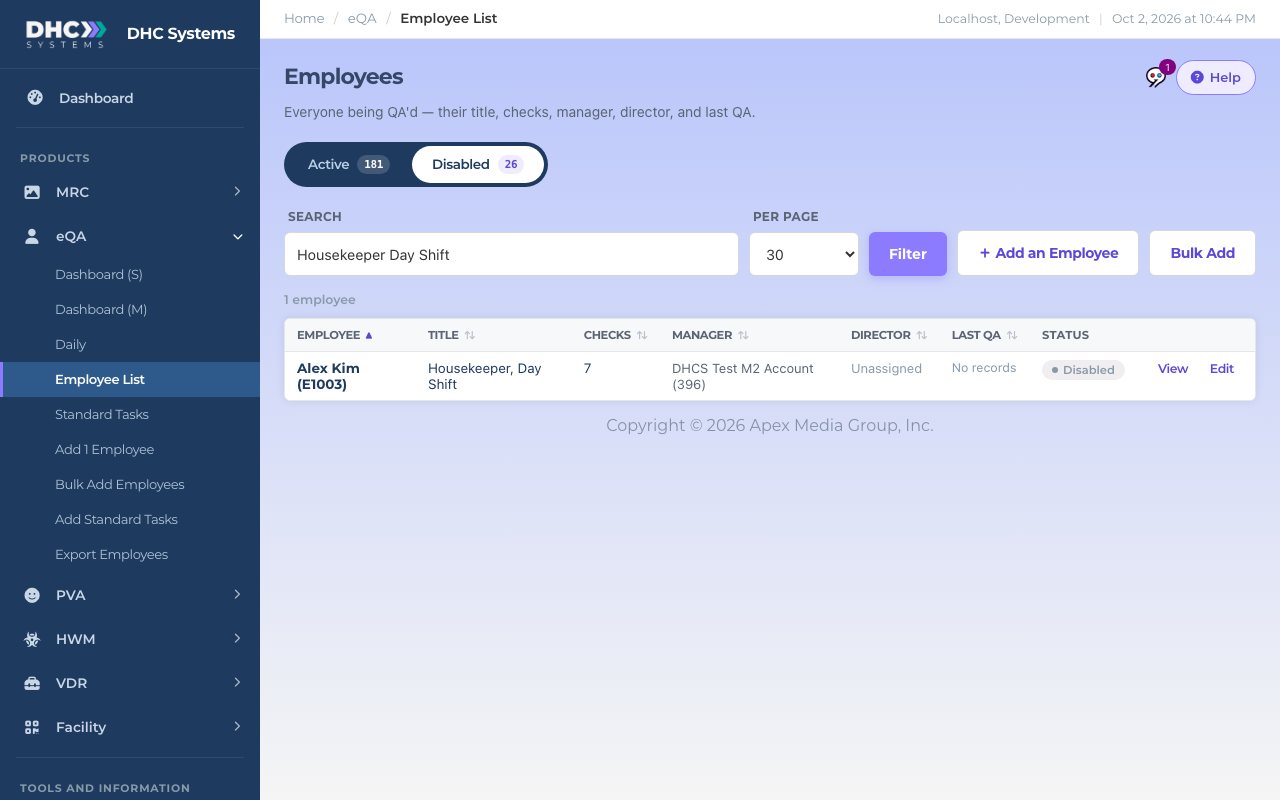
The switch above the filter bar shows how many employees are Active and how many are Disabled. Click Disabled to see the people whose codes no longer accept scans; click Active to come back.
Click either side to switch views
How to view or edit an employee
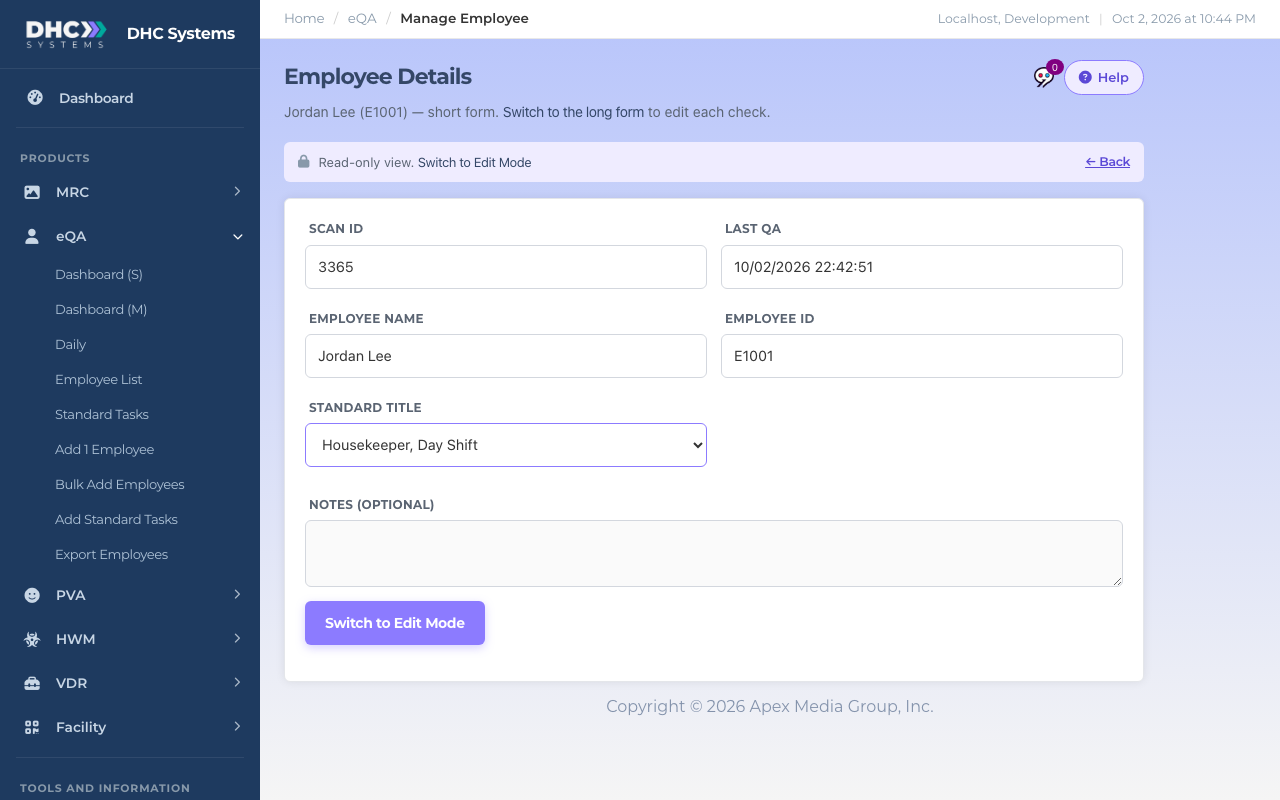
Click View on the row. You see the Employee Details page: Scan ID, Last QA, Employee name, Employee ID, Standard Title and Notes.
View is read only
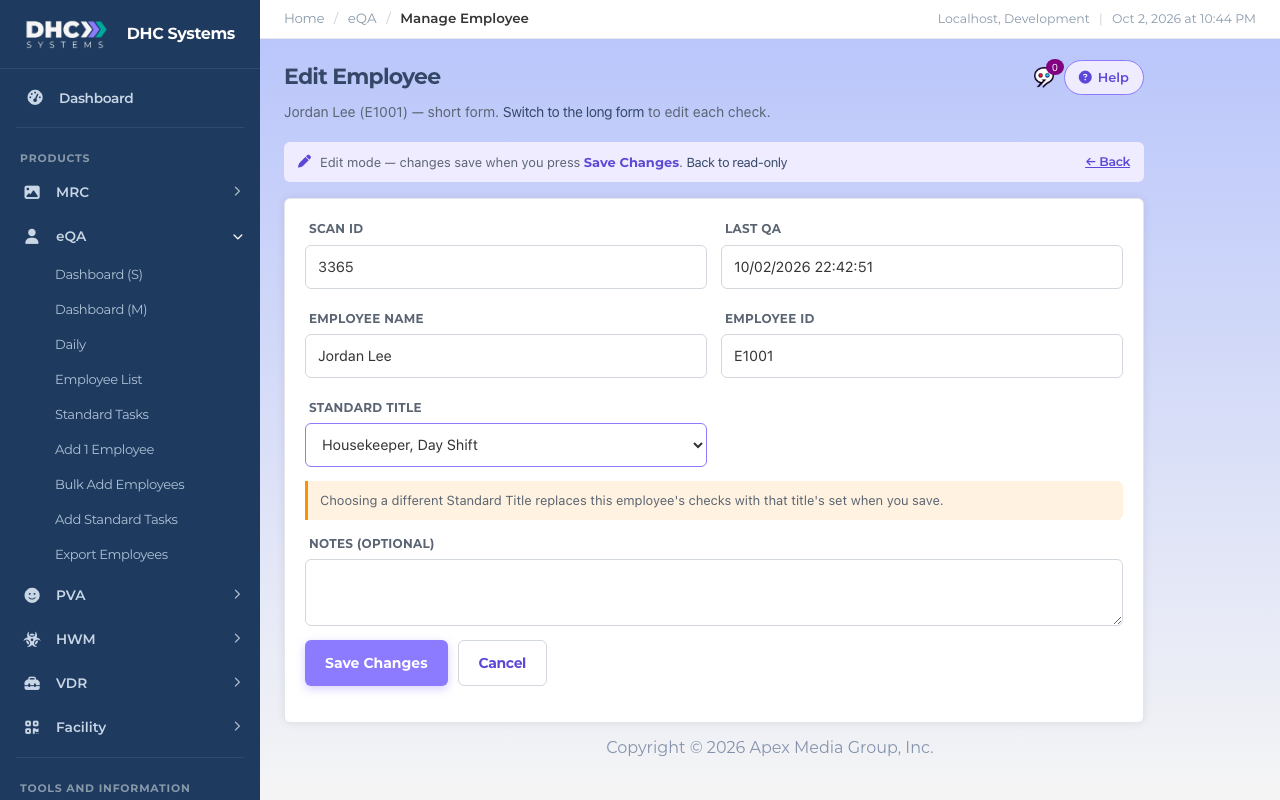
Click Switch to Edit Mode, or click Edit on the list row to open the page ready to change.
Change the name, Employee ID or Notes. To change their checks, pick a different Standard Title; their checks are replaced with that title’s list when you save. Saving also records you as the employee’s Manager (the Manager column on the list), so the quickest way to assign a manager is to have that manager open the record and click Save.
Click Save Changes. You land back on the list with a “Changes saved” message.
Edit mode: every field is live until you press Save Changes
Editing checks one at a time (the long form)
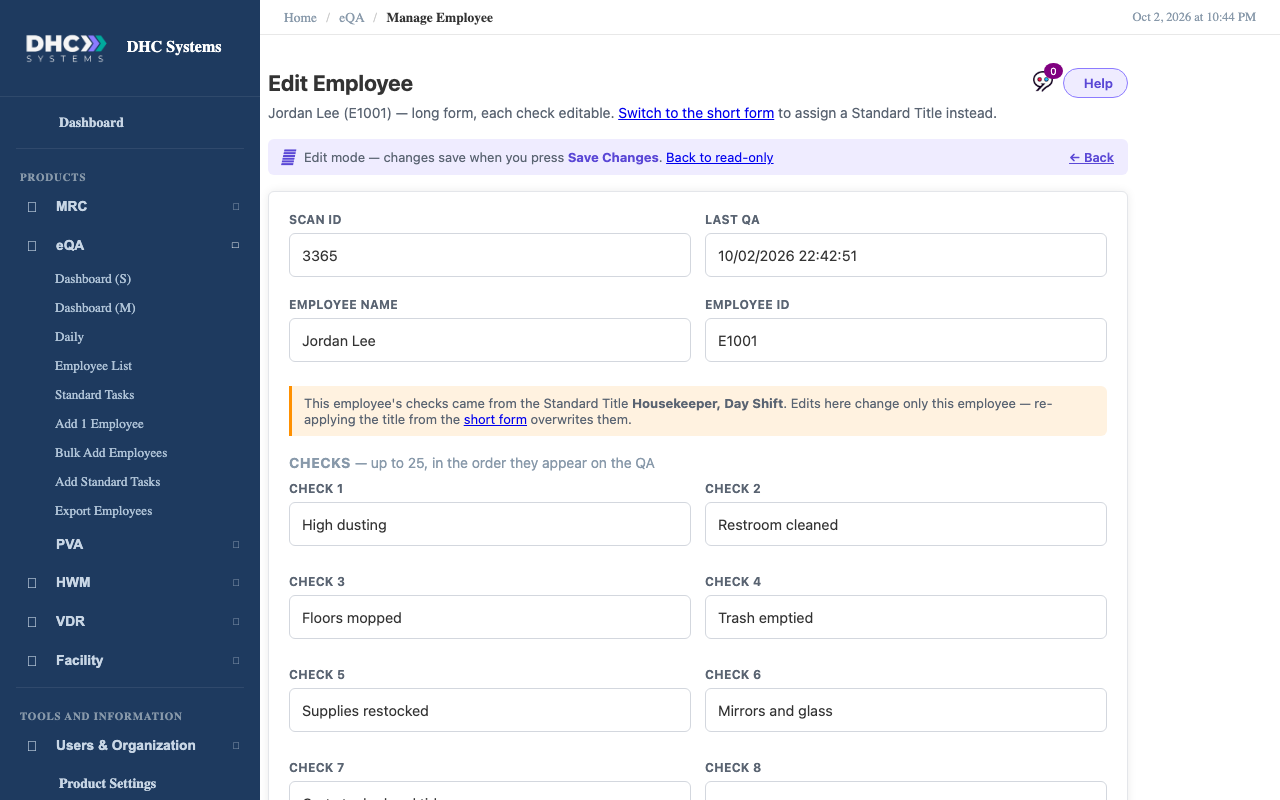
If one person needs a check the rest of their title does not, use the long form. On the Employee Details page click Switch to the long form under the title, then Switch to Edit Mode. You get Check 1 to Check 10, and Show all 25 checks for the rest. Edits here change this employee only, and re-applying a Standard Title later will overwrite them.
The long form edits this one person’s checks
How to disable or enable an employee (Director only)
Click the Active pill on the row.
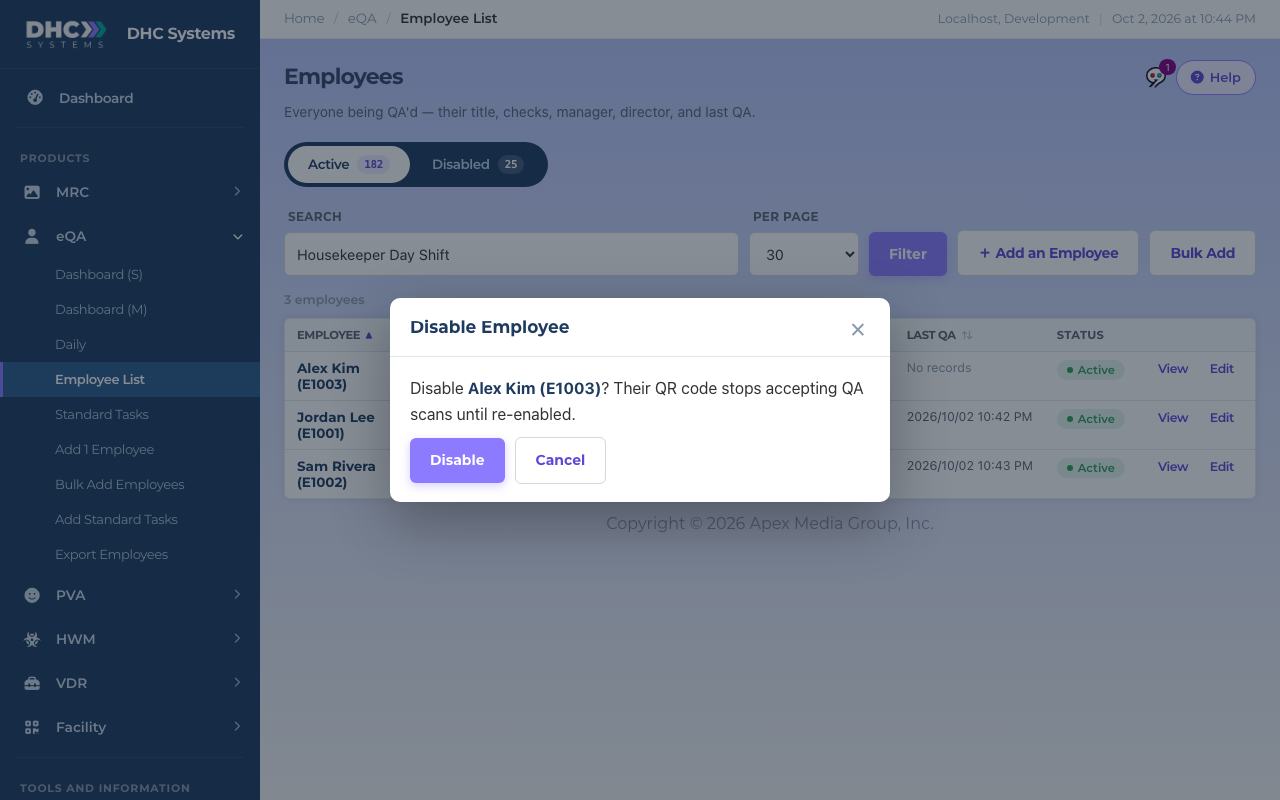
Read the confirmation: “Disable Jordan Lee (E1001)? Their QR code stops accepting QA scans until re-enabled.”
You always get asked first
Click Disable. The list reloads and the person moves to the Disabled view.
To bring them back, open the Disabled view, click their Disabled pill and click Enable.
A disabled employee keeps their record and history
Who can do this
Everyone can view the list and open records. M1 accounts and Directors (M2) can add and edit. Only a Director (M2) can disable or enable an employee, or use Bulk Add.
Tips
Disabling is the right move when someone leaves. Nothing is deleted, their history stays in the reports, and their old badge code simply stops working.
Printed codes carry the Scan ID, not the name, so correcting a name does not mean reprinting.
Use + Add an Employee on this page or Add 1 Employee in the sidebar to add someone. See “eQA Add 1 Employee”.