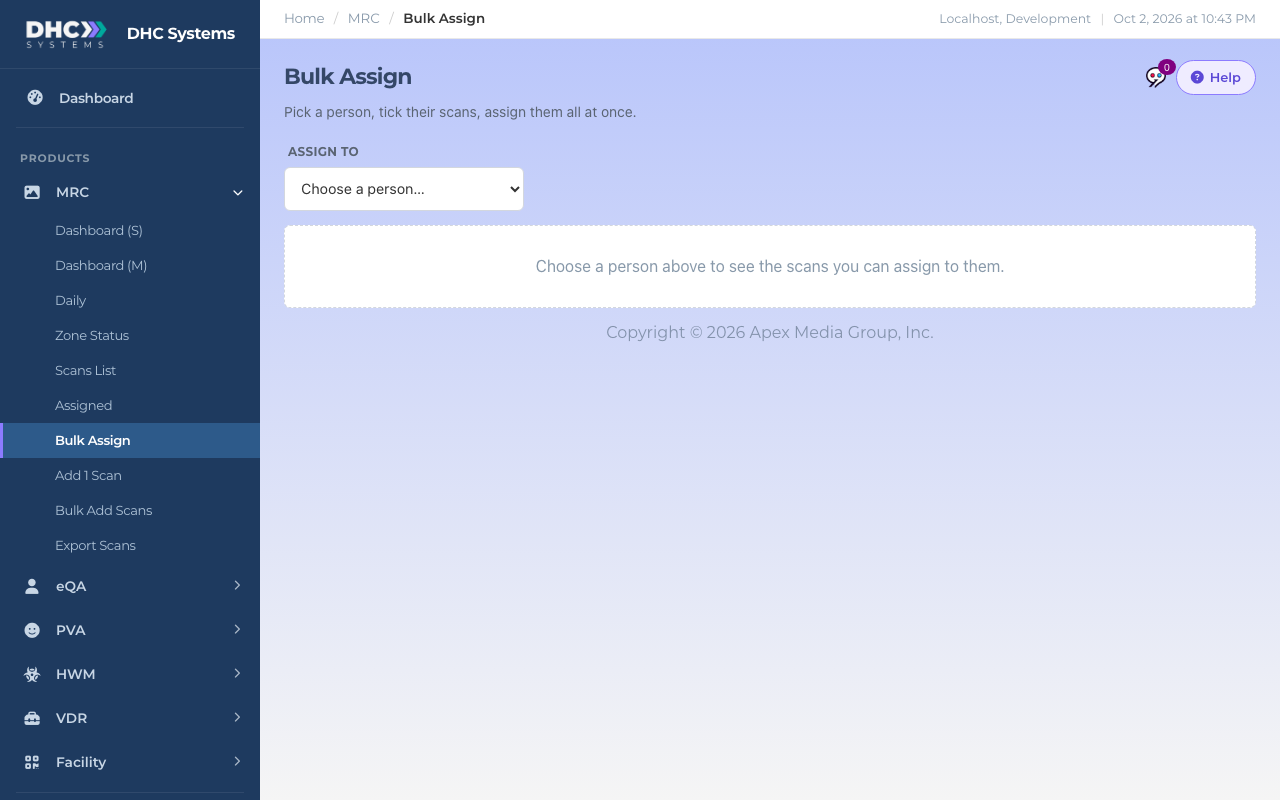
Bulk Assign puts one person on many rooms in a single step. Use it when you set up a new zone, when someone joins or leaves, or whenever the Scans List shows a long run of Unassigned rows.
Start by choosing a person
How to assign rooms
Click MRC, then Bulk Assign.
Pick the person under Assign to. The list shows active users who have an employee ID. The page reloads with the filters and the room list.
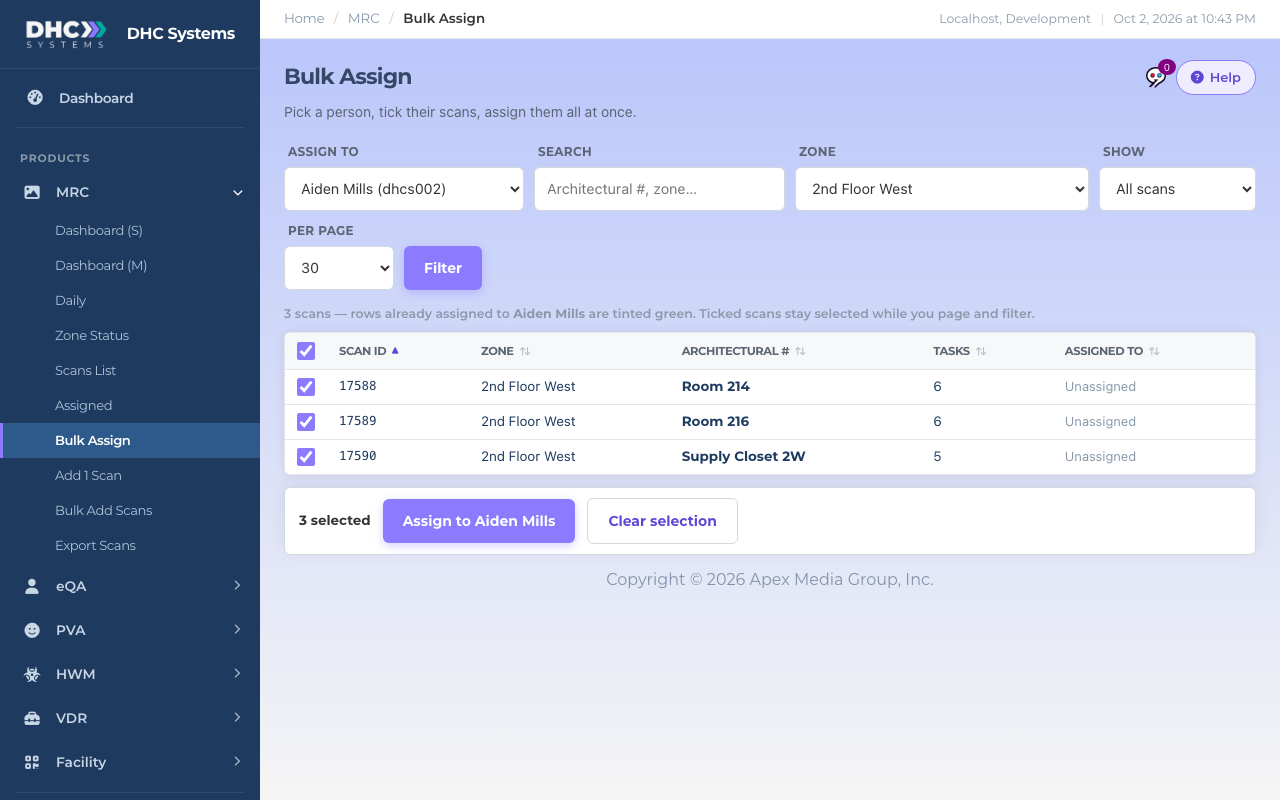
Narrow the list. Pick a Zone, type in Search, or set Show to Unassigned only to see just the rooms nobody owns yet.
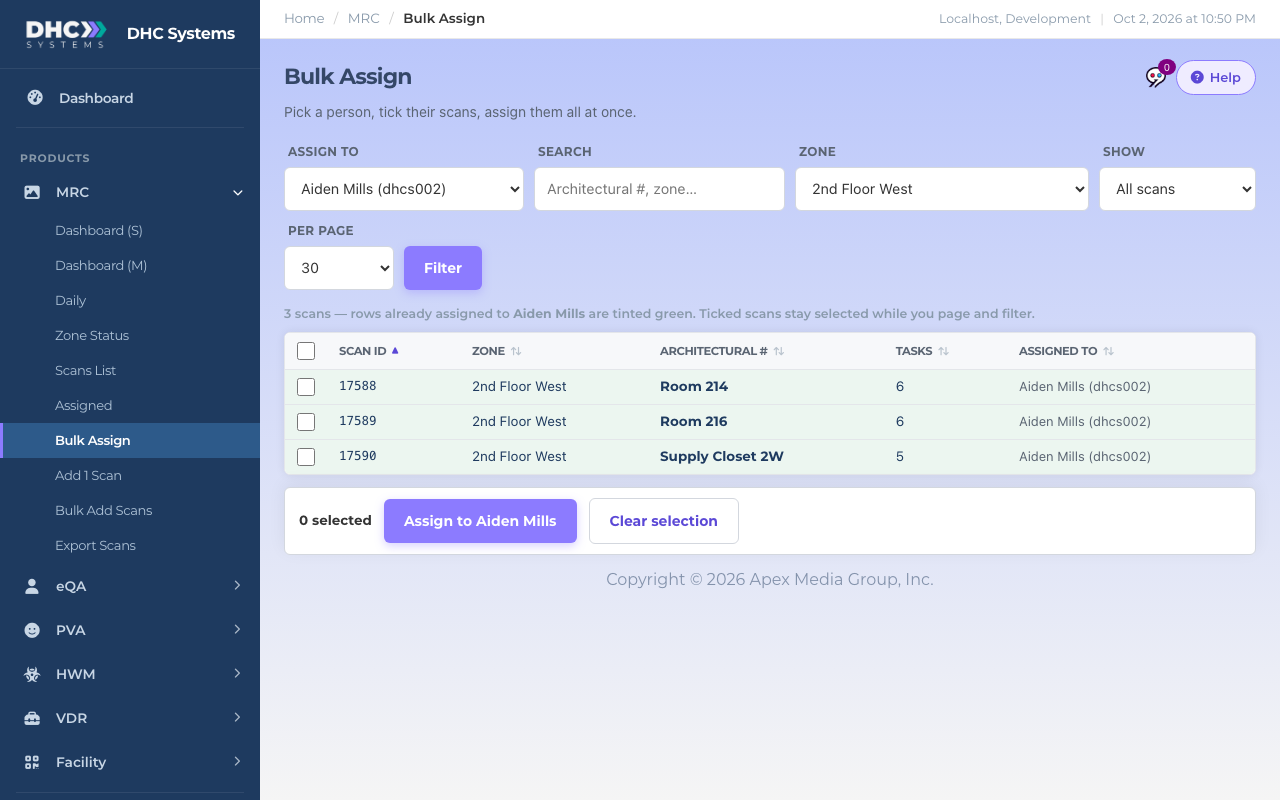
Tick the rooms. The box in the header ticks everything on the current page. Rows already assigned to this person are tinted green.
Watch the bar at the bottom. It always shows how many are selected, even across pages and filters. Clear selection starts over.
Click Assign to [name]. The bar reports how many were assigned, then takes you to the Assigned page.
Three rooms ticked and readyThe action bar stays at the bottom of the screenDone, rows tinted green
What the filters mean
Assign to: the person who will own the ticked rooms. Switching people clears your ticks.
Search: matches Architectural # and zone.
Zone: one zone at a time.
Show: All scans or Unassigned only.
Per page: how many rows per page. Your ticks are kept while you page.
Unassigned only is the quickest way to hand out new rooms
Who can do this
Directors (M2) only. M1 accounts assign one room at a time from the room’s Edit page.
Tips
Assigning a room that belongs to someone else moves it. There is no warning, so glance at the Assigned to column before you click.
Every assignment is written to the activity log.
Only people with an employee ID appear in Assign to. If someone is missing, add the ID to their user record under Users & Organization, Manage Users.