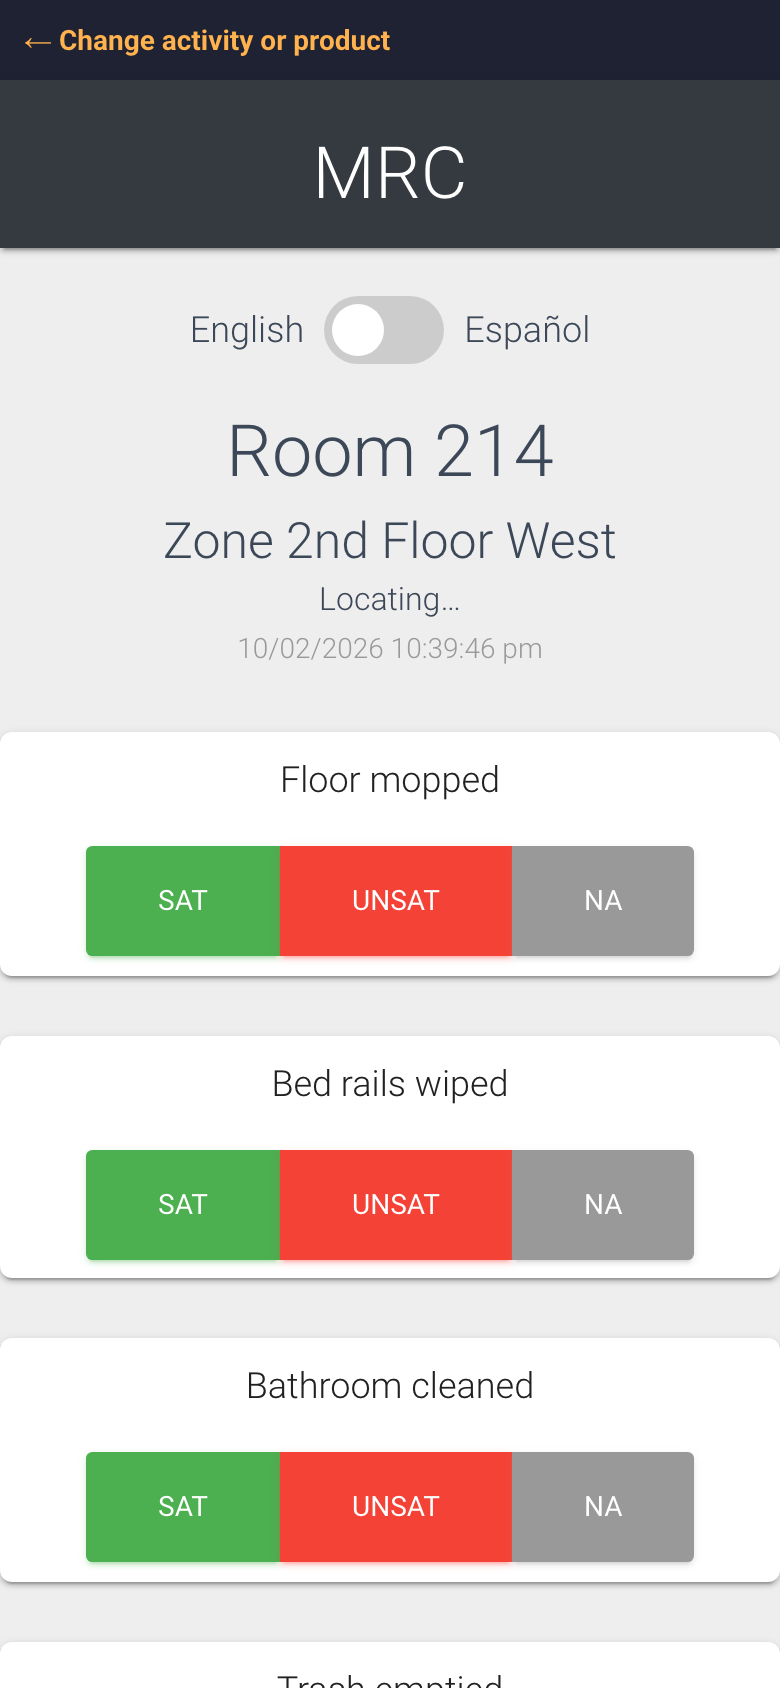
An MRC check takes about a minute. You scan the code on the room, answer the checklist, and tap Submit. No login is needed on the phone, just the camera. Here is the whole flow, screen by screen.
The checklist opens straight after the scan
How to do a check
Open your phone’s camera and point it at the QR code on the wall. Tap the link that appears.
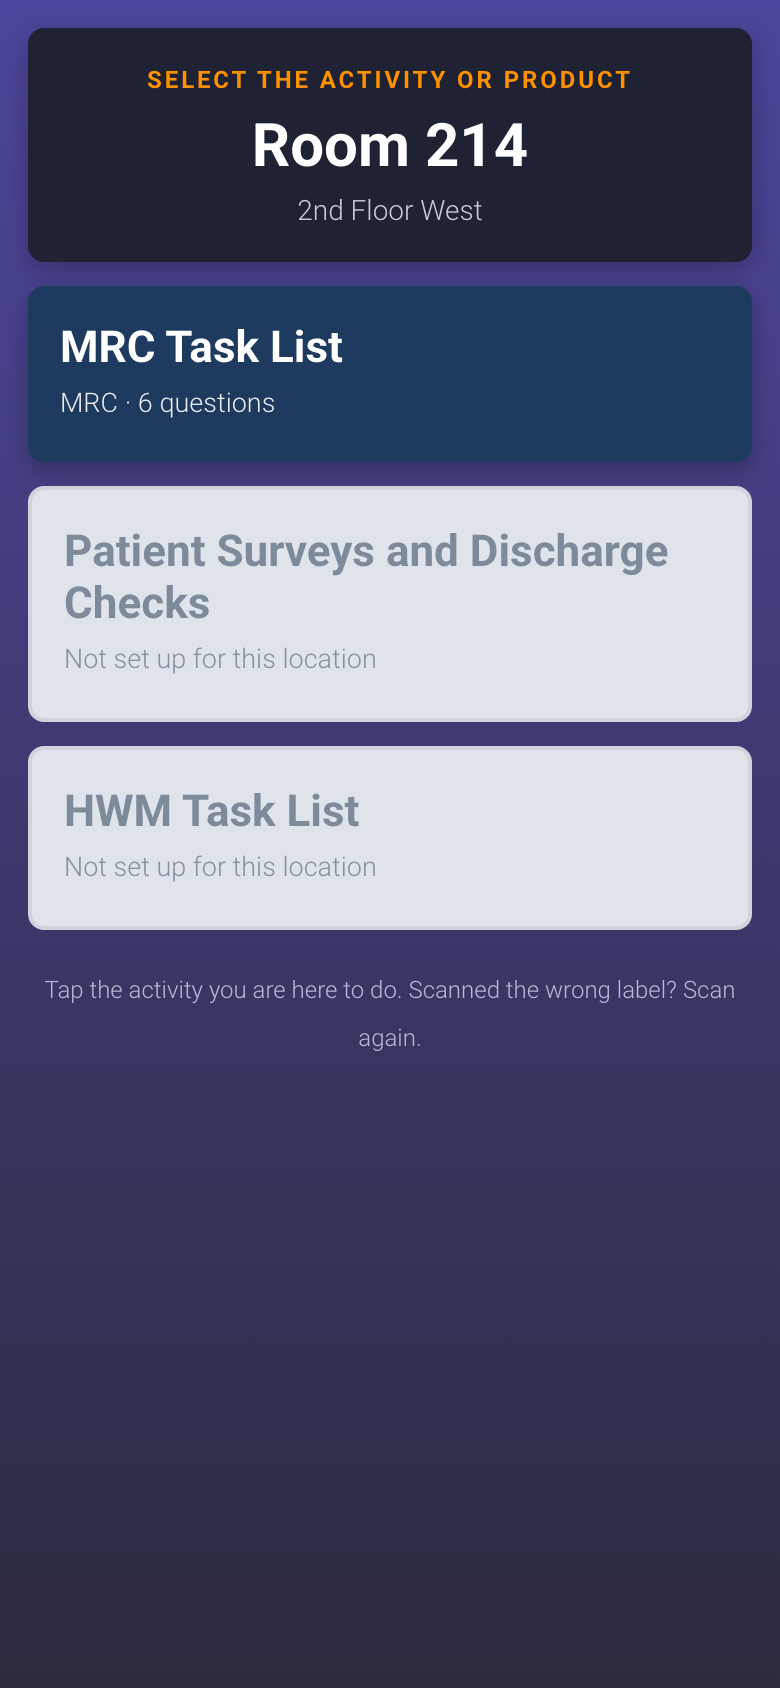
If the code is a uCode that opens more than one product, a screen titled Select the activity or product appears. Tap MRC Task List. If MRC is the only product on the code, you skip this screen and land on the checklist directly.
Check the room name and zone at the top match where you are standing. Scanned the wrong code? Scan again.
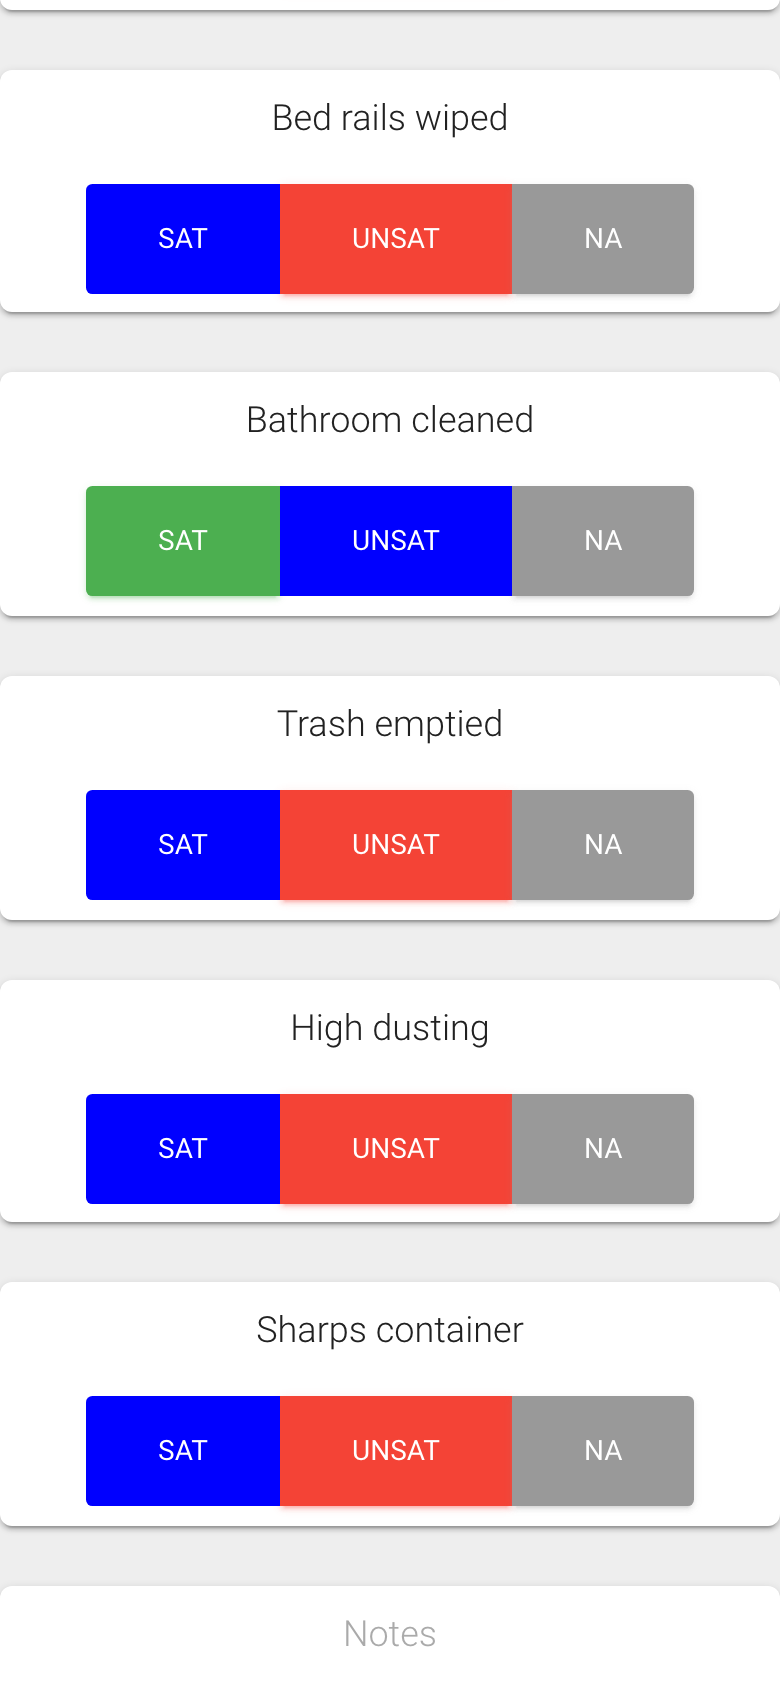
For each task, tap Sat (done and satisfactory), UnSat (not satisfactory) or NA (does not apply). The button you tap turns blue. A task you leave untouched is saved as NA.
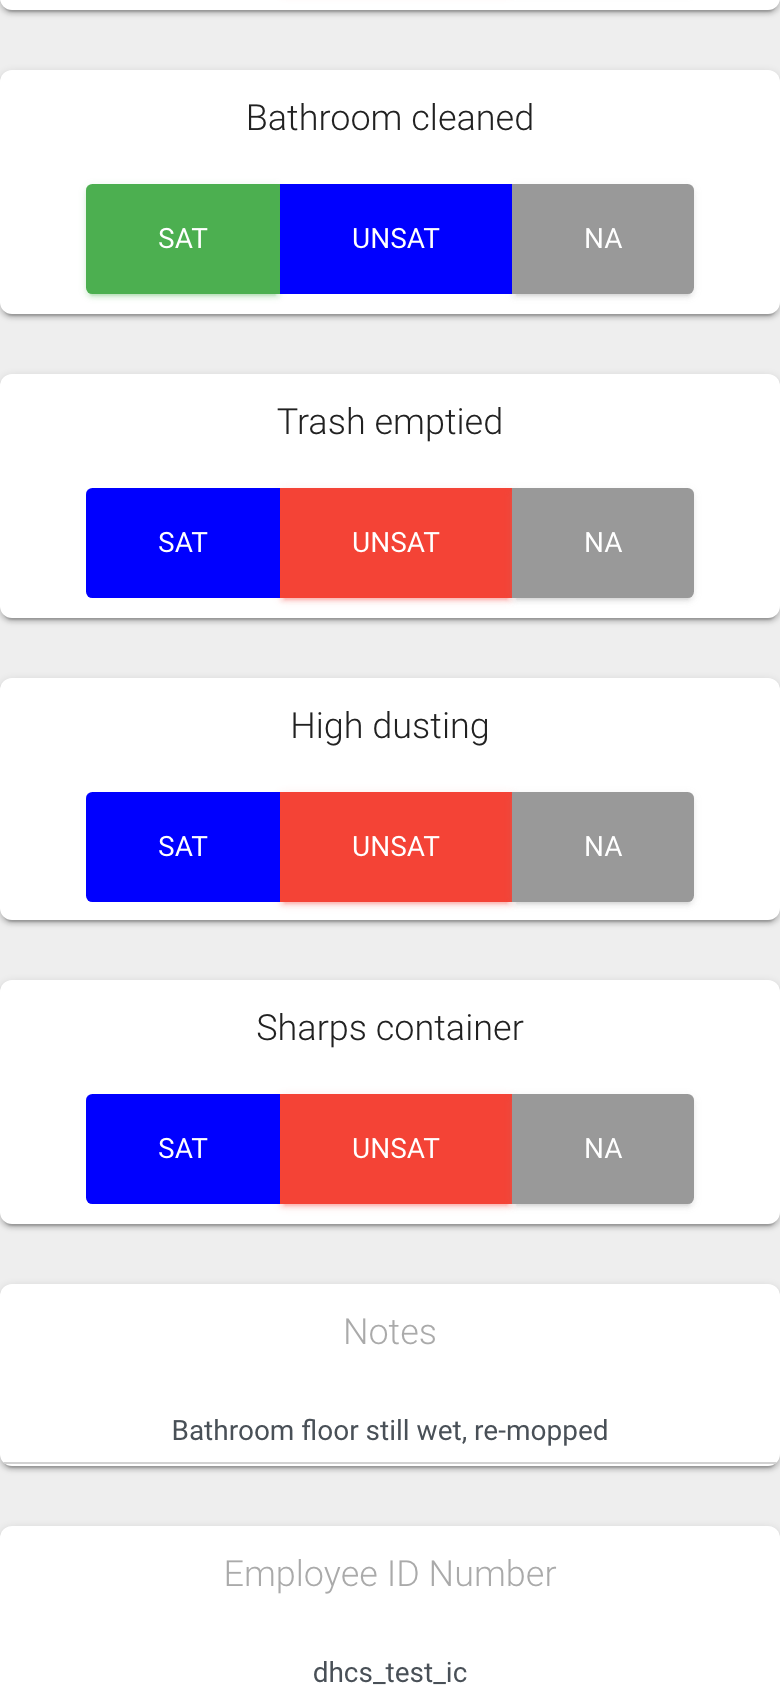
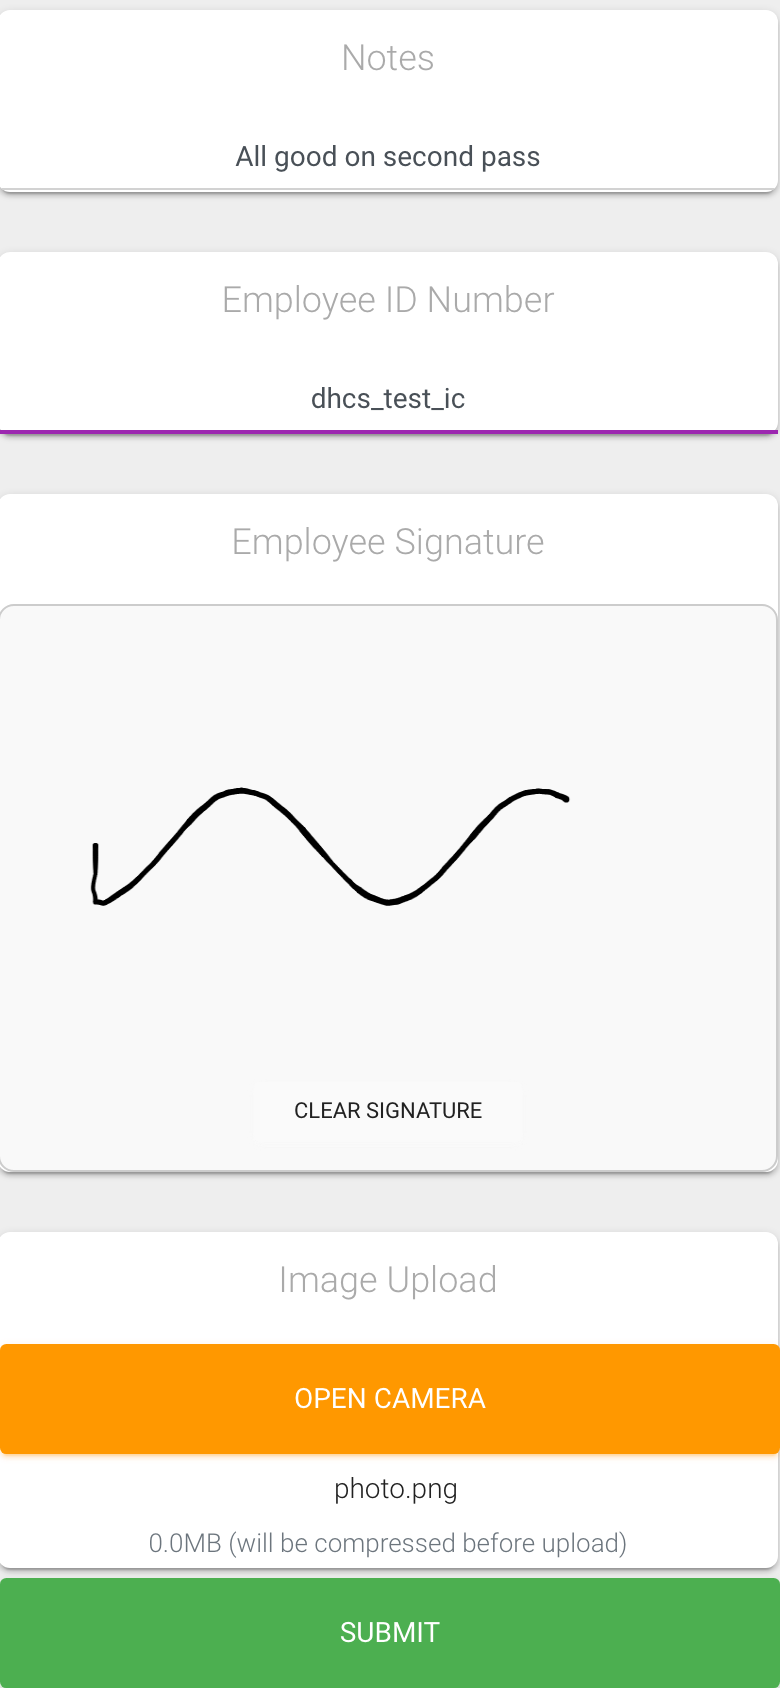
Type Notes if there is anything your manager should know, for example what was wrong and what you did.
Type your Employee ID Number. Use the same ID every time so your work is counted under one name.
If a signature box is shown, sign with your finger. Clear Signature wipes it so you can try again.
Tap Open Camera (or Select or Capture Image) to attach a photo or short video. The file name appears under the button and the photo is compressed before upload.
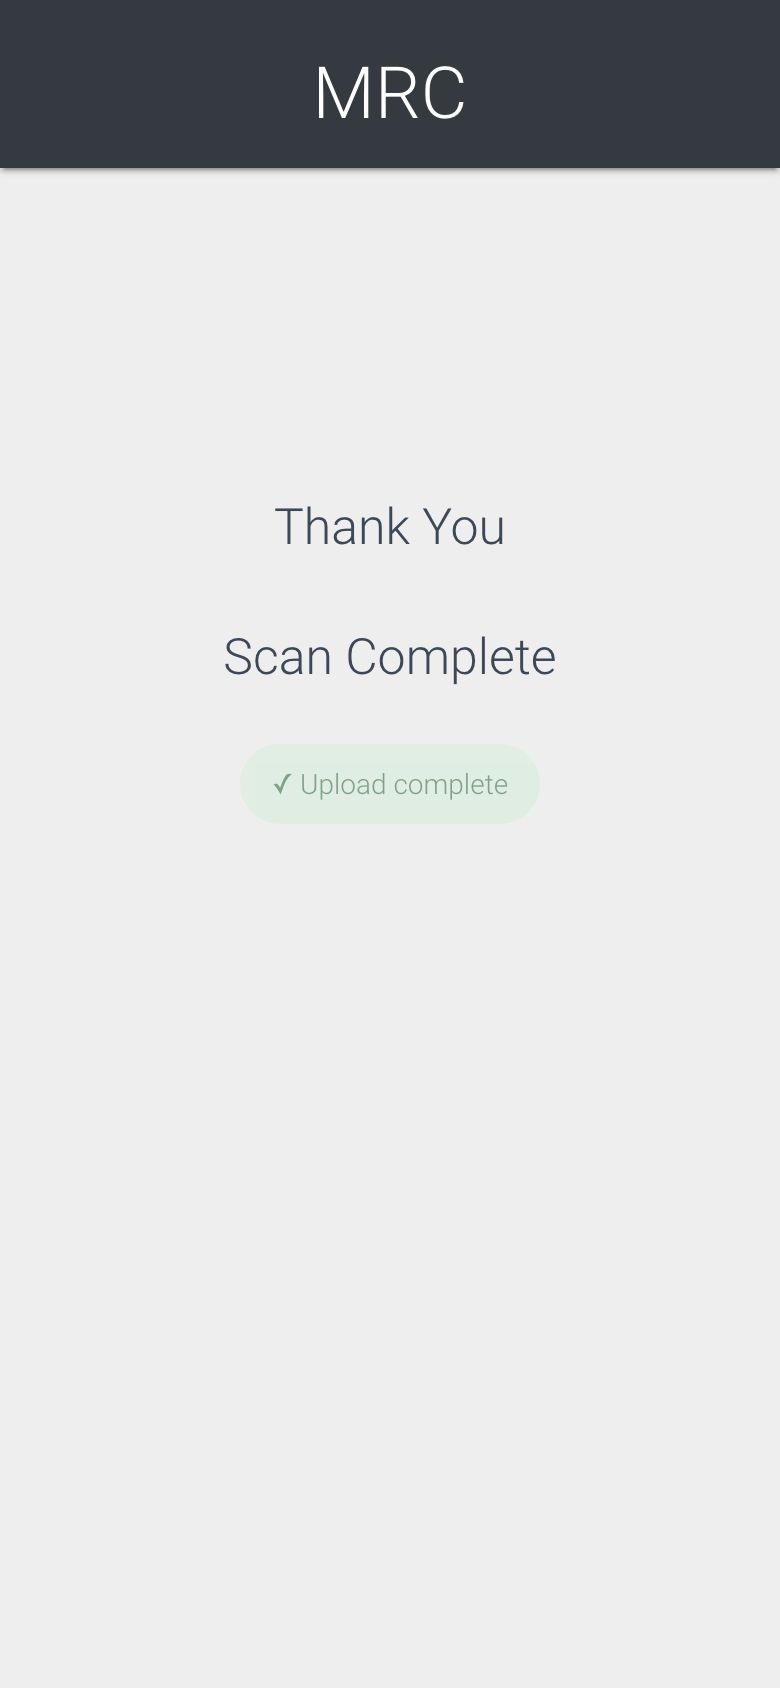
Tap Submit. You see Saving your scan, then the Thank You, Scan Complete page with an Upload complete badge. You can put the phone away.
The chooser you see when a uCode opens more than one productTapped buttons turn blueNotes and your Employee IDSign, add a photo, SubmitDone
What the labels mean
English / Español: the switch at the top translates the task names and labels.
The grey text under the zone is the time the check started. The system also records when you tap Submit, so your manager can see how long the check took.
Image Required or Employee Signature Required in red means your company has made that step mandatory. Submit will not go through without it.
Open Camera means your company only allows live photos. Select or Capture Image means you may also pick one from your gallery.
Who can do this
Anyone with the code and a phone. The page does not need an account. Your Employee ID is how the check is credited to you.
Tips
No signal? Submit anyway. The scan is kept on the phone and sent as soon as you are back online. The Thank You page shows Uploading until it goes through. If it says Scan did not save, please rescan, do the check again.
Keep videos short. Very large files are refused with a message asking you to trim the video or take a photo instead.
If the page says a product is not ready yet or turned off, nothing is wrong with your phone. Tell your manager; the room needs tasks added or re-enabling.
The Change activity or product link at the top takes you back to the chooser if you tapped the wrong product.