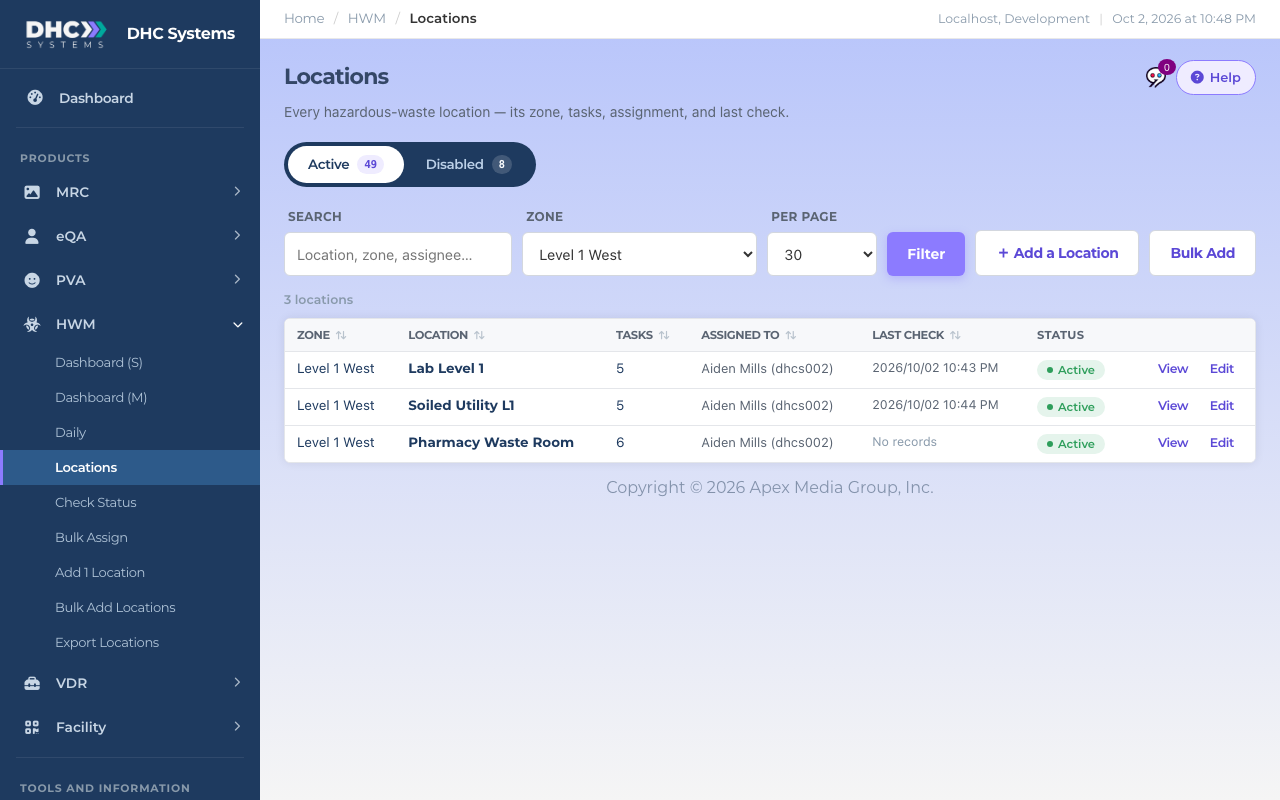
Locations is the home page of HWM. Every hazardous waste location in your organization is one row, with its zone, how many tasks it has, who it is assigned to and when it was last checked. Open it from HWM, then Locations.
The Locations list filtered to one zone
How to find a location
Type part of the name, zone or assignee into Search. Several words narrow the match, so “Level 1 lab” finds Lab Level 1 in Level 1 West.
Or pick a Zone from the dropdown. The list reloads straight away.
Click Filter after typing a search. The count under the bar (“3 locations”) tells you how many matched.
Click a column heading to sort by it. Click again to flip the order.
Use Per page (30, 100 or 250) and the page numbers at the bottom for long lists.
Search, Zone and Per page, with the Add buttons on the right
What the columns mean
Zone: the area the location belongs to.
Location: its name, as printed on the code and shown on the phone.
Tasks: how many checklist items a worker answers when they scan it. Zero means the code is not ready yet.
Assigned to: the responsible person and their Employee ID, or “Unassigned”.
Last check: date and time of the most recent scan, or “No records”.
Status: Active or Disabled. Directors (M2) can click the pill to change it.
View opens the location read-only. Edit opens it for changes (M1 accounts and Directors). See “HWM Location Record: View and Edit”.
Active and Disabled
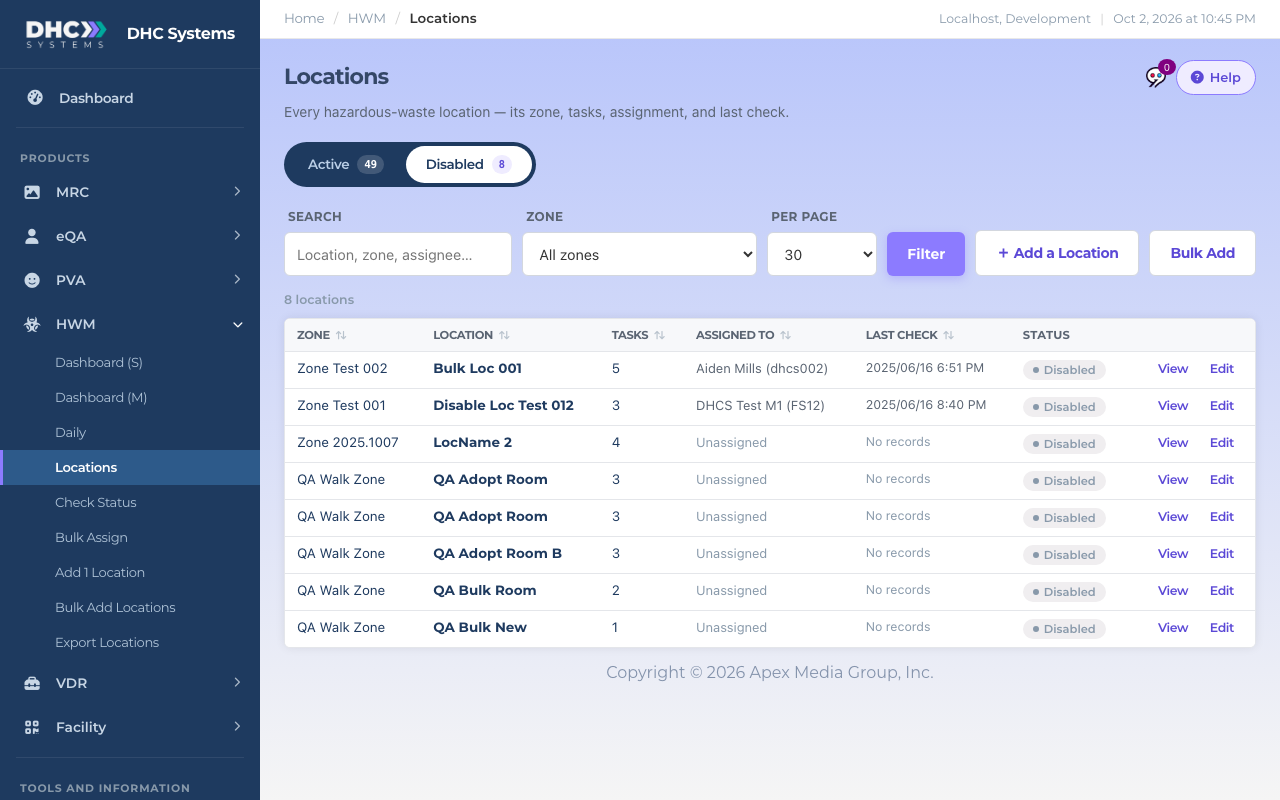
The rail above the filters switches between the two views. The numbers in the pills are your totals. Disabled locations are hidden from Check Status, Bulk Assign and Export Locations, and their code stops accepting scans. Their history stays in the reports.
Click Disabled to see what has been switched off
How to disable a location
Find the row and click its green Active pill.
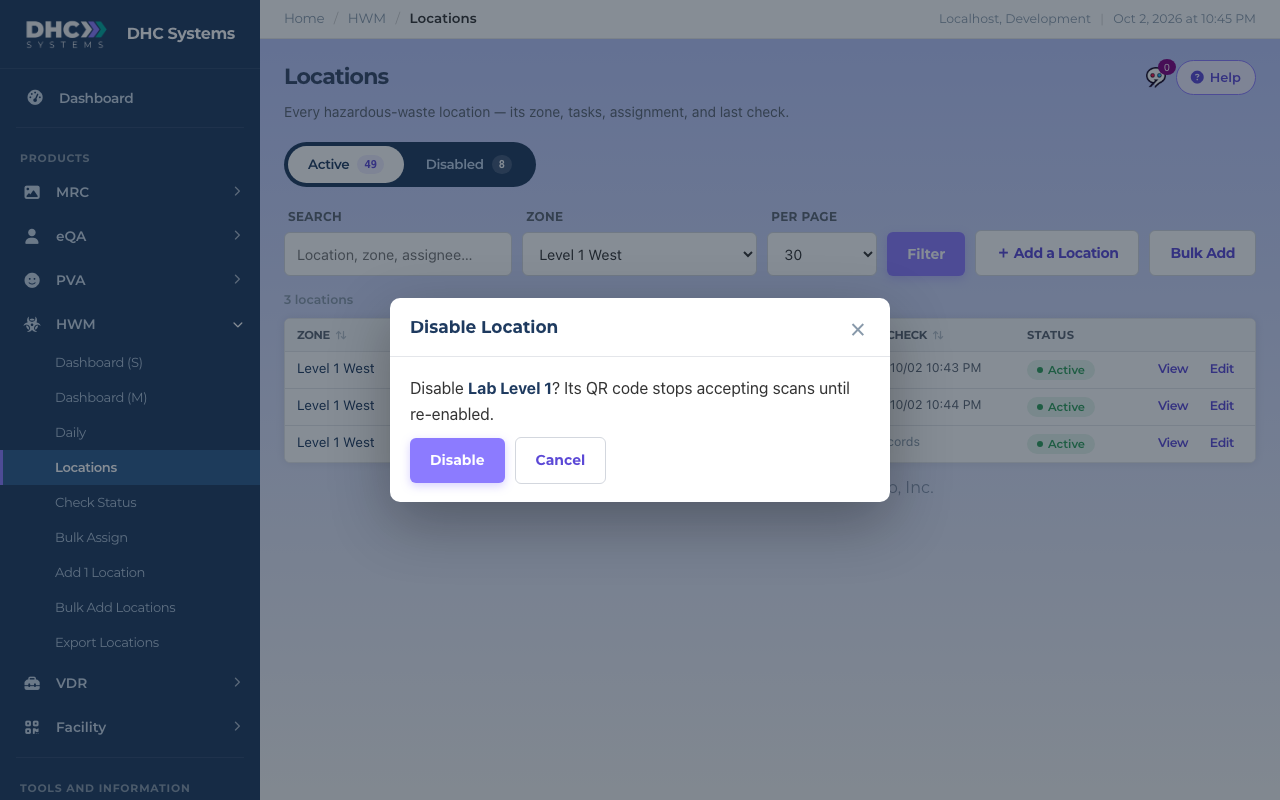
Read the confirmation. It names the location and says its QR code stops accepting scans until re-enabled.
Click Disable. The list reloads and the row moves to the Disabled view. Click Cancel if you changed your mind.
The confirmation before a location is disabled
How to enable it again
Click Disabled on the rail.
Find the row and click its grey Disabled pill.
Click Enable. The location is back on every list and its code works again.
The Disabled view; click a grey pill to enable
On a phone
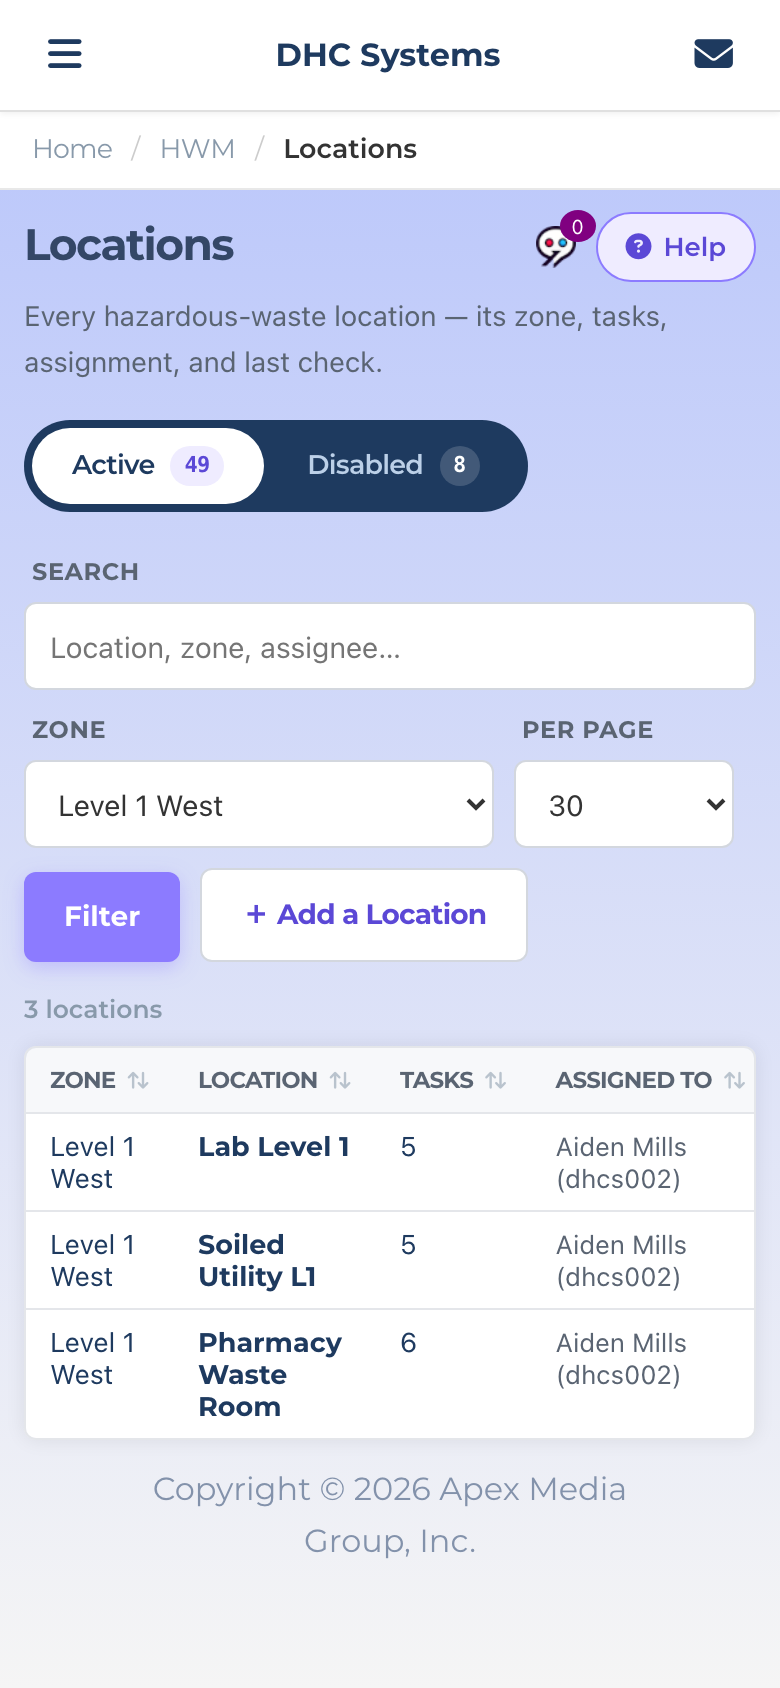
The rail, search and filters stack on top of each other and the table scrolls sideways. Swipe left on the table to reach Last check, Status and the View and Edit buttons.
Locations on a phone; swipe the table to see the rest
Who can do this
Everyone can open the list and use View. M1 accounts and Directors (M2) can Edit and use Add a Location. Only Directors (M2) can disable or enable, and see Bulk Add.
Tips
Disable, do not rename, when a room stops being checked. The old scans keep their original name in the reports.
A location with 0 tasks shows as “not ready” on its uCode and gives the worker nothing to answer. Open Edit and add tasks before printing its code.
“No records” in Last check after the code has been on the wall a while usually means the code was never scanned, not that scans were lost. Check the printed sheet.