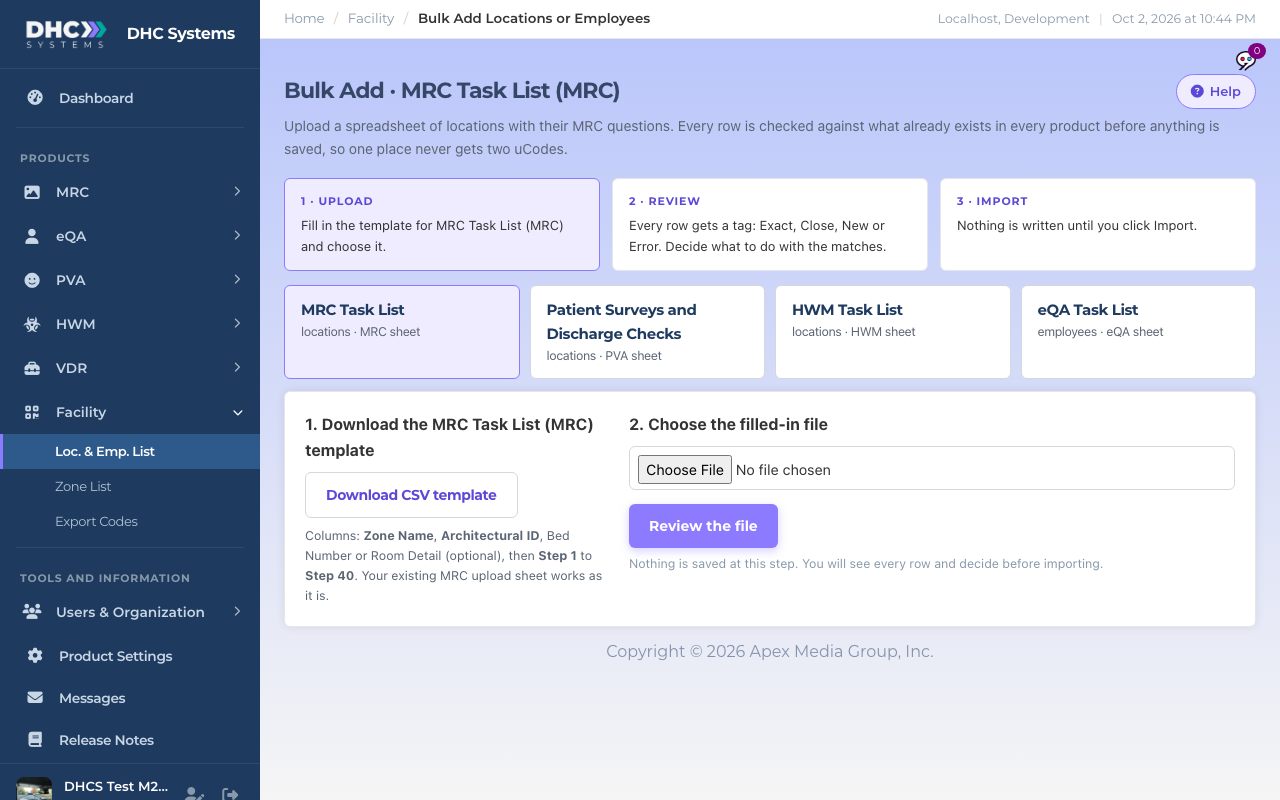
Bulk Add Scans in the MRC sidebar opens the Facility page Bulk Add with the MRC Task List sheet already selected. You download a CSV template, fill in one row per room with its tasks, upload it, review what the page found, and import. The whole three-step flow, including how duplicates are matched and how to keep or replace existing questions, is in the Facility article Bulk Add Locations or Employees from a Spreadsheet. This article covers the MRC sheet only.
Bulk Add with the MRC sheet selected
How to fill in the MRC sheet
Click MRC, then Bulk Add Scans.
Click Download CSV template. The columns are Zone Name, Architectural ID, Bed Number or Room Detail (optional), then Step 1 to Step 40.
One row per room. Put each task in its own Step column, in the order the worker should see them. Leave the rest empty. Your existing MRC upload sheet works as it is.
Click Choose File, pick your filled-in CSV, then Review the file. Nothing is saved at this step.
Work through the review. Each row is tagged Exact, Close, New or Error. Decide what to do with the matches, then click Import.
MRC specifics
Rows with tasks in the sheet keep them. For new rows with empty Step cells, the review page lets you pick an existing room to copy MRC tasks from, or leave them for later. Until tasks are added the uCode says not ready for MRC.
Task names are cut at 30 characters on the phone, so keep them short in the sheet too.
A room that already exists in MRC with no uCode is attached rather than duplicated. Its scan history stays.
Who can do this
Directors (M2) only. M1 accounts add rooms one at a time with Add 1 Scan.
Tips
Spell zone names exactly the same on every row, or you end up with two zones that look alike on Zone Status. The review step matches room names, so check zones yourself before you import.
After importing, open Scans List, filter by the new zone and check the Tasks column. A zero means the Step cells for that row were empty.