A discharge check (DR) is done after the patient has left and the room has been cleaned. You scan the same uCode as for a patient visit, tap Discharge Room, go down the room checklist, record who cleaned the room and who checked it, and tap Submit. The screen still calls it a Discharge Room Assessment.
How to complete a discharge check
Scan the room’s uCode with your phone camera and tap the link.
If the room has more than one product, tap the green Patient Surveys and Discharge Checks button on the Select the activity or product screen.
On Visit Type Selection, tap the pink Discharge Room button. The number under it is how many questions are on the checklist.
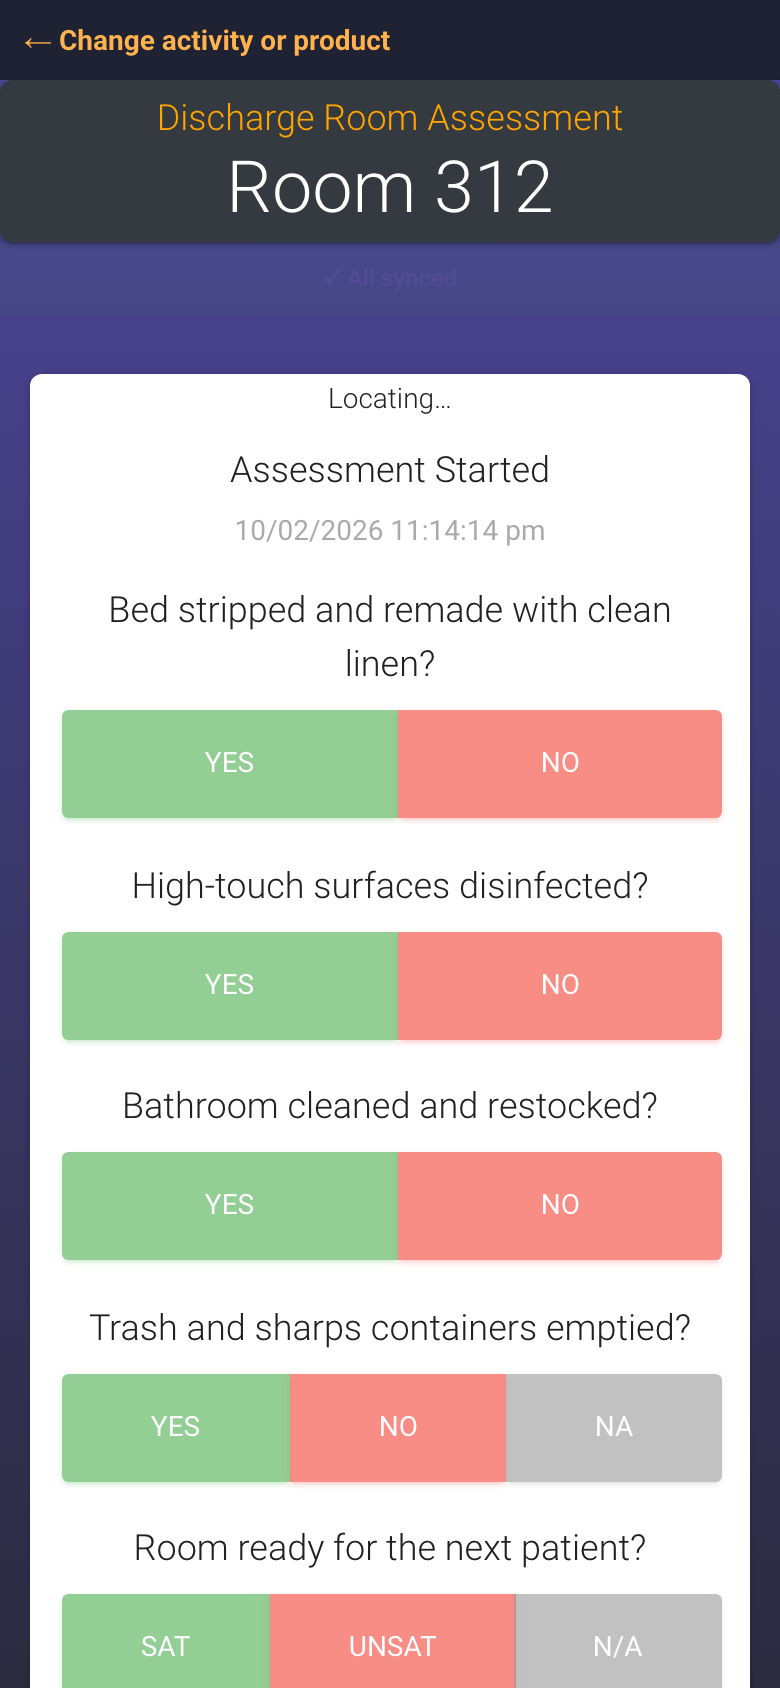
The check opens with Discharge Room Assessment, the room name and the start time. Work down the list. Most items are Yes or No. Some have a third button, NA or N/A, for items that do not apply to this room, and some are rated SAT or UNSAT.
The discharge checklist. Tap one button per item
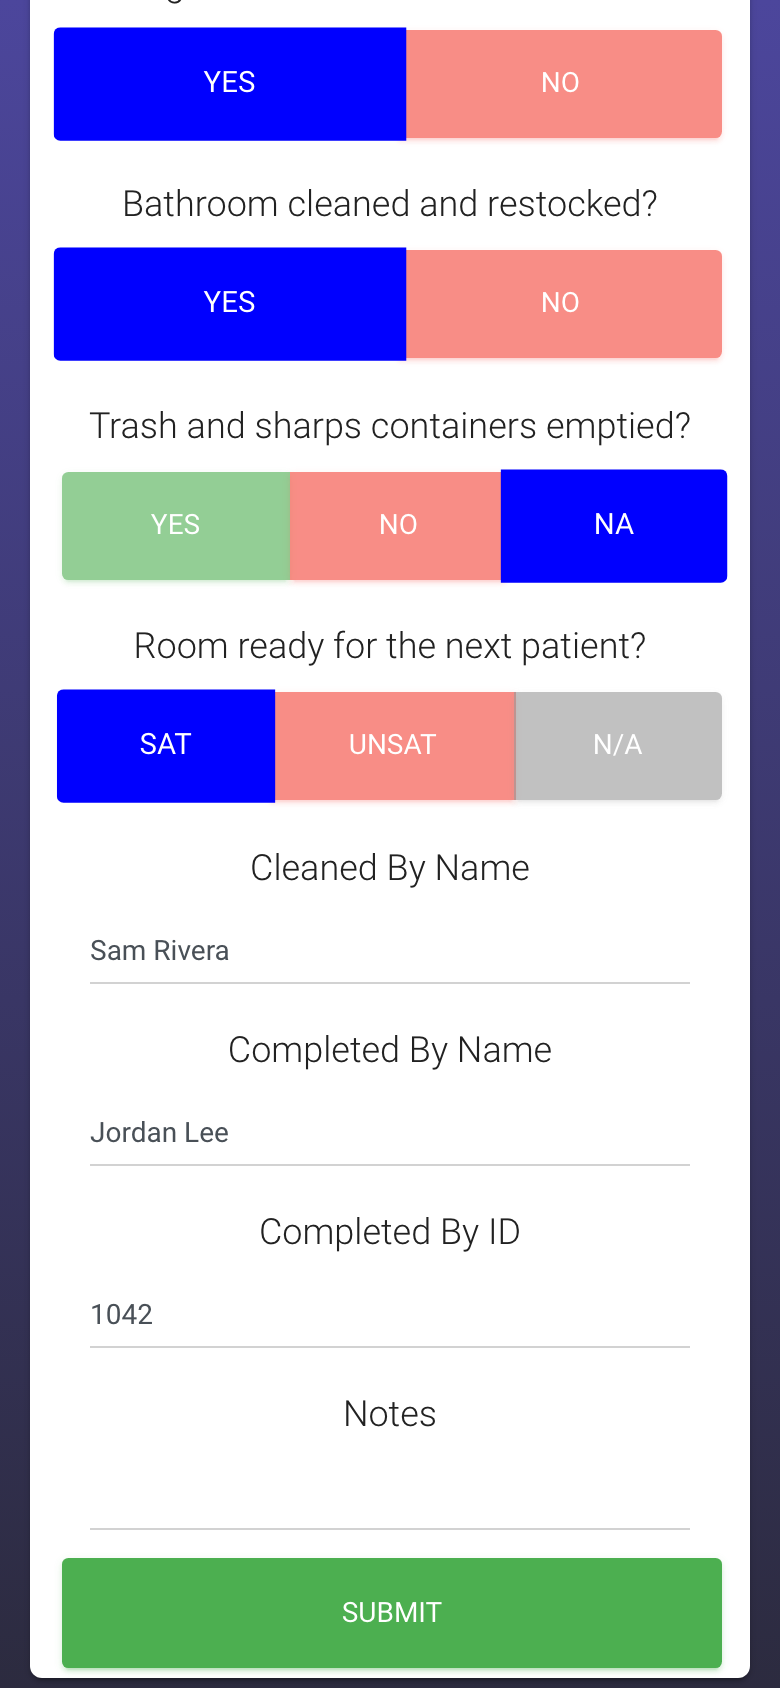
At the bottom, type Cleaned By Name (the person who cleaned the room), then your own Completed By Name and Completed By ID. All three are required. Add anything worth noting in Notes.
Who cleaned it, who checked it, then Submit
Tap Submit. If a required box is empty, a notice says “Please fill in all required fields” and the box gets a red border.
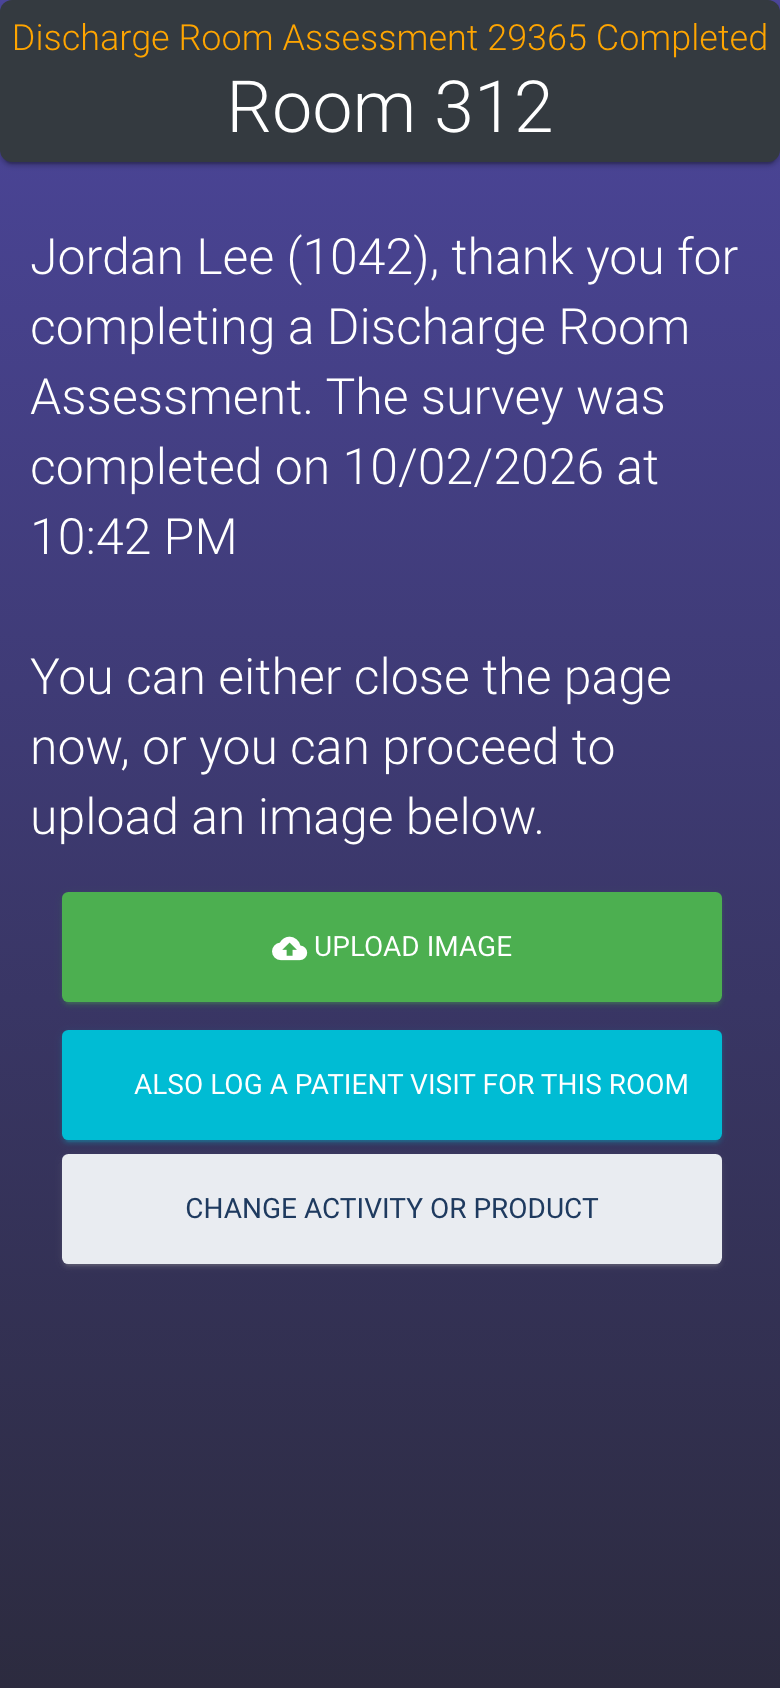
The thank you screen shows the check number, the room, your name and the time. You can close the page.
Done. Add a photo or go straight to another check
Optional: add a photo
Tap Upload Image on the thank you screen, tap Choose File, take or pick a photo, then tap Upload Image and wait for Upload successful!. A photo of the finished room is a good habit for anything you marked No or UNSAT.
Patient visit and discharge on the same scan
The two checks share one uCode and one Visit Type Selection screen. Pick Patient Visit while the patient is there, Discharge Room after they leave. If you finish one and need the other, the thank you screen has Also log a Patient Visit for this room (or Also log a Discharge for this room) so you do not have to scan twice.
Who can do this
Anyone with the uCode in front of them. No login is needed.
Tips
Use NA or N/A honestly. It keeps the room’s Yes ratio accurate in the DR dashboards.
The green All synced badge at the top means your answers have reached the server. If it changes while you are on a weak signal, give it a moment before closing the page.
Only questions from the room’s Scan Template (or its own DR questions) appear. If the list looks wrong, tell a manager which room and which question.