A facility is a site a vendor services: a clinic, a pharmacy, a warehouse, a campus building. Each facility belongs to one vendor and appears in that vendor’s facility list on the technician’s phone form. You manage them on the Facilities page. Open it from the sidebar (VDR, then Facilities) or click a vendor’s card on the Vendors page to see just that vendor’s sites.
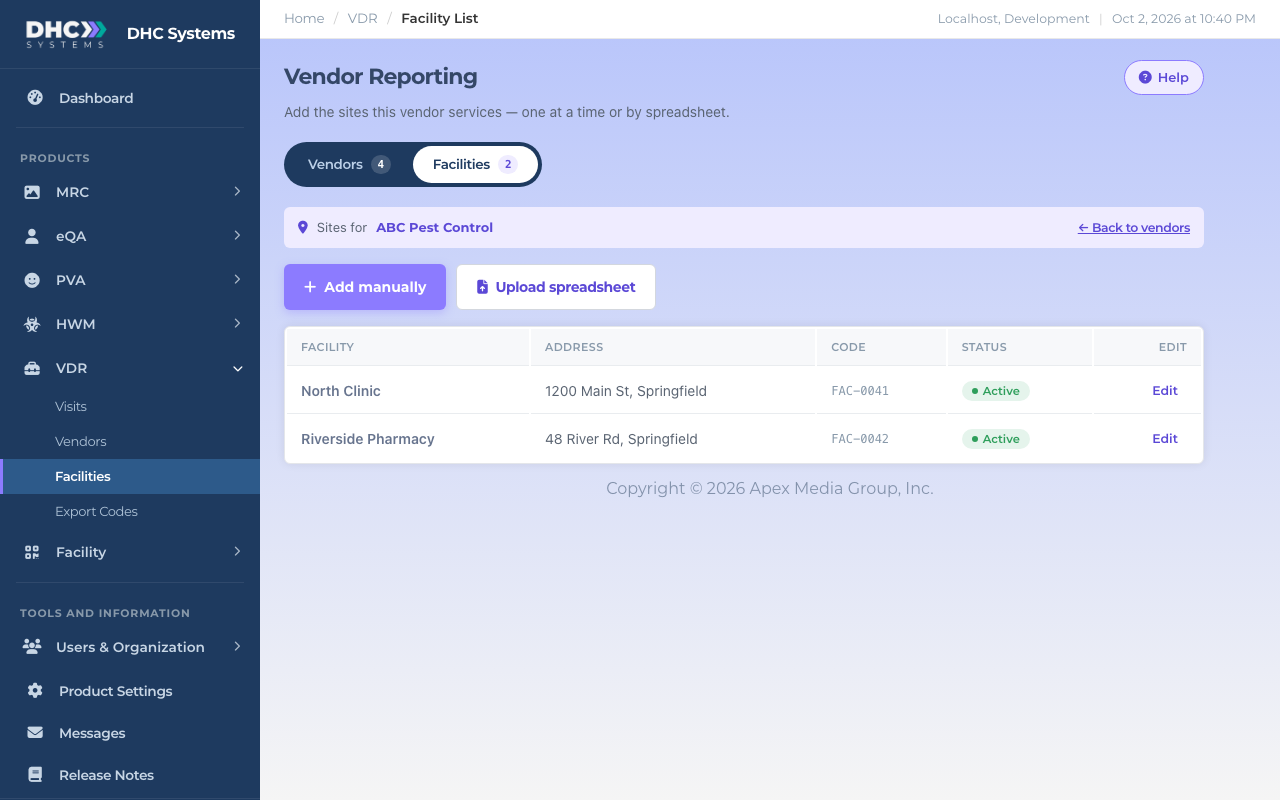
A vendor’s sites. The banner says which vendor you are in.
Two views
One vendor: click a vendor card on the Vendors page. The banner reads “Sites for” that vendor, and anything you add here belongs to it. This is the view to use when adding sites.
All facilities: click Facilities in the sidebar or the Facilities switch at the top. You see every site across all vendors with a Vendor column. Adding from here asks you to choose the vendor first.
How to add a facility
Open the vendor (click its card on the Vendors page).
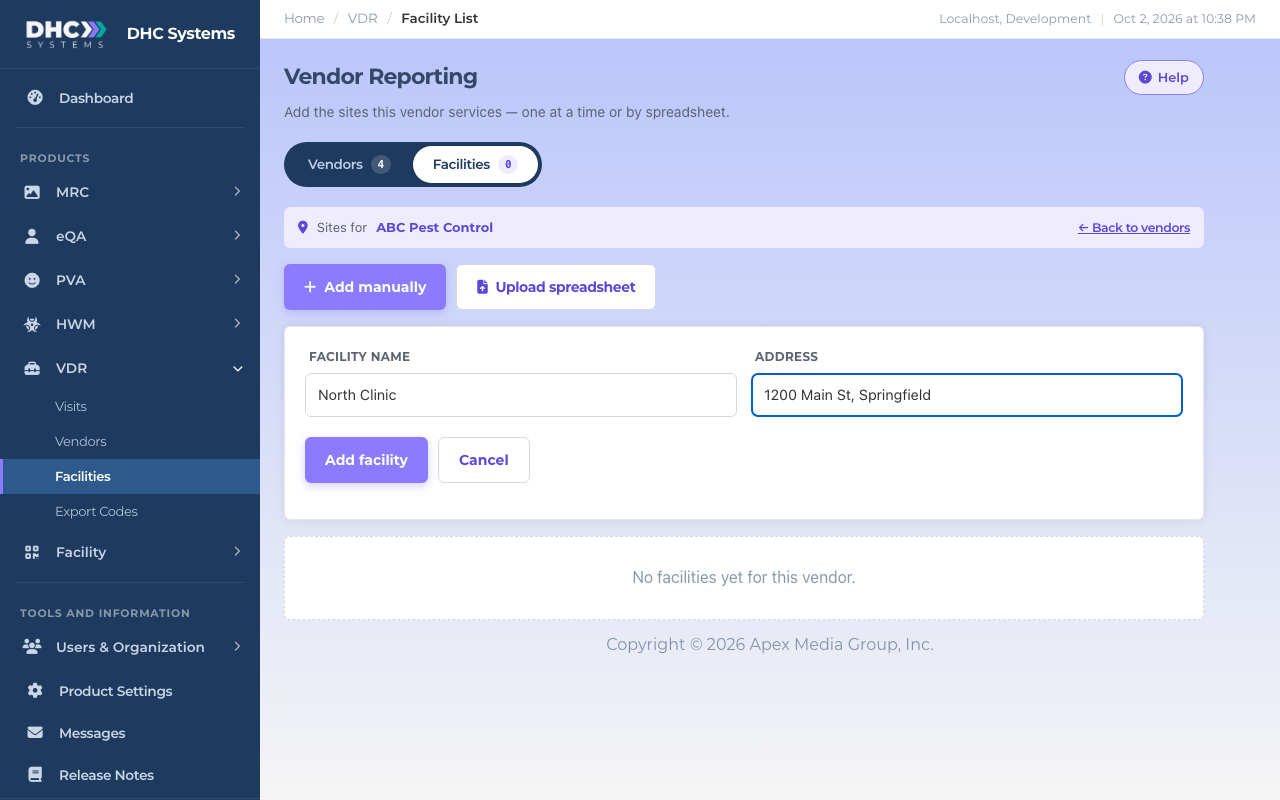
Click Add manually. A small form opens on the page.
Type the Facility name (required) and the Address (optional, but it prints under the QR code and helps the technician pick the right site).
The in-page form for one site.
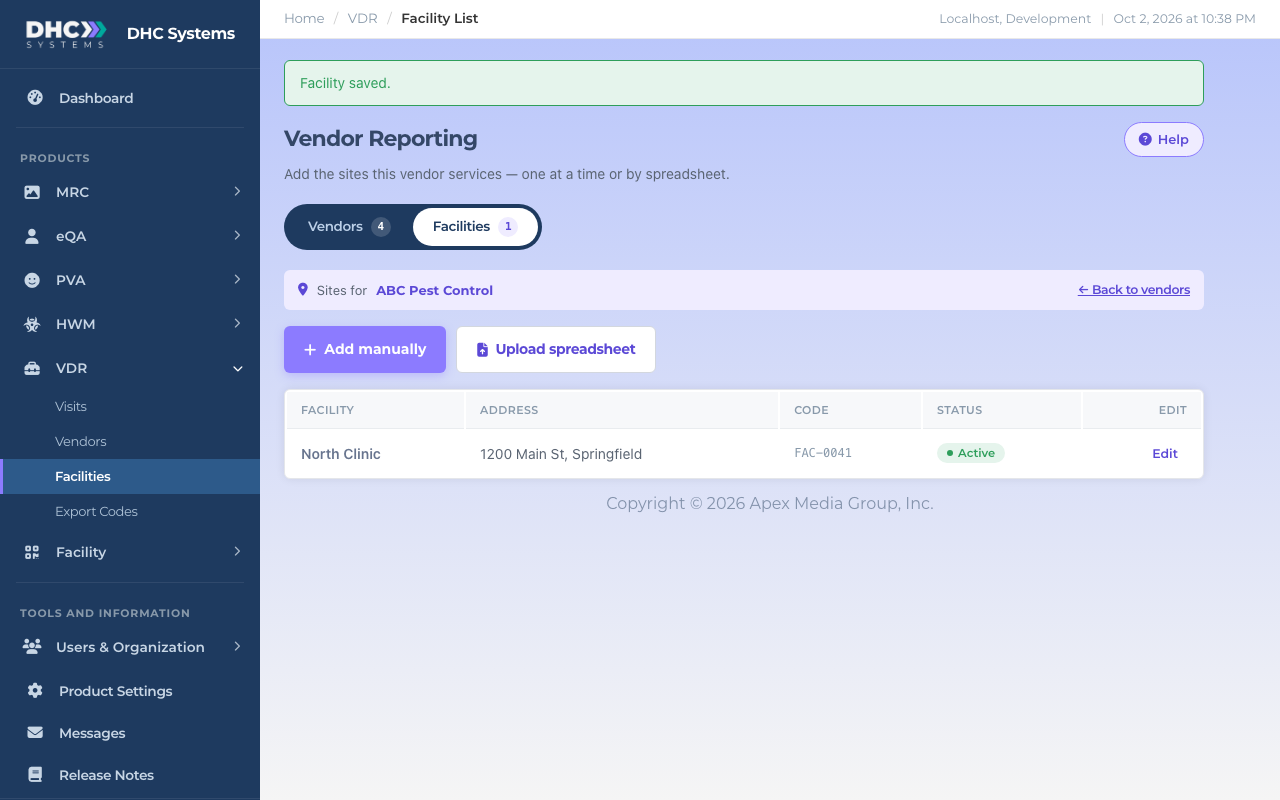
Click Add facility. The page reloads with a “Facility saved.” message and the new row.
Saved. New sites start Active.
If you are in the all facilities view, the form also has a Vendor dropdown. Pick the vendor before you click Add facility.
How to upload a spreadsheet of facilities
Good for a vendor that services many sites. The file must be a CSV.
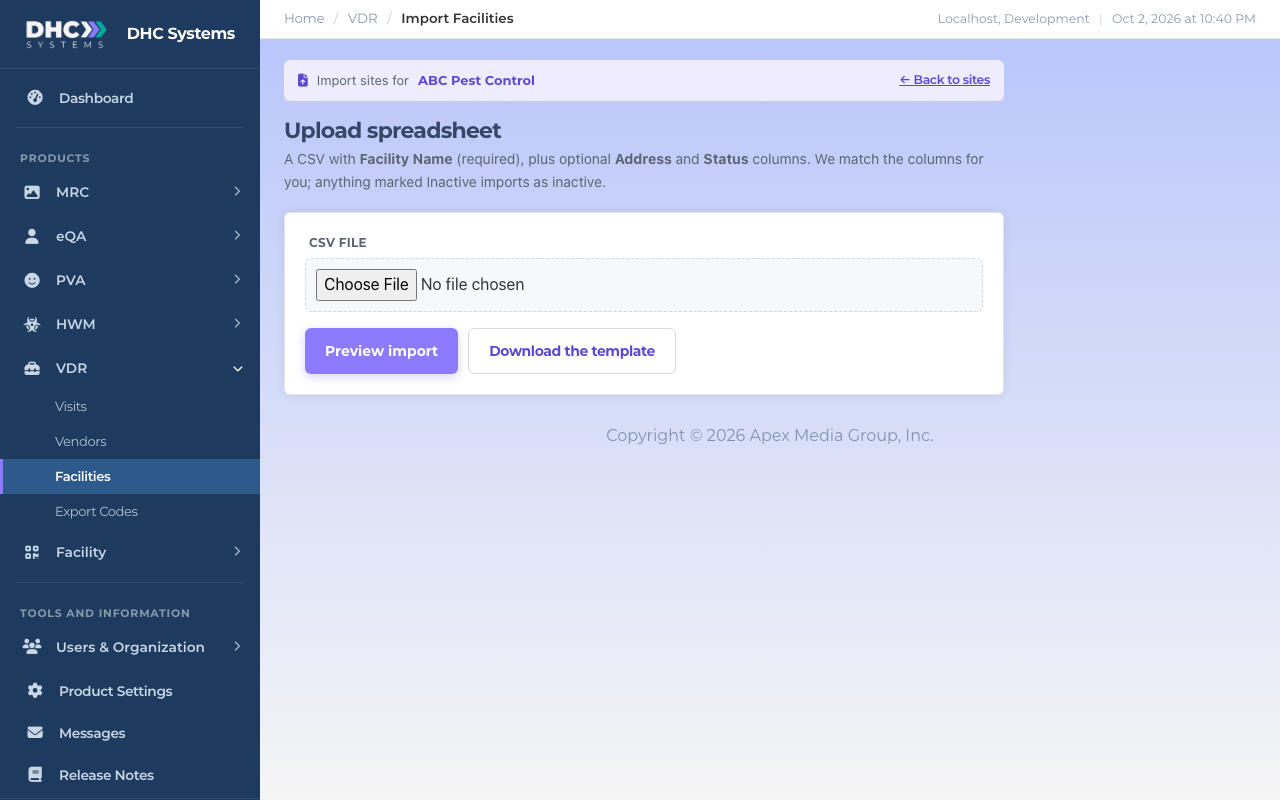
Open the vendor, then click Upload spreadsheet.
Click Download the template if you want a starting file. It has three columns: Facility Name, Address, Status. Only Facility Name is required. The example rows in the template are marked Inactive on purpose, so replace them with your own.
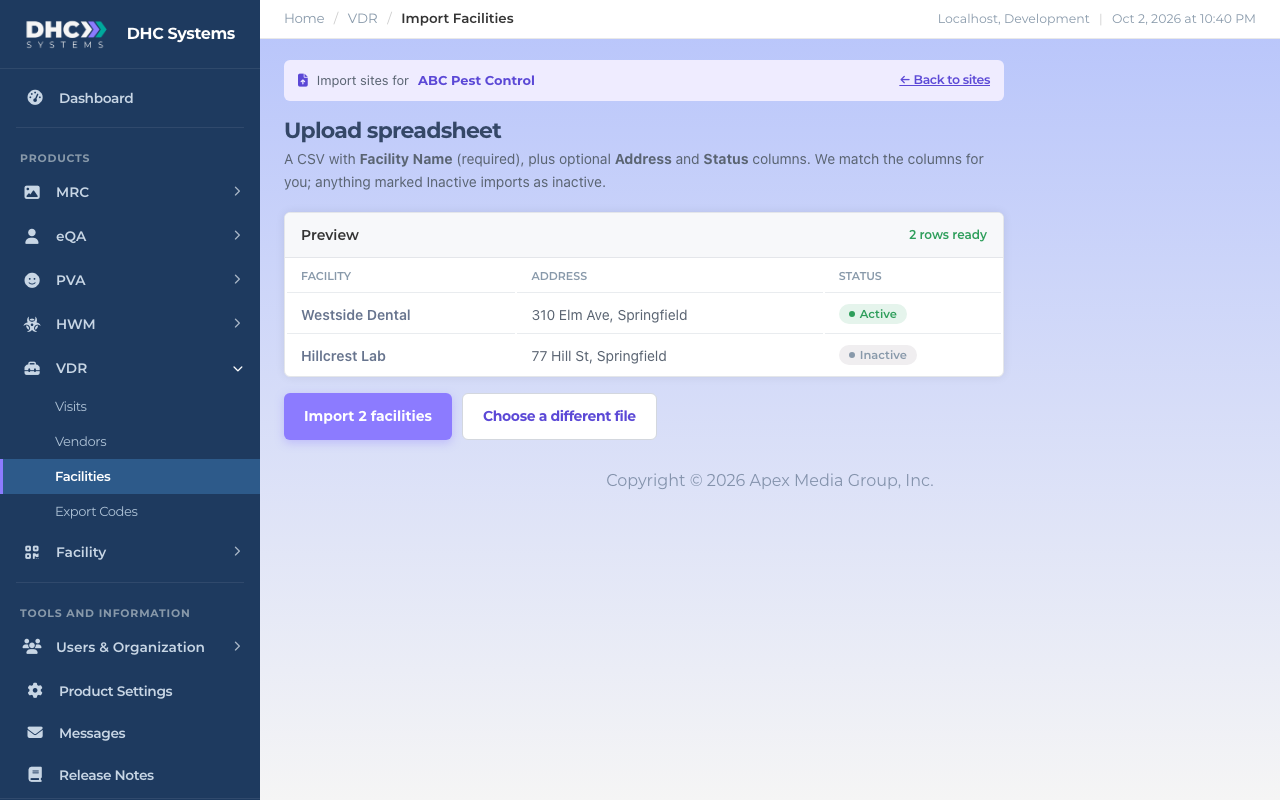
Pick your CSV, then preview before anything is saved.
Choose your CSV file and click Preview import. Nothing is saved yet. You see every row that will be added, with its status.
The preview. Check names and addresses here.
If it looks right, click Import N facilities. If not, click Choose a different file.
Back on the facilities list you get a “N facilities imported.” message.
Column matching is forgiving: a column called Name, Location or Site works as the facility name, Street works as the address, and a separate City column is joined onto the address. In the Status column, “Inactive”, “Disabled”, “No” or “0” imports as Inactive; anything else (or blank) is Active.
How to edit a facility
Find the row and click Edit at the right.
The row turns into fields. Change the Facility name or Address. In the all facilities view you can also change the Vendor, which is how you fix a site added under the wrong vendor.
Click Save. Or Cancel to put the row back as it was.
Rows edit in place.
How to set a facility Active or Inactive
Click the status pill on the row (it reads Active or Inactive). It flips straight away. Inactive sites disappear from the technician’s facility list and from the printed codes, but their past visits stay on the Visits page. There is no delete; Inactive is how you retire a site.
Click the pill to flip it. Directors (M2) only.
What the columns mean
Facility: the site name the technician sees.
Vendor (all facilities view only): which vendor services it.
Address: optional. Printed under the facility QR code.
Code: the site’s reference, like FAC-0041. Handy when talking to support.
Status: Active or Inactive.
Who can do this
Everyone can view the list. M1 accounts and Directors (M2) can Edit a row (name, address, vendor). Only a Director (M2) can Add manually, Upload spreadsheet, or click the status pill. For an IC or M1 the pill is just a label.
Tips
Add the vendor first. If there are no vendors yet the page says “Add a vendor first, then add its sites.”
Give every site an address, even a short one. It prints under the facility QR code, so whoever posts the codes knows which one goes where.
Technicians only see the facility name in their dropdown, so make names distinct (“North Clinic”, “Riverside Pharmacy”) rather than “Clinic 1”, “Clinic 2”.
After adding sites, go to Export Codes and print the new facility codes.