There are times when you will need to edit a users account. Everything from updating the spelling of a name, adding in their correct Employee Number, or changing the users Role, can be done through the “User Management” section.
To access this feature, the user will need to have the Role of “Super Admin”. Once this Role has been assigned to the uses account they will see “User Management” available in their navigation. ![]()
Role Types
There are three types of Roles within DHC Systems. Each has a graduating level of access and permissions. By default users are given the role of “Standard”. To gain higher levels of access, they will contact their locations “Super Admin”.
- Standard User: This is the default level of access for a new user. They have access to reporting, but nothing else.
- Admin User: This level of user is able to access the same reporting as the “Standard User” but also has the ability to manage QR/barcodes in the system. Management of QR/barcodes would include creating, editing, deleting, exporting, etc.
- Super Admin User: This level of access allows the user to do everything the “Standard User” and “Admin User” can do, plus the ability to modify user accounts. In order to gain this level of access, the user must work with their management team. It may be necessary to reach out to DHC Systems Support at gmgllc@outlook.com to have this Role applied to an account.
- Other Users: When an account is first added to the system, or if an account was modified incorrectly, the Role may be missing or erroneous. In those cases, the users account will fall under “Other Users” and their reporting may fail.
Information Cards
The four cards along the top of the User Management page display the number of users by Role. See “Role Types”, and the card footers, for a brief description of the Role functions.

Users List
The main table of information on the page displays basic information for each account, allows for sorting, searching, and modification of the accounts listed.
Searching
Click in the “Search records”, ![]() , box and start typing to quickly filter the “User List”. The table should start narrowing the results as you type.
, box and start typing to quickly filter the “User List”. The table should start narrowing the results as you type.
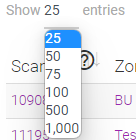
You can also change the number of results shown on the page, or from the search results, by updating the “Show ## entries” selection. Simply click to expand and select the number of records to display on the page.
Column Headers
The headers, or titles, at the top of each column of the “Users List” table can be sorted ascending or descending. Click the header text to toggle the sorting back and forth.
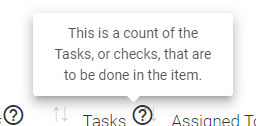
Additionally, the information icon, ![]() , next to the text provides additional information about the contents of that column, and the information in it. Hover over the information icon to display the tooltip.
, next to the text provides additional information about the contents of that column, and the information in it. Hover over the information icon to display the tooltip.
Columns are as follows:
- Emp ID: The users Employee ID as supplied by the employer. Can be used for locating an employee in the system and assigning work.
- Name: The full name of the user. Used for locating the user in the system.
- Email: The email address of the user. This is used when resetting passwords and for occasional communications.
- Role: The role assigned to the user determines their level of access and what activities they can perform in the system.
- Last Login: The last time the user logged into the system. Generally used for management to verify they are using the system.
- Edit: Clicking this will open a form that allows for modification of the user account.
- Quick Apply: Using the Quick Apply button will immediately assign the role indicated on the button to the user noted in the row. Clicking the Disable button will remove access for that user and remove them from the list.
Quick Apply
The fastest way to update a users Role is by using the “Quick Apply” buttons. Simply locate the user that needs their Role, or permissions, updated and click the button corresponding with the Role you would like assigned to the user. The next time the user logs in, their new access will be available.
NOTE: Clicking the “Disable” button will result in the user no longer having access to the system. This change is reversible but will require that you reach out to DHC Systems Support for assistance.

For example, if the user “Corie Masters” is currently able to do reporting but you would like them to be able to load new barcodes. You would find them in the “Users List” and simply click the “Admin” button. You should now see them noted as having “admin” in the “Role” column.
If the user is signed in at the time the changes are made, they will need to sign out, and then back in, to see the changes.
Editing a User
There are times that the user misspelled their email address (which is used for password resets), or their Employee ID is incorrect, or, for whatever reason, the “Quicky Apply” option won’t work for your scenario. For that you will want to click the “Edit” button for the users account needing modification.
Once the form opens, you can make changes to various aspects of the users account, including changing their “Role”.
Once the changes are complete, clicking the “Update User” button will apply the changes to the users account.
Similar to “Quick Apply”, the user may need to log out, then back in, to see the changes in the system.