Welcome to the Patient Visit Assessment (PVA) Product within DHC Systems.
In this document you will find all the information you need to sign up, sign in, navigate, and use PVA.
- finding help/instructions
- terminology
- navigating
- dashboards (coming soon)
- reporting (coming soon)
- data out of date
- location types
- list types
- add 1 type
- adding locations
- add 1 location
- bulk add locations
- type list method
- printing qr codes/barcodes
- scanning qr codes/barcodes
Help and Support
We try to make finding help and support within DHC Systems simple, straightforward, and accessible.
Within the system, keep an eye out for the following icons, buttons, and calls-to-action:
Page Help buttons will open information about the page that you are on, next steps, common terminology, and other information relevant to actions that can be performed from the page you are on. In some cases there will be a link to more detailed instructions that can be printed or opened in another window.

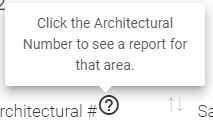
Question (?) mark icons will provide a brief description of what is in the tile, column, or other object within the user interface.


Get Started with <product name here> will open an instruction window and/or a window that allows you to open the detailed instructions in another window.

You can also find instructions on the main site at DHCSystems.com .
We are also always monitoring email at gmgllc@outlook.com for high priority issues, escalations, or general questions.
Service Level Agreement (SLA):
- High priority issues, such as scan failures, upload failures, and outages: 1 hour
- Medium priority requests and system troubleshooting: 4 hours
- Low priority, general questions, information requests, and other non-critical issues: 24 hours
We are also available via the phone number at the top of the page for immediate requests and questions.
Terminology for PVA
Patient Visit Assessments, known as PVA, is real-time assessments of Patient Visit Assessments and Discharge Room Assessments from around the facility.
See a history of a room, or location, in the facility to see how it has fared over time. See an image of the last time an Assessment was completed. Monitor for Assessments for rooms, locations, or areas of the facility that have lower scores to spot areas for improvement.
PVA is a great way to keep a pulse on the experience of the patient. With images and timestamps, it offers a great paper trail.
PVA Specific Terminology
- Assessment: An "Assessment" is what is loaded after the QR Code is scanned. The Assessment offers two paths. One path is the "Patient Visit" and the other is "Discharge Room", see below for definitions.
- Patient Visit: A "Patient Visit" refers to the Assessment conducted with the Patient directly. The staff member will scan the QR Code and select "Patient Visit" to be presented with a list of questions related to their visit.
- Discharge Room: The "Discharge Room" Assessment is conducted after the Patient has checked out. After the Patient has departed the room, the staff member will scan the QR Code, choose "Discharge Room" and be presented with a list of questions to assess the state of the room.
- Location or Location Name: The "Location Name" should be clear, concise, and easy to identify where the Assessment, or Survey, is being conducted. For example, "Patient Room 101" or "Maternity Room 101". The Name will appear on Patient Visit and Room Discharge forms and help when doing analysis in reporting.
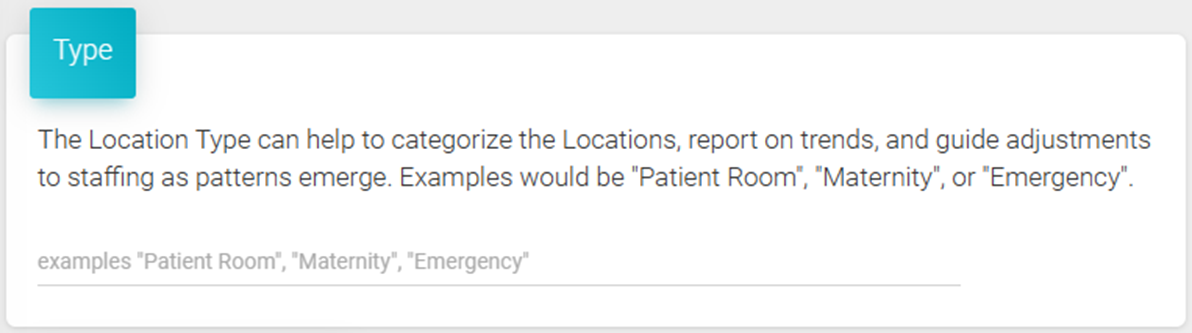
- Type or Location Type: The "Location Type" is used to build a standard set of questions for particular type of Location, or area, of the facility. The Type is used during the "Bulk Add Locations" process. It can also help to categorize the Locations, report on trends, and guide adjustments to staffing as patterns emerge. Examples would be "Patient Room", "Maternity", or "Emergency".
- Bulk Add Locations: After a "Type" is added to the system it is possible to quickly load hundreds of Locations with a single spreadsheet. This is the "Bulk Add Locations" process and can dramatically increase the speed at which Locations are made available for QR Codes.
- Export Locations: Once Locations are added to the system it will be necessary to print the QR Codes. This is done through the "Export Locations" process.
Navigation - PVA
The navigation bar will appear on the left side when on a PC or Mac, and on the right side when on a mobile device.
On mobile, you may see a hamburger menu to expand the navigation: 

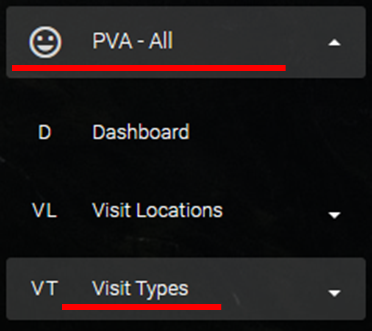
When first loaded, the menu will be collapsed. Here we are looking at the PVA - All section
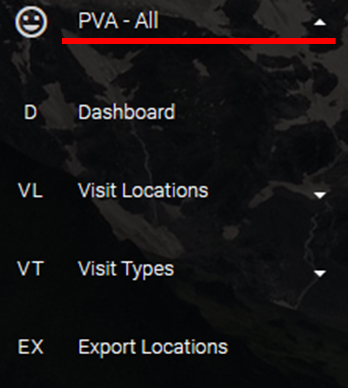
Clicking the triangle will expand the menu to reveal the sections available to you.
- Dashboard - High-level view of activities and status of Patient View and Discharge Room Assessments.
- Visit Locations - A collapsed menu that, when expanded, will display the options for Locations
- Visit Types - A collapsed menu that, when expanded, will display the options for Location Types
- Export Locations - Open a page that displays the QR Codes/barcodes available to print, stick, and scan.

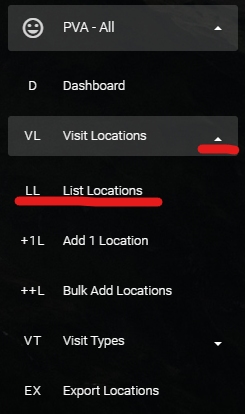
Clicking the triangle to expand the "Visit Locations" menu will reveal additional sections.
- List Locations - Displays all the Locations available in the system with some detail.
- Add 1 Location - Access the form to add 1 new Location to the system.
- Bulk Add Locations - Add multiple Locations into the system with a single upload
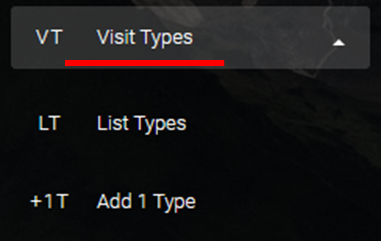
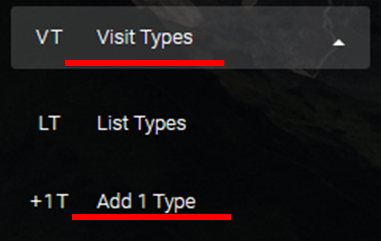
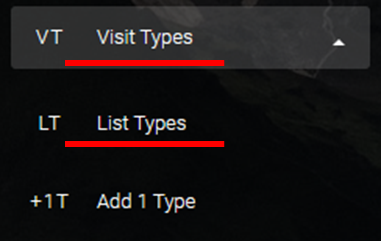
Clicking the triangle to expand the "Visit Types" menu will reveal additional sections.
- List Types - Displays all the Location Types available in the system with some detail.
- Add 1 Type - Access the form to add 1 new Location Type to the system.
PVA Location List Page
The Location List in PVA is a good source of information and the entry point for editing Location information within PVA.
A Location should be identifiable and descriptive enough to determine where the Patient Visit or Discharge Room assessment is being conducted. From this page you can Edit a Location, Delete an Location, and view some high-level information about the location.
Below we will deep dive into the various features and functionality possible from the Location List page.
You can access this page from the navigation bar by expanding the "PVA - All" menu, then expand "Visit Locations" and click "List Locations".

The PVA "Location List" is a list of all the active "Locations" that have been loaded into the Patient Visit Assessment (PVA) system.
The fields available are:
- ID - When a new Location is created within the system it is given a unique number. That is what the id refers to.
- Location Name - The name of the Location where the Assessment will be conducted
- PV Q's - The number of Patient Visit questions that are associated with the Location
- DR Q's - The number of Discharge Room questions that are associated with the Location
- Timestamp - The last time that an Assessment was conducted in the Location
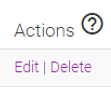
- Actions - Click 'Edit' to change the change the name, modify questions, or add notes for the Location. Click 'Delete' to remove the Location from the list.
General Usage
Below is how you should use this page. Use the numbers from the bullets to correspond to the numbers on the image below.
- This is the unique number give to the Location when it was added to the system. This number is just used to identify the item in the system.
- The Location Name is entered by the user when they add the Location to the system. The name can be anything you want, however, it should help identify where the assessment is being conducted.
- The number of questions that are associated with the Patient Visit (PV) for the Location listed.
- The number of questions that are associated with the Discharge Room (DR) for the Location listed.
- "No Records" indicates that no Assessments have been conducted for the Location. Once an Assessment has been completed, the most recent date and time will appear in the Timestamp column.
- In the "Actions" column, clicking "Edit" will allow the user to make changes to the PV or DR questions, update the name of the Location, or add notes to appear when the Assessment is accessed.
- In the "Actions" column, clicking "Delete" will disable the Location and remove it from the list. The Location can be recovered by clicking "Show Deleted" below the "Location List" card label
- Use "Search" to quickly find a Location of interest. The search feature will narrow the results that include the word, term, or partial term entered in the search box.
- Clicking "Show Deleted" will display the Locations that have been disabled. From the deleted list a Location can be recovered.
- Clicking "Show Available" from the disabled page will return the user to the page that displays all the active and available Locations.
- From the list of disabled Locations, clicking the "Undelete" option will reactivate the Location and make it reappear in the available Locations.

PVA Location List Tips and Tricks
- Clicking the arrows at the top of any column will sort the column:

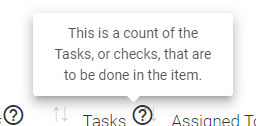
- Hover your mouse over the question mark icon,
 , for tooltip pop-ups:
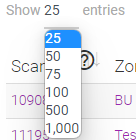
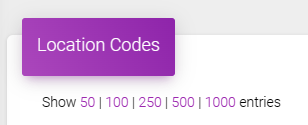
- Use the "Show ## entries" drop down menu to show more or less entries:
- Use "Search" to find records faster:

Data Out of Date?
There are times that you upload a spreadsheet, have conducted some scans, or otherwise had some activity that you feel should be visible in the system.
This could be a report that seems to be delayed, a scan list that is missing the records you just added, or an Export that doesn't have all the barcodes, or QR codes, available.
This generally occurs because of a feature in browsers called caching. In this process the site, or page, is temporarily stored in the memory of the browser. The result can be that you are seeing the page stored in your browsers cache rather than the live page.
There are number of ways to refresh the page:
- The simplest way to help is by clicking the "Reload Content" button that is available on each page, for exactly this purpose.

- The other option is to click the "Refresh" button in your browser.

- You can also press the "F5" key on your keyboard while on the page you would like to refresh.
- For really tough ones, you can hold the "ctrl", or control, key on your keyboard then press "F5".
- Then try logging out and back in.
If all else fails, contact us for assistance. We wouldn't want you to manually clear your browser cache and history unnecessarily.
PVA Visit Types List Page
The Visit Types List in PVA is where you will find the types of visits available in the system.
A Visit Type is a standard set of questions associated with a Location, or a category of visit, that the questions will be used to assess.
The Location Type can help to categorize the Locations, report on trends, and guide adjustments to staffing as patterns emerge. Examples would be "Patient Room", "Maternity", or "Emergency".
Below we will deep dive into the various features and what the Visit Type would be used for.
You can access this page from the navigation bar by expanding the "PVA - All" menu, then expand "Visit Types" and click "List Types".

The PVA "Location Types" is a list of all the active "Types" that have been loaded into the Patient Visit Assessment (PVA) system.
The fields available are:
- ID - When a new Type is created within the system it is given a unique number. That is what the id refers to.
- Type - The name of the Type of Assessment that will be conducted
- PV Q's - The number of Patient Visit questions that are associated with the Type
- DR Q's - The number of Discharge Room questions that are associated with the Type
- Default - If the Type is set as the Default, used in the Bulk Add Locations process, it will have a check mark visible
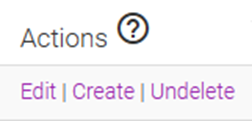
- Actions - Click 'Edit' to change the change the type name, modify questions, or add notes for the Type. "Create" will open a new form to create a new Location, with the questions pre-filled. Click 'Delete' to remove the Location from the list.
General Usage
Below is how you should use this page. Use the numbers from the bullets to correspond to the numbers on the image below.
- This is the unique number give to the Type when it was added to the system. This number is just used to identify the item in the system.
- The Type Name is entered by the user when they add the Type to the system. The name can be anything you want, however, it should help identify the type of assessment to help in the Bulk Upload process.
- The number of questions that are associated with the Patient Visit (PV) for the Type listed.
- The number of questions that are associated with the Discharge Room (DR) for the Type listed.
- The default Type is noted in this column. When using the "Bulk Add Locations" process, the default noted here will fill in the questions.
- In the "Actions" column, clicking "Edit" will allow the user to make changes to the PV or DR questions, update the Type Name, or add notes to appear when the Type is used.
- In the "Actions" column, clicking "Delete" will disable the Type and remove it from the list. The Type can be recovered by clicking "Show Deleted" below the "Type List" card label
- Use "Search" to quickly find a Type. The search feature will narrow the results that include the word, term, or partial term entered in the search box.
- Clicking "Show Deleted" will display the Type that have been disabled. From the deleted list a Type can be recovered.
- Clicking "Show Available" from the disabled page will return the user to the page that displays all the active and available Types.
- From the list of disabled Types, clicking the "Undelete" option will reactivate the Type and make it reappear in the available Types.

PVA Type List Tips and Tricks
- Clicking the arrows at the top of any column will sort the column:
- Hover your mouse over the question mark icon, , for tooltip pop-ups:
- Use the "Show ## entries" drop down menu to show more or less entries:
- Use "Search" to find records faster:
Adding Types in PVA
Before you can use the "Bulk Add Locations" or "Create" a new Location using a standard set of questions, you must add a new Visit Type to the system. The Visit Type is a set of questions that will autofill when using the "Bulk Add Locations" process or when using the "Type List" to "Create" a new Location. Both processes fill in the questions automatically.
Add 1 Type
- You must first be signed into the system
- Expand the "PVA - All" menu
- Click "Visit Types" then "Add 1 Type"
- Enter a "Type Name" to help categorize the Locations, report on trends, and guide adjustments to staffing as patterns emerge.
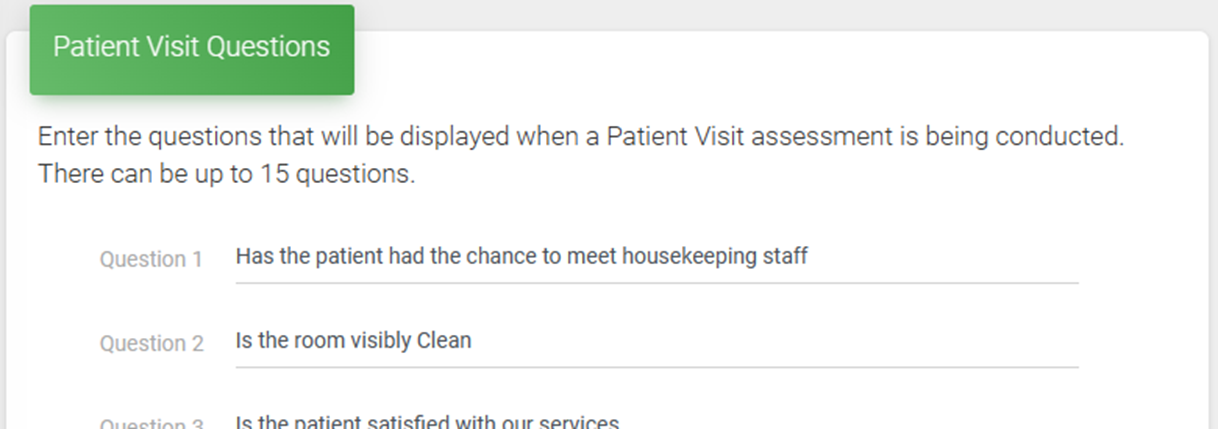
- Enter up to 15 Patient Visitor Questions
- HINT: Use the "Show More Questions" button to display more entry boxes

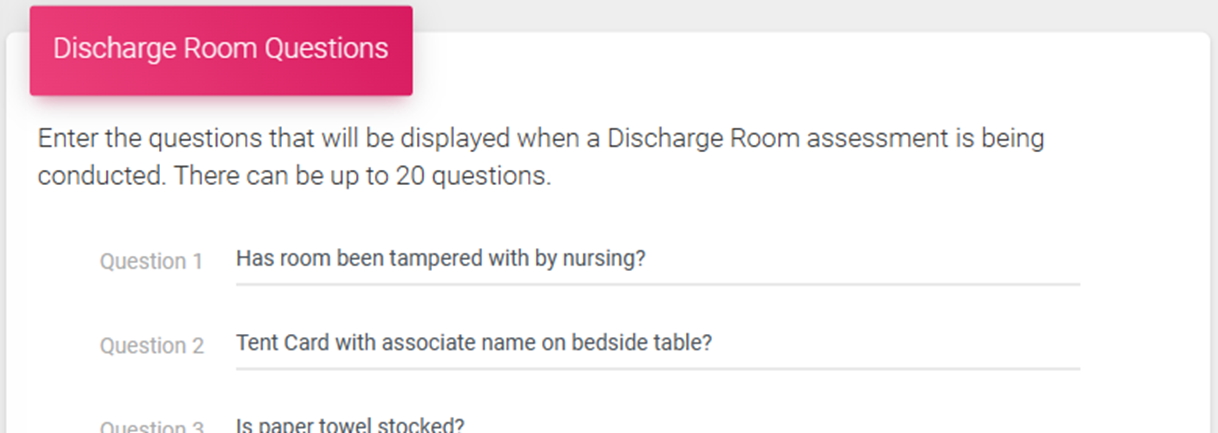
- Enter up to 20 Discharge Room Questions
- HINT: Use the "Show More Questions" button to display more entry boxes

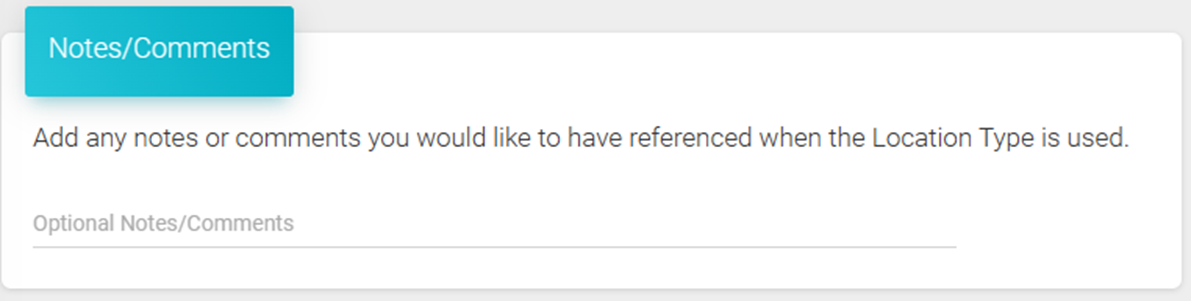
- Optionally, you can add any Notes or Comments that you would like to display when the Type is used to create Locations
- Click the "Create Type" button to add it to the system
- Once the Type has been added, it is available to create new Locations using the "Bulk Add Locations" or "Create" processes

Editing a Type in PVA
After a Type has been added to be used as part of the Location Creation process in Patient Visit Assessment (PVA) it may be necessary to make changes to the questions, spelling, name, add a note, or change the default status.
This is the process for editing the Type Name, editing, removing, or adding associated Patient Visit (PV) Questions, Discharge Room (DR) Questions, adding optional notes or comments, and changing the default.
This process does not change the questions of existing Locations but will apply to new Locations added using this Type.
- You must first be signed into the system
- Expand the "PVA - All" menu
- Click "Visit Types" then "List Types"
- Click "Edit" in the "Actions" column for the Type you want to edit
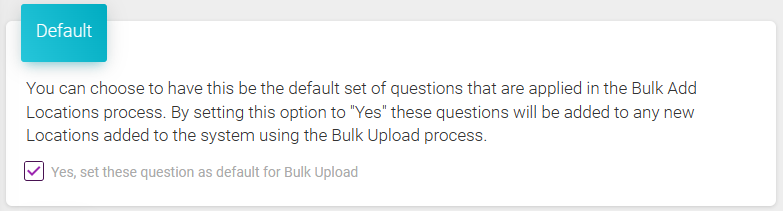
- The check box in the "Default" section should be marked if the questions should be applied in "Bulk Add Locations" process, or unchecked if they should not
- NOTE: If more than one Type is showing as default in the Type List, it may be necessary to Edit and uncheck one of the Types
- If the box is checked, the questions will be automatically applied during the "Bulk Add Locations" process
- If the box is unchecked, the questions will not apply to the "Bulk Add Locations" but can be used to autofill single add Locations
- Review the Type “Name” for any changes needed, edit where applicable
- Review, edit, or remove questions from the "Patient Visit Questions" as needed
- Review, edit, or remove questions from the "Discharge Room Questions" as needed
- Optionally, add or update any "Notes/Comments" that should appear on the Assessment form
- Click "Update Type" to save the changes
- Complete. The Type is now available to "Create" a new Location, or in the "Bulk Add Locations" process to autofill the questions


Adding Locations in PVA
Before you can start conducting Patient Visit or Discharge Room Assessment or reporting on anything, you have to get some Locations into the system.
There are three ways to add Locations. You can add them one at a time, you can use the Visit Type List, or you can load 200 Locations in one fell swoop using the Bulk Add Locations process.
We will cover the "Add 1 Location" and "Bulk Add Locations" first, followed by using the Visit Type List towards the bottom of the page.
From the navigation bar, expand the menu, then click "Add 1 Location" to create one Location at a time, or click the "Bulk Add Locations" to load several at once.
Add 1 Location
- You must first be signed into the system
- Expand the "PVA - All" menu
- Click "Visit Locations" then "Add 1 Location"
- Enter a "Name" for the location
- Enter up to 15 Patient Visitor Questions
- HINT: Use the "Show More Questions" button to display more entry boxes
- Enter up to 20 Discharge Room Questions
- HINT: Use the "Show More Questions" button to display more entry boxes
- Optionally, you can add any Notes or Comments that you would like to display at the bottom of the Assessment
- Click the "Create Location" button to add it to the system
- Once the Location has been added, it is available to print the "Export Locations"


Bulk Add Locations
- You must first be signed into the system
- Expand the "PVA - All" menu
- Click "Visit Types" then "List Types" to check the "Default"
- The "Bulk Add Locations" process uses the default "Type" to assign the Questions, see the process for working with "Visit Types"
- Once you are sure that the correct "Type" is set as the default, click "Visit Locations" then "Bulk Add Locations"
- Follow the on-page steps to first download a fresh template
- Edit the template and save your changes, following the guidance in the "Editing Guidelines"
- Location or Area Name = The Location Name should be clear, concise, and easy to identify where the Assessment, or Survey, is being conducted. For example, "Patient Room 101" or "Maternity Room 101". The Name will appear on Patient Visit and Room Discharge forms and help when doing analysis in reporting.
- Notes (Optional) = Any notes that should appear when the QR Code is scanned. This is optional.

- Use the "Choose File" button to select the file you just edited and saved
- Click "Upload"
- Once the upload is complete the new Locations, with the default questions applied, are available to print the "Export Locations"


Type List Method
- You must first be signed into the system
- Expand the "PVA - All" menu
- Click "Visit Types" then "List Types"
- Click "Create" in the "Actions" column on the row of the applicable Location Type
- Enter a "Name" for the location
- The "Patient Visit Questions" will be filled in automatically based on the selected Location Type, edit as needed
- The "Discharge Room Questions" will be filled in automatically based on the selected Location Type, edit as needed
- Optionally, you can add any Notes or Comments that you would like to display at the bottom of the Assessment
- Click the "Create Location" button to add it to the system
- Once the Location has been added, it is available to print the "Export Locations"
Editing a Location in PVA
After a Location has been added for a Patient Visit Assessment it may be necessary to make changes to the questions, spelling, name or just add a note.
This is the process for editing the Location Name, editing, removing, or adding associated Patient Visit (PV) Questions, Discharge Room (DR) Questions, or optional notes or comments.
- You must first be signed into the system
- Expand the "PVA - All" menu
- Click "Visit Locations" then "List Locations"
- Click "Edit" in the "Actions" column for the Location you want to edit
- Review the Location “Name” for any changes needed, edit where applicable
- Review, edit, or remove questions from the "Patient Visit Questions" as needed
- Review, edit, or remove questions from the "Discharge Room Questions" as needed
- Optionally, add or update any "Notes/Comments" that should appear on the Assessment form
- Click "Update Location" to save the changes
- Complete. The next time the Location is scanned the changes will appear on the Assessment form.

Exporting and Printing QR Codes in PVA
After the Locations have been loaded into the system, they are ready to be printed and placed around the facility.
Once the QR Codes, often referred to as barcodes, are in place they are ready for conducting assessments. Many devices include a QR Code scanner on the camera, but if not, any "Barcode" or "QR Code" reader app will work.
From the navigation bar, expand "PVA - All", then click "Export Locations" to load the Location Codes.
Below, we will detail loading the QR Code list, changing the number displayed and then either printing from the page, or downloading the QR Code list to print later.

How to Export Locations - Print Full Page
- From the navigation bar, expand "PVA - All", then click "Export Locations"
- There is also a shortcut from the "Bulk Add Locations" page, just click the "Bulk Export Process" button there

- Click the "Browser Print" option next to "Print Options"
- When printing from Chrome it may be necessary to expand 'More Settings' then check the box under Options for "Background Graphics"

- A full page of the scans to print will open, click the button

- Select your printer and click "Print"
- Once printed, cut each code out and place them in the applicable location, or area
- Note: By default, the most recent 20 Locations loaded into the system will display
- You can show more by clicking the "Show 100..." to show the most recent 100 Locations, 200 for the most recent 200, and so on. The follow the steps above to print.
- You can show more by clicking the "Show 100..." to show the most recent 100 Locations, 200 for the most recent 200, and so on. The follow the steps above to print.
How to Export Locations - Download, and/or Print, a PDF File
- From the navigation bar, expand "PVA - All", then click "Export Locations"
- There is also a shortcut from the "Bulk Add Locations" page, just click the "Bulk Export Process" button there
- Click the "PDF Print or Download" option next to "Print Options"
- Please note that the PDF option is available for 50, or less, scans due to the time it takes for the file to be created

- A new page that contains the PDF file will open
- Print is available from the icon

- If "Print" is selected, you will want to select your printer and click "Print"
- Download is available from the icon

- If "Download" is selected, you will want to name your file and choose the applicable location on your computer to save it for printing later
- Once printed, cut each code out and place them in the applicable location, or area
- Note: By default, the most recent 20 Locations loaded into the system will display
- You can show more by clicking the "Show 100..." to show the most recent 100 Locations, 200 for the most recent 200, and so on. The follow the steps above to print.
How to Export Locations - Using a Word Processor (such as Word)
- From the navigation bar, expand "PVA - All", then click "Export Locations"
- There is also a shortcut from the "Bulk Add Locations" page, just click the "Bulk Export Process" button there
- Highlight the codes on the page by clicking your mouse above the first scan that you want to print. Then drag, while holding down your mouse button, down to the last scan that you want to print.
- In this example, I would be selecting the first three Locations only, but this can work for any number of Locations.
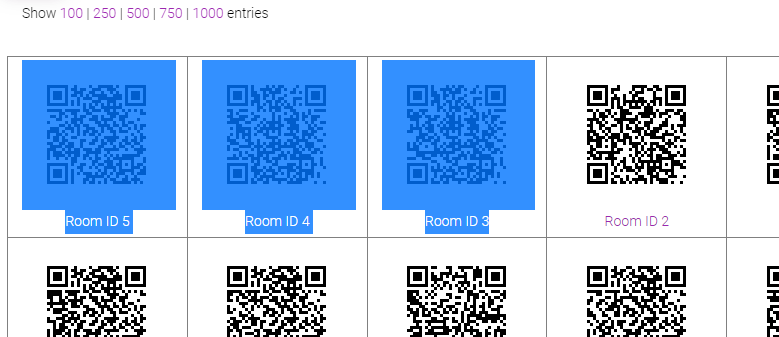
- Copy the Locations to your clipboard
- Press the keys "ctrl" and "c" on your keyboard to copy
- Press the keys "control" and "c" on your keyboard to copy
- Right-click your mouse in the highlighted area and choose "Copy"
- Open a blank Word, or other Word Processing program, and paste in the contents from your clipboard
- Press the keys "ctrl" and "v" on your keyboard to copy
- Press the keys "control" and "v" on your keyboard to copy
- Right-click your mouse in the highlighted area and choose "Paste"
- HINT: Depending on the number of Locations you are trying to print, it may be necessary to change the layout of the page to horizontal

- Print from the word processor page
- Once printed, cut each code out and place them in the applicable location, or area
- Note: By default, the most recent 20 Locations loaded into the system will display
- You can show more by clicking the "Show 100..." to show the most recent 100 Locations, 200 for the most recent 200, and so on. The follow the steps above to print.
Scanning a QR Code or Barcode in PVA
Once the QR Codes, sometimes referred to as barcodes, are in place they are ready for conducting Assessments.
Most devices include a barcode scanner on the camera by default, but if not, any "Barcode" or "QR Code" reader app will work. All these devices are supported out of the box. No extra hardware or software needed.
Your device will need an internet connection. Any decent stable WiFi connection or mobile carrier will work.
Scanning the QR Code or Barcode:
- Open the reader app on your device
- This can be the camera with QR code reader built-in or any standalone, free, Barcode/QR Code reader app
- Allow the app to scan the code which will open the default browser on your device
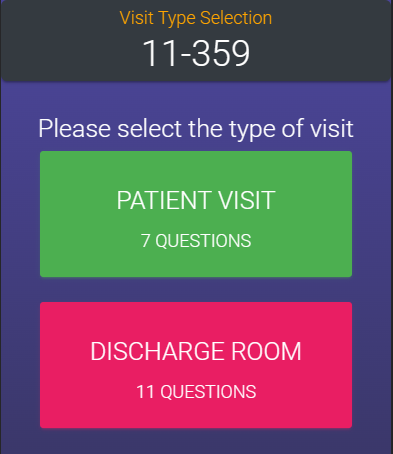
- Choose the type of visit Assessment
- Press the Patient Visit button to begin a Patient Visit Assessment
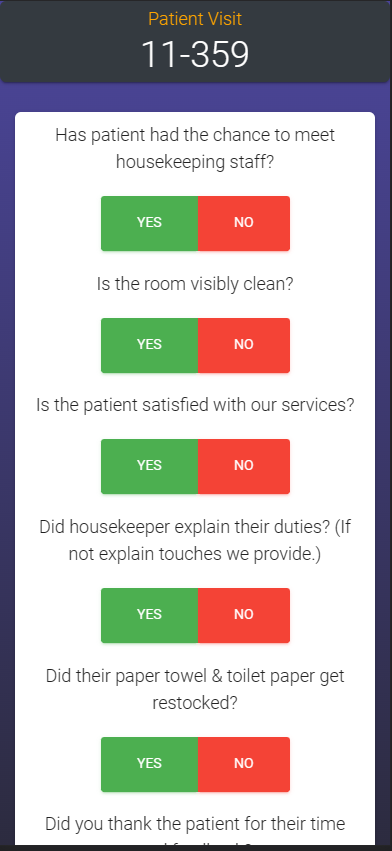
- Answer each question, marking "Yes" or "No"
- Enter "Your Name"
- Enter your "Employee ID Number"
- Click "Submit"
- You can be done here, or proceed to upload an image
- To upload, click the "Upload Image" button
- Click "Choose File", this will open a dialog on your device
- Take a new photo (this is the most common)
- Select an image from your device
- Click "Upload Image" to send the image to the system and attach it to the Assessment
- Once you receive the "Upload Complete" message, you are finished uploading and attaching the image to the Assessment
- Press the Discharge Room button to begin a Discharge Room Assessment
- Answer each question, marking "Yes" or "No"
- Enter "Your Name"
- Enter your "Employee ID Number"
- Click "Submit"
- You can be done here, or proceed to upload an image
- To upload, click the "Upload Image" button
- Click "Choose File", this will open a dialog on your device
- Take a new photo (this is the most common)
- Select an image from your device
- Click "Upload Image" to send the image to the system and attach it to the Assessment
- Once you receive the "Upload Complete" message, you are finished uploading and attaching the image to the Assessment
Below are some screen shots of example screens from the mobile scan.
- Choose the Visit Type
- Patient Visit Questions
- Upload Option
- Upload Complete