Before you can start tracking, collecting and reporting on anything, you have to get some QA’s into the system.
Standard User accounts do not have access to create QA’s. If you do not see “Add 1 Employee” or “Bulk Add Employees”, and believe that you should, please let us know. We will work with your company contact to ensure appropriate permissions.
There are two ways to add QA’s. You can either add them one at a time or you can load them in bulk.
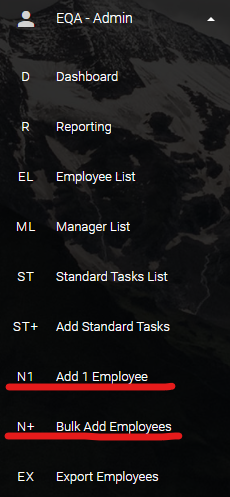
From the navigation bar, expand the menu, then click “Add 1 Employee” to create one QA at a time, or click the “Bulk Add Employees” to load several at once.
We will detail both options below.
If you see a term that is unfamiliar, please see Terminology of eQA for eQA specific terminology.
Add 1 New QA – Short Form
Note: The Short Form uses a “Standard Title”. If you have not added any Standard Titles to the system, the drop-down list may be limited. For instructions for creating Standard Titles, see the article Adding Standard Titles and Tasks in eQA.
- From the navigation bar, expand the “eQA – Admin” menu, then click “Add 1 Employee”
- Enter the Employee Name
- Enter the Employee ID
- Select a “Standard Title”
- Enter Optional Notes or Comments
- Click the “Add Employee” button
- Once the QA has been added, it is available to print through “Export Employees”
Add 1 New QA – Long Form
Note: The Long Form is mainly used with a “Standard Title” has not been added to the system, or it is unavailable.
- From the navigation bar, expand the “eQA – Admin” menu, then click “Add 1 Employee”
- Click the “Switch to Long Form” button at the top of the form
- Enter the values for the Employee (QA) you would like to add
- Employee Name = Enter the name of the Employee as you would like it to appear in reports and when QA’s are conducted.
- Employee ID = The ID of the Employee that will be QA’d.
- Task 1 – Task 25 = The item, or task, that is to be checked for the Employee QA. Essentially, this is the checklist to be reviewed during the QA.
- Click the “Add Employee” button
- Once the QA has been added, it is available to print through “Export Employees”
Bulk Add Employees
- From the navigation bar, expand the menu, then click “Bulk Add Employees”
- Download a fresh template using the “Download” button, if you already have the template you can skip this step.
- Fill in the template with as many new QA’s as you would like. There are several columns in the template:
- employee_name = The Name of the Employee that will be QA’d
- employee_id = The ID of the Employee that will be QA’d
- step_1_name – step_25_name = The Checks that should be conducted, up to 25 per QA, or row
- company_abbr = This is the abbreviation for your company account
- Save the completed template to your local system
- Click the “Choose File” button and locate the template that you just saved
- Click “Upload”
- Once the Scans have been loaded, they are available to print through “Export Scans”
Troubleshooting Bulk Add Employees, or QA’s
If you are unable to find the Employee that you added to the system please check the following. These are the most common reasons an Employee does not show:
- Refresh the page. Sometimes the page gets cached in the browser and may not display the most recent data.
- Incorrect value in the “company_abbr” field.
- Correct “company_abbr” value but it is in the wrong column. For example, if I put “dhcs” (my company_abbr) in the “step_25_name” column, it will not show in my account.
- If the file fails to upload, please make sure the file is saved as a .csv. It is always a good idea to download a fresh copy of the template as the fields may have changed.